garden-design
Container Gardening: Substrates, Overwintering, Placement by Growth Stage, and Drainage Systems
Complete guide to container gardening covering substrates for different plants, bringing containers inside for winter, zone-specific growing.
The Case for Containers
Container gardening is the most adaptable form of cultivation. It works on a balcony, a patio, a rooftop, a driveway, or scattered across a sprawling backyard. Containers let you grow in places where in-ground gardening is impossible—above concrete, on rented property, in contaminated soil areas, or in climates where tender plants must come indoors for winter. The mobility of containers is their defining advantage: you can follow the sun, flee from frost, and rearrange your garden on a whim.
The tradeoff is that container plants are entirely dependent on you. They have no access to subsoil moisture, no deep microbial networks, and no buffer against temperature extremes. Every drop of water and every nutrient must be delivered by the grower. This dependency, however, also means total control—you can optimize conditions for each individual plant in ways that ground gardening never allows.
Substrates and Soils for Different Plant Types
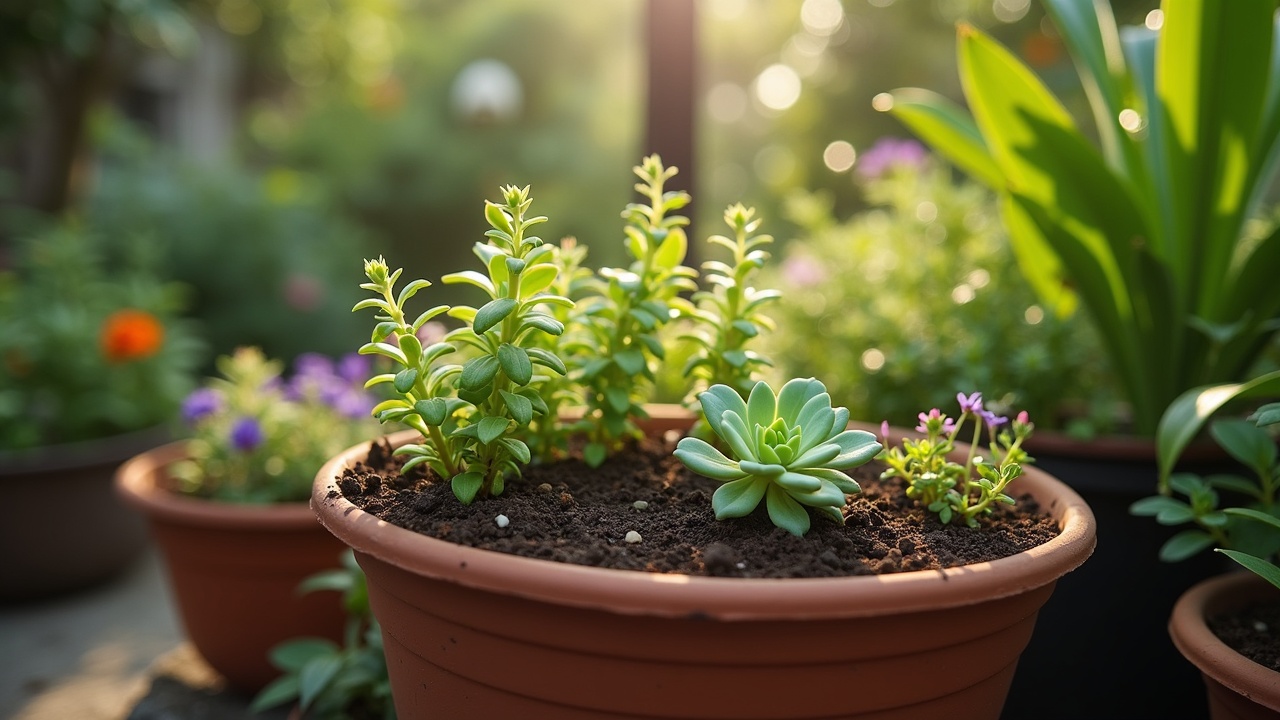
Never use garden soil in containers. Native soil compacts in pots, drains poorly, and often harbors pathogens and weed seeds. Container growing demands purpose-built substrates that balance water retention, aeration, and drainage within the confined volume of a pot.
General Vegetable and Herb Mix
A reliable all-purpose container mix: 40% coconut coir or peat moss, 30% compost, 20% perlite, 10% vermiculite. This provides moisture retention for daily watering, nutrients from the compost, and enough drainage and aeration to prevent root rot. Suitable for tomatoes, peppers, lettuce, basil, cucumbers, and most annual vegetables and herbs.
Succulent and Cactus Mix
These plants need fast drainage above all else: 40% coarse sand or pumice, 30% perlite, 20% potting soil, 10% small gravel. The mix should feel gritty and dry out completely between waterings. Any standard potting mix will hold too much moisture and rot succulent roots within weeks.
Acid-Loving Plants (Blueberries, Azaleas)
Use 50% peat moss (naturally acidic, pH 4.0–5.0), 25% composted pine bark, 15% perlite, 10% compost. Target a pH of 4.5–5.5. Supplement with sulfur-based acidifiers if pH drifts upward over time. Avoid lime-containing amendments in this mix.
Orchid and Epiphyte Mix
Epiphytic plants grow on tree surfaces in nature and need maximum aeration: 50% coarse bark chips, 25% sphagnum moss, 15% charcoal, 10% perlite. This mix holds almost no water and must be watered frequently, but it provides the air circulation that orchid roots demand.
| Plant Type | Key Substrate Component | Watering Frequency | pH Range |
|---|---|---|---|
| Vegetables & herbs | Coir/peat + compost | Daily in summer | 6.0–7.0 |
| Succulents & cacti | Coarse sand + pumice | Every 7–14 days | 6.0–7.5 |
| Acid-loving (blueberry) | Peat + pine bark | Every 2–3 days | 4.5–5.5 |
| Orchids & epiphytes | Coarse bark + charcoal | Every 3–5 days | 5.5–6.5 |
| Citrus trees | Bark + perlite + compost | When top 2” dry | 6.0–7.0 |
Refresh Substrate Annually
Container substrate degrades over time. Organic components decompose, compacting the mix and reducing aeration. Perlite and vermiculite settle to the bottom. Each spring, remove the top 2–3 inches of old mix and replace with fresh substrate. Every 2–3 years, completely repot into fresh mix, inspecting and trimming roots as needed.
Container Materials and Sizing
Container material affects weight, insulation, moisture retention, and durability. Choose based on your climate, where containers will sit, and whether they need to be moved.
| Material | Weight | Insulation | Durability | Best For |
|---|---|---|---|---|
| Terracotta / clay | Heavy | Moderate | Fragile (frost cracks) | Herbs, succulents, Mediterranean plants |
| Plastic / resin | Light | Low | Good (UV degrades) | Balconies, rooftops, frequent moving |
| Fabric grow bags | Very light | Low | 2–5 seasons | Vegetables, root crops, air pruning |
| Glazed ceramic | Heavy | Good | Good (if thick-walled) | Ornamentals, citrus, permanent displays |
| Wood (cedar/redwood) | Heavy | Excellent | 10–20 years | Large plants, trees, permanent patio gardens |
| Galvanized metal | Moderate | Low (conducts heat) | Excellent | Modern aesthetics, herb gardens (line interior) |
Sizing Guidelines
Container size directly determines what you can grow and how much attention the plant demands. Larger pots hold more moisture and buffer temperature swings, but cost more and weigh more. As a rule, always choose a pot slightly larger than you think you need.
- 2–4 gallon: Herbs, lettuce, radishes, small peppers, strawberries
- 5–7 gallon: Tomatoes (determinate), peppers, eggplant, dwarf beans, kale
- 10–15 gallon: Tomatoes (indeterminate), squash, cucumbers, dwarf fruit trees
- 15–25 gallon: Full-size fruit trees, blueberry bushes, large perennial herbs
- 25+ gallon: Fig trees, citrus trees, and any plant you intend to keep for many years
Bringing Containers Inside for Winter
One of container gardening’s greatest advantages is the ability to overwinter tender plants indoors. Plants that would die in your zone’s winter can thrive year after year when brought inside before the first hard frost.
When to Move Plants Inside
Begin the transition when nighttime temperatures consistently drop below 50°F for tropical plants or below 35°F for subtropicals. Do not wait for the first frost—many tender plants suffer damage at temperatures well above freezing. Move plants gradually: a few days in a sheltered outdoor spot (under an eave or against a south wall), then into an unheated garage or porch, then to their indoor location. This 1–2 week hardening-off period in reverse reduces transplant shock.
Indoor Conditions
Most overwintering plants need bright indirect light from a south or west-facing window, reduced watering (soil should dry out more between waterings indoors), and cooler temperatures (55–65°F is ideal for dormancy rather than active growth). Avoid placing containers near heating vents, which create hot, dry air that stresses plants.
Pest Inspection
Before bringing any container indoors, inspect thoroughly for hitchhiking pests. Aphids, spider mites, whiteflies, slugs, and ants are common stowaways. Spray foliage with a strong stream of water, treat with insecticidal soap or neem oil, and quarantine new arrivals from your existing houseplants for 2 weeks. One infested plant can contaminate an entire indoor collection within days.
Plants Worth Overwintering
The highest-value plants to bring inside include: fig trees (can cost $30–$80 to replace), rosemary and bay laurel (slow-growing, expensive), citrus trees (years of growth invested), tropical herbs like lemongrass and turmeric, and any perennial that is expensive or slow to establish from scratch. Annual vegetables are generally not worth overwintering—start fresh from seed in spring.
What Grows in Containers by Zone
Almost anything can be grown in a container if the pot is large enough and the conditions are managed. Here is a zone-specific framework.
- Zones 3–5: Short-season vegetables (lettuce, radishes, peas, beans) in outdoor containers during summer. Potatoes in grow bags. Overwinter herbs indoors. Use containers on wheels (casters) to chase the sun across a patio as the season progresses.
- Zones 6–7: Full vegetable production in containers outdoors from April through October. Dwarf fruit trees (apple, cherry, fig) in 15–25 gallon pots that can be wheeled into a garage for winter. Year-round herbs if brought indoors November through March.
- Zones 8–9: Near year-round outdoor container gardening. Citrus, tropical herbs, and perennial vegetables (peppers, eggplant) can overwinter outdoors in protected spots. Move containers into shade during peak summer heat to prevent root cooking in dark-colored pots.
- Zone 10: True year-round container production. Tropical fruits (mango, papaya, banana) in large containers. The challenge shifts from cold protection to heat management and consistent irrigation during hot, dry periods.
Placement by Growth Stage
Plants have different environmental needs at different stages of their life. Moving containers to match these needs is one of the unique advantages of container growing.
Seedling Stage
Bright but indirect light, protection from wind, consistent moisture. Place seedling containers in a sheltered spot—under a porch overhang, against a south-facing wall, or in a cold frame. Direct midday sun can scorch young seedlings that have not developed UV-protective leaf compounds.
Vegetative Growth Stage
Maximum light exposure. Move containers to the sunniest available location. This is when the plant is building its framework of stems and leaves and needs all the photosynthetic energy it can capture. Rotate pots a quarter turn every few days so all sides receive equal light and growth stays balanced.
Flowering and Fruiting Stage
Continued full sun, plus protection from heavy rain that can damage flowers and knock off developing fruit. For crops like tomatoes and peppers, consistent conditions (avoiding temperature swings) improve fruit set. If a heat wave is forecast, move containers to afternoon shade to prevent blossom drop.
Dormancy and Overwintering
Reduced light is acceptable. Many deciduous plants (figs, grapes, pomegranates) drop their leaves and need only a cool, dark location (35–45°F) with minimal watering. An unheated garage, basement, or root cellar is ideal. Evergreen plants (citrus, bay, rosemary) need bright light even during dormancy and should be placed near the brightest window available.
Drainage and Watering Systems
Drainage is the single most important factor in container plant health. Without adequate drainage, water pools at the bottom of the pot, displaces oxygen, and roots suffocate within days. Every container must have drainage holes—no exceptions.
Drainage Hole Requirements
Minimum one drainage hole per pot. For containers over 12 inches in diameter, drill additional holes. Each hole should be at least 1/2 inch in diameter. Cover drainage holes with a piece of mesh screen or a shard of pottery to prevent soil from washing out while allowing water to flow freely.
The Gravel Myth
Putting a layer of gravel in the bottom of a pot does not improve drainage—it actually makes it worse. Water does not move freely from fine-textured media (potting mix) into coarse-textured media (gravel) until the fine layer is nearly saturated. The gravel layer effectively raises the water table inside the pot, keeping roots wetter, not drier. Use uniform potting mix from bottom to top and rely on drainage holes for water exit.
Self-Watering Systems
For gardeners who travel or struggle with consistent watering, self-watering containers (also called sub-irrigated planters) use a reservoir at the bottom that wicks water upward into the root zone through capillary action. You fill the reservoir through a tube, and the plant draws water as needed. These systems work exceptionally well for vegetables and herbs but are not suitable for plants that need dry periods between waterings (succulents, cacti, Mediterranean herbs).
Drip Irrigation for Container Gardens
For multiple containers, a drip irrigation system with a timer eliminates daily hand-watering. Run a mainline along your container arrangement and branch off with 1/4-inch tubing to individual drip emitters inserted into each pot. Adjustable-flow emitters let you deliver more water to large pots and less to small ones. A battery-powered timer on the spigot automates the entire system for under $50.
The Finger Test
The most reliable way to determine if a container needs water: insert your finger 2 inches into the soil. If it feels dry at that depth, water thoroughly until water runs out the drainage holes. If it feels moist, wait another day. This simple test prevents both overwatering (the leading cause of container plant death) and underwatering. Automated systems should be checked weekly with the finger test to verify they are delivering the right amount.
Feeding Container Plants
Container plants exhaust the nutrients in their substrate much faster than ground plants because the root zone is small and frequent watering leaches dissolved nutrients out the drainage holes. Begin fertilizing 3–4 weeks after planting (earlier applications can burn young roots) and continue every 1–2 weeks through the growing season.
Use a balanced liquid fertilizer (such as fish emulsion, seaweed extract, or a soluble organic blend) diluted to half the label rate applied twice as often. This provides a steady, gentle nutrient supply rather than boom-and-bust cycles from full-strength monthly feeding. Slow-release granular fertilizers mixed into the substrate at planting time provide a baseline that liquid feeds supplement.
Getting Started
Begin with 3–5 containers of different sizes growing plants you actually eat or use. A 5-gallon bucket of basil, a 10-gallon pot of cherry tomatoes, and a window box of lettuce will teach you more about container growing in one season than any amount of reading. Pay attention to how fast different containers dry out, which spots on your patio get the best light, and how your plants respond to the substrate you chose. Adjust next season based on what you learned. Container gardening rewards observation and experimentation more than any other growing method.