plants
Earthbag Construction
Earthbag Construction - comprehensive guide from Nored Farms.
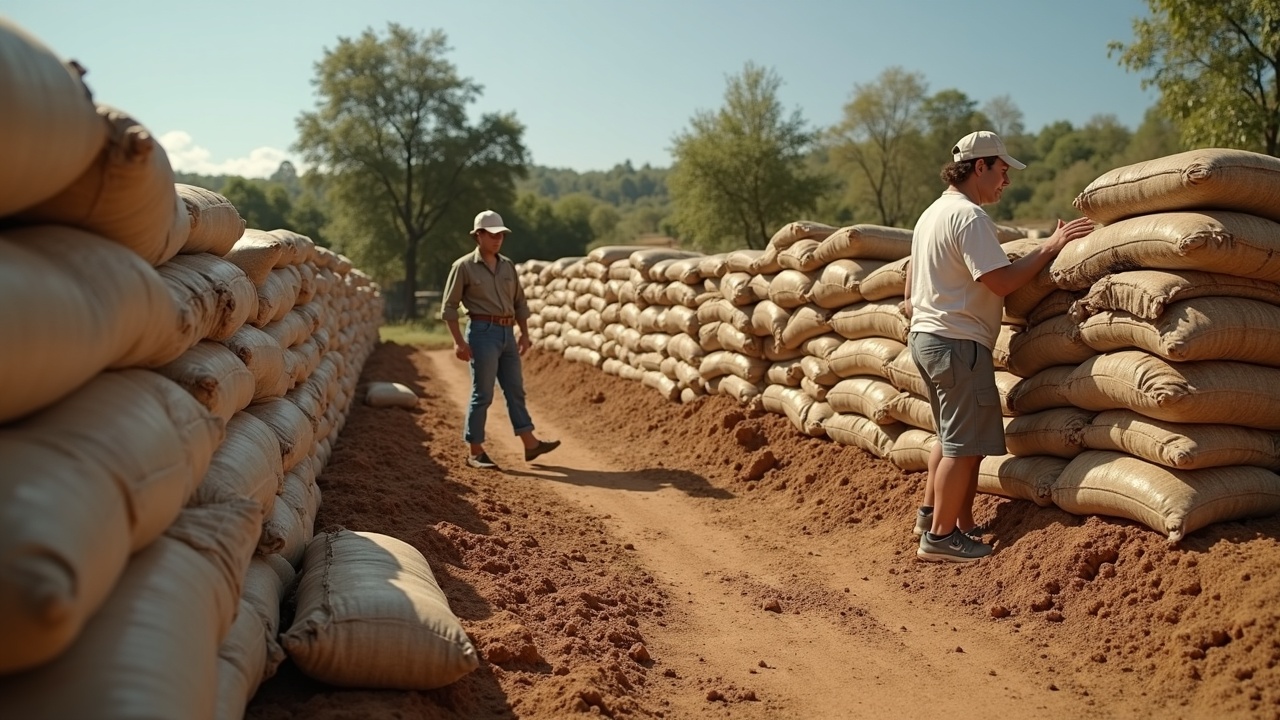
title: "Earthbag Construction" subtitle: "Contained Earth, Tensioned Wire, Curved Walls — A Complete Building Manual from Bag Fill to Finished Dome" author: "Nored Farms" date: "2026"
Content Extraction Summary
Hook Options
1. A single polypropylene earthbag filled with moistened subsoil and tamped into place withstands 74 psi in compression — more than three times the load-bearing capacity of a standard concrete masonry unit. The bag is the form, the fill is the structure, and the barbed wire between courses is the tensile reinforcement. Total materials cost for a 400-square-foot dome: under $5,000. 2. Nader Khalili designed SuperAdobe for NASA lunar habitat prototypes. The same system passes California seismic zone 4 testing. The strongest earthbag structures on Earth were engineered for buildings on the moon. 3. Every sandbag fortification ever built by every military in the last 200 years is an earthbag structure. The technique was never "discovered" — it was reclassified. Khalili's contribution was proving that what stops bullets also passes building code.
Key Mechanism
Earthbag construction works through confined compression. Loose soil has negligible compressive strength because particles can displace laterally under load. Enclosing that soil in a woven polypropylene container and tamping it eliminates lateral displacement — the bag provides tensile confinement while the fill provides mass and compressive resistance. Barbed wire between courses adds shear resistance and interlocking friction equivalent to mortar in masonry. The result is a composite wall system where the fill handles compression, the bag handles tension, and the barbed wire handles shear — the same three-force division found in reinforced concrete, achieved with dirt and $0.15/foot tubing.
Misconception to Correct
Earthbag is assumed to be a developing-world technique unsuitable for permitted construction in code-governed jurisdictions. CalEarth (the California Institute of Earth Art and Architecture) submitted SuperAdobe structures to full International Building Code testing in the 1990s. The test structures passed California seismic zone 4 requirements — the most stringent in the United States. A 15-foot-diameter SuperAdobe dome withstood simulated earthquakes exceeding magnitude 7.0 without structural failure (Khalili, 1999). The IRC does not have an earthbag-specific appendix (unlike Appendix S for rammed earth), but the alternative materials pathway under IRC Section R104.11 has been used successfully to permit earthbag structures in California, Arizona, New Mexico, Utah, Colorado, Hawaii, and Texas.
Practical Application
A builder with no prior construction experience can erect the structural shell of a 400-square-foot earthbag dome in 4–6 weeks with two laborers. Materials cost $3,000–5,000 for the shell (bags/tubes, barbed wire, gravel, fill soil). Finishing (plaster, doors, windows, roof waterproofing) adds $2,000–6,000 depending on material choices. The technique requires no power tools for the structural phase — a tamper, a slider, a level, and a compass pole are the primary tools. Fill material comes from the building site in most cases. The limiting factor is labor, not skill or capital.
Citation-Ready Claims
- Earthbag compressive strength: 74 psi (510 kPa) for bags filled with moistened sandy-clay subsoil, tamped to refusal (Daigle, 2008, thesis, University of Bath)
- CalEarth SuperAdobe passed California seismic zone 4 requirements (Khalili, 1999, *Racing Alone*, CalEarth Press)
- Barbed wire between courses provides shear resistance equivalent to Type S mortar in unreinforced masonry (Pelly, 2010, *Plastic Limit Analysis of Earthbag Structures*, University of Bath)
- Polypropylene woven bags maintain tensile strength >150 lbf/in for 500+ years when protected from UV by plaster or earth cover (Crawford & Quinn, 2017, *Microplastic Pollutants*, Elsevier)
- Earthbag wall R-value: R-0.11 per inch for mineral fill, R-2.0+ per inch for volcanic pumice or perlite fill (Stouter, 2017, *Earthbag Building Guide*, New Society Publishers)
- NASA selected SuperAdobe for lunar habitat prototyping due to its compatibility with regolith fill and minimal tool requirements (Khalili, 1989, *Lunar Bases and Space Activities of the 21st Century*, Lunar and Planetary Institute)
- 400 sq ft dome shell cost: $3,000–5,000 materials, 4–6 week build time with two laborers (Hunter & Kiffmeyer, 2004, *Earthbag Building*, New Society Publishers)
1. Introduction — From Military Bunkers to Moon Bases
Every army in the modern era has built with earthbags. The technique is older than reinforced concrete. Sandbag fortifications absorb blast energy, stop ballistic projectiles, and can be erected by unskilled labor in hours using locally available soil. What Nader Khalili did in the 1980s was not invent earthbag construction — he proved it could meet building code, scale to permanent housing, and form curved structures that outperform rectilinear buildings in every measurable engineering metric.
Khalili was an Iranian-born architect who spent five years traveling through the deserts of Iran studying traditional earth construction before settling in Hesperia, California, and founding CalEarth in 1991. His core insight was that the sandbag — already proven under the most extreme loading conditions warfare can produce — could be elongated into a continuous tube, laid in courses with barbed wire between them, and formed into domes using the same catenary geometry that governs arches and shells in classical structural engineering. He called the system SuperAdobe.
**The NASA connection is not marketing.** In 1984, NASA issued a call for lunar habitat designs that could be built using in-situ materials with minimal transported equipment. Khalili submitted SuperAdobe. The concept was selected for prototyping because it met NASA's core constraints: the fill material is whatever exists at the building site (lunar regolith, in that case), the containment is a fabric that can be transported in compressed rolls, and the construction requires no specialized tools or power equipment (Khalili, 1989). The same design constraints that make earthbag viable on the moon — no lumber, no concrete plant, no skilled trades — make it the most accessible permanent construction method on Earth.
**Why it works structurally.** Earthbag is a confined-fill masonry system. Each course functions as a flexible form filled with compacted earth, analogous to a masonry unit, but with three advantages over rigid block or brick:
1. **Conformability.** Bags and tubes conform to the course below them, creating full-surface contact with no voids. Rigid masonry units require mortar to fill gaps — and mortar joints are the weakest element in any masonry wall. 2. **Tensile confinement.** The polypropylene bag or tube provides circumferential tension that prevents the fill from displacing laterally under load. This confinement increases the compressive capacity of the fill by a factor of 3–5x compared to unconfined soil (Daigle, 2008). 3. **Continuous reinforcement.** Two strands of 4-point barbed wire between every course create a continuous bond beam that resists shear forces, prevents course sliding, and locks the wall into a monolithic structure. In seismic loading, barbed wire between courses prevents the racking failure that destroys unreinforced masonry.
**Performance envelope.** Properly built earthbag structures resist seismic loading (CalEarth testing passed zone 4), wind loading (dome geometry sheds wind — no flat surfaces to catch lateral force), flood loading (earth-filled bags do not float, dissolve, or lose structural integrity when submerged), and fire (mineral fill does not burn; polypropylene bags are protected from flame by plaster). The only loading condition earthbag handles poorly is sustained standing water against unplastered walls — the bags degrade under prolonged UV and moisture if left exposed. Plaster is not decorative. Plaster is structural weatherproofing.
2. Materials — Bags, Fill, Wire, and What Actually Matters
Bags vs. Continuous Tubes
Two containment options exist: individual polypropylene bags (typically 18" x 30" or 50 lb grain bags) and continuous polypropylene tubing (sold in rolls, typically 15"–24" width).
| Feature | Individual Bags | Continuous Tube | |---|---|---| | Cost per linear foot | $0.08–0.12 | $0.12–0.18 | | Speed of construction | Slower — each bag must be folded, pinned, placed | Faster — fill in place, no closing step | | Structural continuity | Each bag is a discrete unit — joints between bags are potential failure points | Continuous — no joints within a course | | Curved walls and domes | Requires careful overlap at curves | Conforms naturally to any radius | | Availability | Grain bags available at any feed store | Must order from earthbag suppliers (CalEarth store, Zeppelin Supply) | | Recommended use | Small projects, retaining walls, planters | All permanent structures, domes, primary walls |
**Use continuous tubing for any permanent structure.** The structural superiority is not theoretical. Pelly (2010) demonstrated that continuous tube courses resist 40% higher lateral loading than equivalent courses built from individual bags because the tube eliminates the inter-bag joints that concentrate shear stress. Individual bags are fine for retaining walls, garden borders, and learning the technique. For a house, use tubes.
**Bag material: polypropylene woven fabric only.** Burlap rots. Cotton rots. Non-woven polypropylene tears under tamping. Woven polypropylene (the same material used for grain sacks, sandbags, and bulk packaging) is the only bag material with adequate tensile strength, puncture resistance, and longevity. UV is the only threat — unprotected polypropylene degrades to brittle failure within 6–12 months of direct sun exposure. This is irrelevant in finished construction because every earthbag wall receives plaster. The bags are never exposed in a completed building.
Misprinted bags (reject polypropylene feed bags) are the cheapest source. Check feed mills, grain elevators, and agricultural supply companies for bulk rejects at $0.10–0.25 per bag.
Fill Material
The fill is the structural component. The bags confine it. Choose fill material based on the structural and thermal requirements of the application.
**Subsoil (the default fill).** Ideal composition: 25–35% clay, 65–75% sand/gravel, moisture content at approximately 10–12% (damp enough to hold a ball when squeezed, dry enough that the ball breaks cleanly when dropped from waist height). This is a jar test: fill a quart jar half with soil, add water, shake vigorously, let settle 24 hours. Sand settles in minutes, silt in hours, clay stays suspended longest. Read the layers to estimate ratios.
Subsoil from the building site is the first material to test. Dig below the topsoil (organic layer) — typically 6–18 inches down. Topsoil contains organic matter that decomposes and weakens fill over time. Never use topsoil as fill. Set it aside for garden beds.
**Gravel.** Used for below-grade courses (foundation), drainage fills, and situations where moisture contact is expected. Gravel does not compact into a monolithic mass the way clay-sand subsoil does — it remains granular. This is acceptable for foundation courses where drainage matters more than maximum compressive strength. Use 3/4" crushed gravel, not river rock (round stones roll and do not interlock).
**Volcanic rock (scoria, pumice).** The high-performance fill for insulated earthbag walls. Scoria (the red/black volcanic rock sold as landscaping material) has an R-value of approximately R-2.0 per inch — compared to R-0.11 per inch for mineral soil (Stouter, 2017). A 15-inch-wide earthbag wall filled with scoria provides R-30, comparable to a well-insulated conventional wall. The tradeoff: scoria is lighter and does not compact as densely as subsoil, reducing the thermal mass benefit. In cold climates where insulation matters more than thermal mass, scoria is the correct fill. In hot-arid climates where thermal mass matters most, use subsoil.
**Perlite and vermiculite.** Even higher R-value per inch than scoria (R-2.7 for perlite, R-2.1 for vermiculite) but significantly more expensive and lower in compressive strength. Use only in non-load-bearing insulation fills — between a structural earthbag wall and an interior finish wall, for example. Not recommended as primary structural fill.
**Sand.** Pure sand without clay does not hold together when tamped — it remains loose and granular. Sand-filled bags are adequate for temporary flood barriers but should not be used for permanent structures. If your site soil is predominantly sand, add 15–25% clay (powdered pottery clay, bentonite, or local clay-rich soil) to create a mix that compacts and cures into a cohesive mass.
Barbed Wire
Standard 4-point galvanized barbed wire, the same product used for livestock fencing. Two strands between every course — one placed 2 inches from each edge of the bag. The barbed wire serves three structural functions:
1. **Shear resistance.** Barbs embed into the polypropylene fabric on the course above and below, preventing lateral sliding. This is equivalent to mortar bond in conventional masonry. 2. **Tensile reinforcement.** In dome construction, the barbed wire provides hoop tension that resists the outward thrust of upper courses — the same structural function as rebar in a concrete ring beam. 3. **Interlocking.** Even without embedded barbs, the wire creates friction between courses that must be overcome before displacement occurs. Two strands of 4-point wire between 15-inch-wide courses provides more shear resistance than Type S mortar between concrete masonry units (Pelly, 2010).
Do not substitute smooth wire, rebar, or poly strapping. Smooth wire does not embed into the bags. Rebar is rigid and creates point loads. Poly strapping degrades under UV and loses tension over time. Four-point barbed wire at approximately $50 per 1,320-foot roll is the correct material.
Ancillary Materials
- **Tamper.** A flat-faced hand tamper (8" x 8" steel plate welded to a handle) weighing 15–20 lbs. Commercial versions available; a piece of 3/8" plate welded to a pipe works identically.
- **Slider/chute.** A metal or plywood form used to hold the bag/tube open during filling. A #10 can with both ends removed works for individual bags. For tubes, a short section of PVC pipe or a fabricated metal funnel.
- **Bucket.** Fill bags with buckets, not shovels. A shovel tears bags. A coffee can works for precise filling of tube ends and around forms.
- **Compass pole.** A fixed center pole with an attached measuring line — used in dome construction to maintain consistent radius and wall angle. Essential for dome geometry. Covered in detail in Section 5.
- **Level and plumb bob.** Check every course. Earthbag is forgiving of minor irregularities, but cumulative lean kills structures.
3. Foundation — Below-Grade Courses and Moisture Management
Earthbag structures need two things from a foundation: a stable bearing surface and protection from rising moisture. The foundation system is simpler than conventional construction because earthbag walls are flexible — they tolerate minor differential settlement that would crack rigid masonry or concrete.
Rubble Trench Foundation
The standard earthbag foundation is a rubble trench — a trench filled with compacted gravel that distributes loads and drains water away from the wall base. This is the same foundation system used by Frank Lloyd Wright for Fallingwater and by thousands of residential builders in regions with stable soils.
**Excavation.** Dig a trench 24 inches wide (wider than the finished wall by at least 3 inches on each side) and 18–24 inches deep, or below the local frost line, whichever is deeper. In non-freezing climates, 12 inches is adequate. The trench bottom must be level — check with a string line and level, not by eye.
**Drainage.** Lay 4-inch perforated drain pipe (rigid PVC, not flexible corrugated — corrugated pipe crushes under fill) at the trench bottom, sloped at minimum 1/8 inch per foot toward daylight or a dry well. Cover the pipe with geotextile fabric to prevent silt intrusion. Backfill the trench with 3/4" crushed gravel (not round river rock) in 6-inch lifts, tamping each lift with a plate compactor or hand tamper.
**Moisture barrier.** Lay 6-mil polyethylene sheeting over the top of the rubble trench, extending 6 inches beyond each side of the wall footprint. This capillary break prevents ground moisture from wicking into the earthbag courses above. Overlap seams by 12 inches minimum. This step is not optional in any climate.
Below-Grade Earthbag Courses
The first 2–3 courses of earthbag sit below finished grade (ground level) and are filled with gravel rather than subsoil. Gravel-filled courses serve as a continuation of the rubble trench — they drain freely and do not wick moisture. Subsoil fill in below-grade courses wicks moisture upward through capillary action and eventually saturates the wall. Gravel prevents this.
Lay two strands of barbed wire on the moisture barrier, then place the first course of gravel-filled bags directly on the wire. Tamp firmly. Lay two more strands of wire. Place the second course. Continue for 2–3 courses until the wall is at or slightly above finished grade. Transition to subsoil fill (or your chosen structural fill) for all courses above grade.
Stemwall Alternative
In regions with expansive clay soils, extreme moisture, or code requirements that mandate a conventional foundation, a poured concrete or concrete block stemwall can support earthbag walls above. The stemwall must include anchor bolts or embedded rebar stubs to mechanically connect the first earthbag course to the stemwall. Set J-bolts at 4-foot centers along the stemwall top. Drill a 3/4" hole through the first earthbag course directly above each bolt and slip the course over the bolts before tamping. This prevents the earthbag wall from sliding off the stemwall under lateral loading.
4. Wall Construction — Filling, Tamping, and Building Courses
Filling Technique
**For continuous tube:** Fold the end of the tube under itself (about 6 inches) and pin it with a 6-inch galvanized nail or piece of rebar driven through the fold into the course below. This creates a closed end. Attach the slider (open-ended metal form or PVC pipe section) to hold the tube open. Fill with buckets — not shovels. A shovel blade cuts polypropylene. Pour fill into the slider, pack down with a stick or fist, and advance the slider along the course as the tube fills. Fill to approximately 90% capacity — overfilled tubes do not tamp flat. When you reach the end of the course, cut the tube with 12 inches extra, fold under, and pin.
**For individual bags:** Fill to approximately 85% capacity. Fold the open end over twice and pin with a nail or staple. Place bags with the folded end tucked under (facing the direction of the course below's fold) so that each bag's weight holds the previous bag's closure in place.
Tamping
Tamp every course immediately after placement — before the fill can dry or shift. Use the flat tamper in overlapping strokes across the full width of the course. Tamp until the fill no longer compresses and the tamper rebounds. A properly tamped earthbag course is flat-topped, firm enough to walk on, and approximately 4–5 inches tall (compressed height of a single course from an initial fill height of 6–7 inches).
**Do not skip tamping.** Untamped courses settle unevenly, create voids between courses, and reduce compressive strength by 50% or more. Tamping is the most physically demanding part of earthbag construction and the step most often done inadequately by beginners. Every course. Full width. Tamp to refusal.
Course Layout
**Straight walls:** Snap a chalk line or stretch a string line for each course. Earthbag walls can drift laterally if courses are placed by eye. Check plumb every 3 courses with a spirit level held against the wall face.
**Curved walls:** Use a compass pole (center stake with attached measuring line) to maintain consistent radius. Mark the inside edge of the wall on each course. Curved walls are inherently more stable than straight walls because the curvature provides lateral bracing — a curved wall cannot rack (tip sideways) the way a straight wall can without buttressing.
**Corners on straight walls:** Overlap bags at corners in alternating courses (running bond pattern) just as you would with brick or block. First course: wall A bags run past the corner, wall B bags butt against them. Second course: reverse the overlap. This interlocking prevents the corner from separating under load.
Barbed Wire Placement
Lay two strands of 4-point barbed wire on every tamped course before placing the next course. Position each strand approximately 2 inches from the bag edges. Press the wire down into the tamped surface with a stick or gloved hand (never bare hands). The barbs embed into the polypropylene fabric on both the course below and the course above, locking the courses together.
At corners and course ends, overlap wire by at least 12 inches and twist the overlapping section to prevent separation. Do not cut wire at every course end — running continuous wire around corners and continuing to the next course creates a stronger bond.
Door and Window Openings
**Wooden forms.** Build rectangular door and window forms (bucks) from 2x lumber the same width as the finished wall. Brace the forms rigidly in place and build earthbag courses around them. The bags butt against the form on each side of the opening. Anchor the form to the earthbag wall by driving 12-inch galvanized spikes through the form frame into the adjacent bags every 2–3 courses.
**Arched openings.** Earthbag excels at arched openings because the continuous tube naturally follows curved forms. Build an arched form from plywood, place bags over the form in a continuous arc, tamp, wire, and continue courses above. Remove the form after 3–5 courses above the arch have been placed and tamped (the superimposed weight locks the arch in compression).
**Lintel requirement for flat-topped openings.** Unlike arched openings, flat-topped openings in earthbag walls require a structural lintel — a reinforced concrete bond beam or a heavy timber beam — spanning the opening and bearing at least 6 inches into the wall on each side. Without a lintel, the bags above a flat opening have no support and will collapse inward.
Buttressing
Straight earthbag walls longer than 12 feet require buttressing to resist lateral forces (wind, seismic, internal pressure if used as retaining walls). Buttresses are perpendicular wall sections that tie into the main wall, providing lateral bracing.
**Minimum buttress dimensions:** 24 inches deep (perpendicular to the main wall) and the full width of the wall. Interlock buttress courses with main wall courses using alternating overlap, identical to corner construction.
**Curved walls eliminate the need for buttressing.** A wall with a radius of curvature less than 20 feet is self-buttressing — the geometry prevents racking. This is one of the primary structural advantages of curved and circular earthbag floor plans.
Corbelled Dome vs. Post-and-Beam Roof
Two roof strategies exist for earthbag walls:
**Corbelled dome (monolithic earthbag dome).** Each course is stepped inward slightly from the course below, gradually closing the structure into a dome. No separate roof structure is needed — the dome is the roof. Covered in detail in Section 5.
**Post-and-beam or truss roof on earthbag walls.** Earthbag walls serve as load-bearing walls supporting a conventional roof structure. A reinforced concrete bond beam must be poured atop the final earthbag course to distribute roof loads and provide anchor bolt points for the roof plate. The bond beam is typically 6 inches tall and the full width of the wall, reinforced with 2 rebar bars (continuous, lapped 40 diameters at splices) and stirrups at 12-inch spacing.
For flat or low-slope roofs, the bond beam is critical — it converts the granular earthbag wall into a rigid monolithic top plate. For steep-pitch roofs with primarily vertical loading, a doubled top plate of pressure-treated lumber spiked into the top 2–3 courses can substitute for a full bond beam in non-seismic zones.
5. Dome Construction — Geometry, Compass Pole, and Catenary Curves
Earthbag domes are the highest-performing application of the technique. A dome is a self-supporting shell structure that requires no internal framing, no roof trusses, no ridge beam, and no load-bearing interior walls. The dome's geometry converts all applied loads into compressive forces distributed through the shell — the same principle that allows eggshells, Roman domes, and igloo blocks to support loads many times their own weight.
The Compass Pole Method
**Setup.** Drive a vertical pole (steel pipe or wooden post) at the exact center of the dome floor plan. The pole must be plumb and rigidly anchored — it serves as the reference point for every course.
**Measuring line.** Attach a non-stretch line (mason's line, not rope) to the compass pole. The line length equals the inside radius of the dome at each course height. For a vertical cylindrical wall section (the first several courses of most domes), the line length remains constant. When you begin corbelling inward, shorten the line by a fixed increment per course.
**The guide angle.** Attach an angle gauge (a protractor with a weighted string, or a digital level) to the measuring line or to a straight board held against the wall face. The wall angle from vertical tells you whether you are building a stable dome or an unstable one. Key thresholds:
- 0–15 degrees from vertical: stable cylindrical wall, no corbelling needed
- 15–30 degrees: gradual corbelling, each course steps inward 1–2 inches, stable
- 30–45 degrees: moderate corbelling, additional barbed wire recommended (3–4 strands per course)
- Beyond 45 degrees: approaching the critical angle where gravity wants to pull courses inward. Most earthbag domes do not exceed 30 degrees from vertical — the dome closes through accumulated inward stepping, not steep angling.
Catenary Curve vs. Hemispherical
**Hemispherical dome:** constant radius, the shape of a ball cut in half. Generates significant outward thrust at the base (the walls want to spread apart). Requires a tension ring (bond beam or cable) at the base to resist this thrust.
**Catenary dome:** the shape formed by a hanging chain inverted. This curve is geometrically special because every point is in pure compression with no outward thrust. A catenary dome does not require a tension ring at the base because the forces at every point resolve vertically into the foundation.
**Build catenary, not hemispherical.** Khalili's SuperAdobe domes are catenary curves. The practical difference: a catenary dome has steeper walls at the base and a flatter top than a hemisphere of the same diameter. This means more usable interior volume at standing height and a gentler closing angle at the top. The compass pole method naturally produces a catenary by shortening the measuring line according to a catenary lookup table rather than a constant radius.
**Catenary curve determination.** For a dome with interior diameter D and height H, the catenary equation is: y = a * cosh(x/a) - a, where a = H / (cosh(D/2H) - 1). In practice, builders use pre-calculated catenary tables that specify the radius and corbel offset for each course height. Khalili published these tables. Hunter and Kiffmeyer (2004) reproduced them in simplified form. The compass pole length at each course equals the horizontal distance from center to the inside wall face at that height per the catenary table.
Closing the Dome (Keystone)
The final courses at the dome apex require careful work because the opening is small and access is limited. The last opening (typically 18–24 inches diameter) is closed with a keystone course — a final ring of bags tamped tightly together. Some builders leave the apex open and cap it with a skylight or a concrete plug. Either approach works structurally. If closing with bags, fill the final bags slightly wetter than normal (12–15% moisture) so they conform to the tight radius.
Dome Waterproofing
A dome is the roof. It must be waterproof. Three options:
1. **Earthen plaster + linseed oil.** Traditional, breathable, requires annual maintenance. Apply 2–3 coats of boiled linseed oil over cured earthen plaster. Effective in arid climates. Not recommended in regions with more than 30 inches annual rainfall. 2. **Lime plaster.** Hydraulic lime (NHL 3.5 or NHL 5) plaster is waterproof, breathable, and self-healing (lime recrystallizes in the presence of water and CO2, sealing hairline cracks). Three coats: scratch, brown, finish. Total thickness 1.5–2 inches. Effective in all climates. The recommended finish for dome exteriors. 3. **Elastomeric coating over cement stucco.** Apply cement stucco (Type S morite mix or equivalent) as the base coat, then roll or spray elastomeric roof coating (acrylic or silicone). This is the most reliably waterproof option and the lowest maintenance, but it is not breathable — moisture can become trapped in the wall if the interior is also sealed with an impermeable finish. Always use a breathable interior finish (earthen or lime plaster) when the exterior is sealed with elastomeric coating.
6. Structural Engineering — Why Contained Earth Outperforms Block
Compressive Strength
Loose sandy-clay subsoil in an unconfined compression test fails at approximately 15–25 psi (100–175 kPa). The same soil tamped into a polypropylene earthbag and tested fails at 74 psi (510 kPa) — a 3x to 5x increase attributable entirely to lateral confinement (Daigle, 2008). For comparison:
| Material | Compressive Strength (psi) | |---|---| | Standard concrete masonry unit (CMU) | 20–25 (net area, ungrouted) | | Earthbag (subsoil fill, tamped) | 74 | | Rammed earth (stabilized, 8% cement) | 45–60 | | Adobe brick (sun-dried, unstabilized) | 15–30 | | Earthbag (gravel fill) | 40–50 | | Fired clay brick | 100–200 | | Poured concrete (3000 psi mix) | 3,000 |
Earthbag exceeds CMU and adobe. It does not approach fired brick or concrete. For single-story and dome structures, 74 psi is vastly more than required — a single-story earthbag wall is loaded to approximately 5–10 psi at the base, giving a safety factor of 7–15x.
Continuous Tube vs. Individual Bag Performance
Continuous tube courses outperform individual bag courses under lateral loading because they eliminate inter-bag joints. In a wall built from individual bags, lateral force (wind, seismic) concentrates at the joints between bags — the weakest points in the course. In a continuous tube course, there are no joints within the course, so lateral force distributes evenly along the full length. Pelly (2010) measured a 40% increase in lateral load capacity for tube courses over equivalent bag courses.
Shear Resistance from Barbed Wire
Shear failure in earthbag walls means one course slides horizontally relative to the adjacent course. Barbed wire between courses resists this in two ways: mechanical interlock (barbs embedded in fabric prevent sliding) and friction (wire pressed between two tamped surfaces under the weight of all courses above).
The shear resistance of a barbed-wire-reinforced earthbag joint exceeds the shear resistance of a Type S mortar joint between CMUs (Pelly, 2010). This finding is structurally significant because it means earthbag walls meet the shear requirements of conventional masonry code without mortar.
Seismic Performance
Domes outperform rectilinear structures in seismic events for geometric reasons. A dome is a doubly-curved shell — forces are distributed two-dimensionally through the surface. A rectangular building is a series of flat planes connected at corners — forces concentrate at the connections.
CalEarth's seismic testing demonstrated that SuperAdobe domes withstand accelerations exceeding 0.4g (equivalent to magnitude 7+ earthquakes) without structural failure. The failure mode, when it occurred under extreme loading, was localized bag rupture — not structural collapse. The dome settled and deformed but did not lose its load path. This is ductile failure behavior, which is inherently safer than the brittle failure of unreinforced masonry (sudden catastrophic collapse).
7. Plumbing and Electrical — Embedding Services in Earthbag Walls
Rough-In Timing
All plumbing and electrical rough-in must be planned before wall construction begins. Retrofitting conduit and pipes through completed earthbag walls is difficult — the walls are solid compacted earth enclosed in fabric. You cannot drill a clean hole through an earthbag wall the way you drill through framing.
**Before the first course:** Mark the locations of all pipe and conduit penetrations on the foundation plan. Install below-slab plumbing (drain lines, water supply risers) before pouring the slab or finishing the foundation.
**During wall construction:** Embed conduit vertically in the wall as you build. Place conduit against the wall face (interior or exterior side) and build courses around it. Secure conduit to the wall with galvanized wire ties every 2–3 courses. At the desired height, bend the conduit horizontally and exit the wall through a gap left in the course.
Electrical
Run all wiring in conduit — never embed bare Romex in earthbag walls. Use 3/4" schedule 40 PVC conduit or EMT (electrical metallic tubing) for vertical runs. Leave pull strings in all conduit during installation so wires can be pulled after the wall is complete and plastered.
**Outlet and switch boxes:** Mount electrical boxes to a short section of plywood or lumber screwed to the conduit, positioned at the desired height. Build courses around the box, leaving the box face flush with or slightly recessed from the future plaster surface.
**Exterior routing alternative.** In some jurisdictions and for simpler builds, all electrical is run on the exterior wall surface in weatherproof conduit (rigid PVC or liquid-tight flexible metallic conduit) after the wall is plastered. This avoids embedding anything in the wall but creates visible conduit runs that must be covered by exterior trim or a second plaster coat.
Plumbing
**Supply lines.** PEX tubing is the preferred supply line for earthbag construction. PEX is flexible, freeze-tolerant, and can be routed through walls with gentle curves. Embed PEX in a larger sleeve (1" PVC pipe around 1/2" PEX) to allow replacement without demolishing the wall.
**Drain lines.** DWV (drain-waste-vent) pipes are rigid and require straight runs with specific slopes (1/4" per foot minimum). Route drain lines below the slab or through the foundation rather than through earthbag walls. Vertical vent stacks can penetrate the wall or dome at a single point — frame the penetration with a rigid sleeve and seal with hydraulic cement.
**Wet walls.** Concentrate all plumbing fixtures (kitchen, bathroom) on one or two walls. Build these walls as interior partitions (non-load-bearing) from conventional framing if the plumbing layout is complex. Earthbag is the structural shell; interior partitions can be framing, earthbag, cob, or any material that suits the plumbing layout.
8. Finishing — Plaster, Stucco, and Surface Protection
Plaster is not optional on earthbag construction. Unplastered polypropylene bags degrade under UV exposure within 6–12 months. Plaster provides UV protection, weather resistance, impact resistance, and fire protection. The plaster system you choose depends on climate, budget, and maintenance tolerance.
Earthen Plaster
**Composition:** Clay-rich subsoil, sand, and chopped fiber (straw, cattail fluff, horse hair, or synthetic fiber). Typical ratio: 1 part clay soil, 2–3 parts sand, fiber at approximately 5% by volume. Mix to a thick paste consistency — it should stick to a vertical wall without slumping.
**Application:** Wet the wall surface. Apply scratch coat (3/8" thick) by hand or with a plastering trowel. Score the surface with horizontal scratches for the next coat to key into. Let cure 3–7 days. Apply brown coat (3/8" thick). Let cure. Apply finish coat (1/8–1/4" thick) — this coat can be polished with a trowel or sponge for a smooth surface.
**Advantages:** Zero cost if materials are sourced on-site. Breathable. Repairable — patch damaged areas by wetting and re-applying the same mix. Beautiful mottled texture.
**Limitations:** Not waterproof. Will erode under sustained rain unless protected by roof overhangs or sealed with linseed oil. Not suitable for dome exteriors in wet climates without additional waterproofing. Requires 2–4 inch roof overhang on straight-wall structures.
Lime Plaster
**Composition:** Hydraulic lime (NHL 3.5 or NHL 5), sharp sand, and optional fiber. Ratio: 1 part lime to 2.5–3 parts sand. Hydraulic lime sets through a combination of hydration (like cement) and carbonation (absorbing CO2 from air), making it water-resistant while remaining breathable.
**Application:** Similar to earthen plaster — scratch, brown, finish coats. Lime plaster requires moist curing (mist with water daily for the first week). Do not apply in direct sun or temperatures below 40 degrees F.
**Advantages:** Waterproof when properly applied. Self-healing — hairline cracks recrystallize shut as lime carbonates. Breathable. Historically proven — Roman lime plaster survives 2,000 years. Ideal for dome exteriors in all climates.
**Limitations:** More expensive than earthen plaster ($15–25 per 50 lb bag of NHL). Longer cure time (28 days to full strength). Caustic during application — requires gloves, eye protection.
Cement Stucco
**Composition:** Portland cement, lime (Type S hydrated lime), sand. Standard ratio: 1 cement, 1 lime, 6 sand (Type S mortar mix). Apply over galvanized stucco mesh (17-gauge, 1" hex netting) stapled or wired to the earthbag wall surface.
**Application:** Stucco mesh is essential — cement stucco does not bond reliably to polypropylene bags without mechanical attachment. Wire the mesh to the bags using galvanized wire pushed through the bags with a needle. Apply scratch coat (3/8"), cure 48 hours, apply brown coat (3/8"), cure 7 days, apply finish coat (1/8").
**Advantages:** Extremely durable. High impact resistance. Familiar to building inspectors (this is the same stucco system used on millions of conventional homes).
**Limitations:** Not breathable — traps moisture inside the wall if used on both interior and exterior. Use only on exterior, paired with breathable earthen or lime plaster on the interior. Rigid — cracks under foundation movement or thermal cycling (add control joints every 10 feet). Higher cost and higher embodied energy than earthen or lime plaster.
Papercrete
**Composition:** Shredded paper or cardboard, Portland cement, and water. Typical ratio: 60% paper, 30% cement, 10% water (by volume). Mix in a barrel with a drill-mounted paint mixer or a repurposed washing machine tub.
**Application:** Apply in thick coats (1–2 inches) by hand. Papercrete sticks to earthbag walls without mesh due to the fibrous texture. It can also be cast into blocks and used as interior insulation.
**Advantages:** Excellent insulation value (R-2.0 per inch). Lightweight. Inexpensive. Uses waste paper.
**Limitations:** Absorbs water — must be used on interior walls only, or as an insulating layer beneath an exterior waterproof plaster. Not code-recognized as a structural plaster. Susceptible to rodent damage if not coated with lime or cement finish.
Waterproofing Exposed Surfaces
Any earthbag surface exposed to weather (dome tops, parapet walls, garden walls without caps) requires waterproofing beyond plaster. Options, ranked by durability:
1. **Elastomeric roof coating** over cement stucco — 15–20 year lifespan, recoatable 2. **Hydraulic lime plaster** — indefinite lifespan with minor maintenance every 5–10 years 3. **Boiled linseed oil** over earthen plaster — 1–2 year reapplication cycle 4. **Liquid-applied EPDM** — 20+ year lifespan, expensive, not breathable
9. Code and Permits — Getting Earthbag Approved
The IRC Problem
The International Residential Code (IRC) does not include earthbag construction as a prescriptive building method. This means there is no chapter an inspector can open to verify that your earthbag wall meets code the way Chapter 6 covers conventional wood framing or Chapter 21 covers masonry. This is the single largest barrier to permitted earthbag construction in the United States.
It is not an insurmountable barrier. Three pathways exist:
**1. Alternative materials and methods (IRC R104.11).** Every edition of the IRC includes a provision allowing the building official to approve alternative materials, designs, or methods of construction that demonstrate equivalence to code-prescribed methods. The applicant must provide sufficient evidence — engineering analysis, test data, or an engineer's stamp — that the proposed construction achieves the intent of the code.
This is the most commonly used pathway for permitted earthbag construction. It requires a structural engineer willing to stamp the plans and a building official willing to review alternative materials documentation. Both exist in greater numbers than the earthbag community acknowledges. Engineers understand confined compression. Building officials understand that the code provides the R104.11 pathway specifically for situations like this.
**2. CalEarth testing data.** Khalili's SuperAdobe structures were tested to destruction at the International Conference of Building Officials (ICBO, predecessor to ICC) labs in the 1990s. The test data is publicly available through CalEarth and has been cited in successful permit applications nationwide. Key findings from the tests:
- SuperAdobe dome (15' diameter) withstood simulated seismic loading exceeding California Seismic Zone 4 requirements
- Vertical load testing exceeded code requirements for single-story residential by a factor of 3
- Lateral load testing (wind and seismic) exceeded code minimums by a factor of 2
This data package, combined with a structural engineer's analysis of the specific proposed structure, has been accepted by building departments in California, Arizona, New Mexico, Utah, Colorado, Hawaii, and Texas.
**3. Owner-builder exemptions.** Many rural jurisdictions in the western United States have either no building code enforcement or owner-builder provisions that allow the property owner to build their own residence without code compliance, provided they acknowledge in writing that the structure may not meet code. This is a legal pathway, not a workaround — it is codified in state law in many states.
Khalili's Contribution to Code Acceptance
Nader Khalili's most lasting contribution was not the construction method itself — military engineers already knew sandbag construction worked. His contribution was generating the test data and engineering analysis necessary to demonstrate code equivalence, then publishing it openly so that any builder could reference it in a permit application. He died in 2008. CalEarth continues to operate his Hesperia campus, offer workshops, and maintain the testing documentation.
Practical Permit Strategy
1. **Hire a structural engineer** who has experience with alternative building methods. Provide them with CalEarth testing data, the Daigle (2008) thesis, and the Pelly (2010) thesis. Ask them to produce a site-specific structural analysis and stamp the plans. 2. **Meet with the building department** before submitting plans. Present the project as an "alternative materials" application under R104.11. Bring the engineer's stamp and the CalEarth test reports. Most rejections come from surprise — an inspector who has never seen earthbag plans and has no framework to evaluate them. A pre-application meeting solves this. 3. **Design for inspection access.** Include a conventional foundation (the inspector knows how to inspect it), conventional plumbing and electrical (ditto), and a plaster specification the inspector can verify. The earthbag wall is the only unconventional element — and you have engineering for it. 4. **Document everything.** Photograph every course during construction. Record fill type, moisture content, tamping protocol, and barbed wire placement. This documentation protects you during inspections and provides a record for future buyers, insurers, and appraisers.
10. Sources
- Daigle, B. (2008). *Earthbag Housing: Structural Behaviour and Applicability in Developing Countries.* Master's thesis, University of Bath.
- Hart, K. (2018). *Essential Earthbag Construction.* New Society Publishers.
- Hunter, K. & Kiffmeyer, D. (2004). *Earthbag Building: The Tools, Tricks and Techniques.* New Society Publishers.
- Hunter, K. & Kiffmeyer, D. (2010). *Earthbag Building Guide: Small Domes.* Hartworks.
- Khalili, N. (1986). *Racing Alone.* CalEarth Press.
- Khalili, N. (1989). Lunar structures generated and constructed using on-site materials. In *Lunar Bases and Space Activities of the 21st Century.* Lunar and Planetary Institute.
- Khalili, N. (1999). *Ceramic Houses and Earth Architecture: How to Build Your Own.* CalEarth Press.
- Geiger, O. (2011). *Earthbag Building Guide.* Earthbag Building.com.
- Pelly, R. (2010). *Plastic Limit Analysis of Earthbag Structures.* Master's thesis, University of Bath.
- Stouter, P. (2017). *Earthbag Building Guide.* New Society Publishers.
- Crawford, C. & Quinn, B. (2017). *Microplastic Pollutants.* Elsevier.
- Marsh, H. & Rodriguez-Reinoso, F. (2006). *Activated Carbon.* Elsevier.
`[practical-skills]` `[facility-design]` `[advanced]`