plants
Gravity Fed Water Systems
Gravity Fed Water Systems - comprehensive guide from Nored Farms.
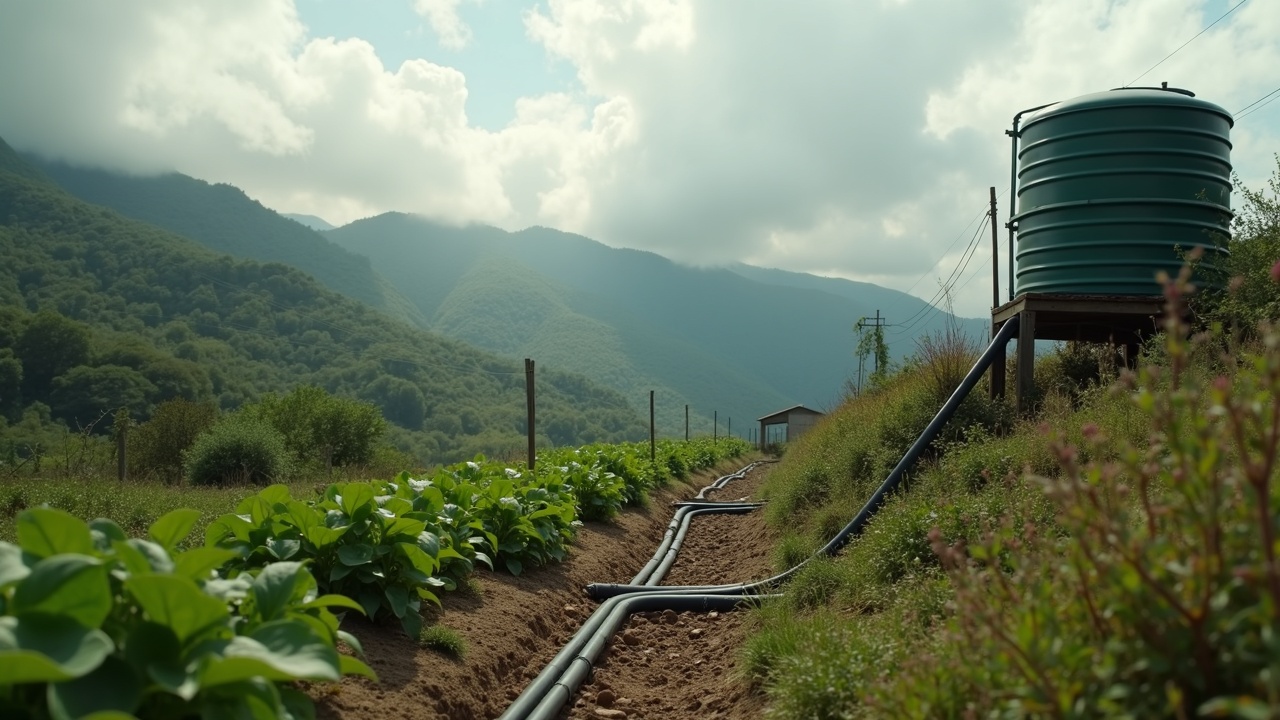
title: "Gravity-Fed Water Systems" subtitle: "Design, Build, and Maintain Pressurized Water Without a Pump" author: "Nored Farms" date: "2026"
Content Extraction Summary
**Hook Options:** 1. Every municipal water system in history started as a gravity-fed system — and most of the world's most reliable water supplies still are. 2. A spring 50 feet uphill from your house delivers 21.7 psi at the tap — no electricity, no pump, no moving parts, no monthly bill. 3. The Romans moved 1.2 billion liters of water per day into Rome using nothing but slope. The physics have not changed.
**Key Mechanism:** Gravity converts vertical elevation difference (head) into pressure at a constant rate: 1 foot of head = 0.433 psi. A pipe from a source at elevation to a point of use below creates a closed system where atmospheric pressure and the weight of the water column do all the work. No energy input required beyond the initial plumbing.
**Misconception to Correct:** Most people assume gravity-fed systems are low-pressure, unreliable trickle-feeds suitable only for off-grid cabins. In practice, a properly designed gravity system with 100+ feet of head delivers pressure equal to or exceeding municipal supply (43.3 psi at 100 ft head), with zero operating cost and zero points of mechanical failure.
**Practical Application:** A rural landowner with a spring, creek, or hilltop rainwater catchment can design a complete pressurized water system — house supply, livestock watering, garden irrigation — using only pipe, fittings, a storage tank, and elevation. This document provides the hydraulic calculations, pipe sizing tables, and construction details to do it.
**Citation-Ready Claims:**
- Roman aqueducts supplied approximately 1.2 billion liters/day to Rome at their peak capacity (Hodge, 2002, *Roman Aqueducts & Water Supply*)
- The Hazen-Williams equation remains the standard for friction loss calculation in pressurized pipe systems (Mott & Untener, 2014, *Applied Fluid Mechanics*)
- Slow sand filtration removes 90–99% of bacteria and 99%+ of protozoa without chemicals (WHO, 2017, *Guidelines for Drinking-water Quality*)
- HDPE pipe has a service life exceeding 50 years when operated within pressure ratings (PPI, 2019, *Handbook of Polyethylene Pipe*)
- Ferrocement tanks cost 30–50% less than equivalent polyethylene tanks at volumes above 5,000 gallons (Watt, 1978, *Ferrocement Water Tanks and Their Construction*)
1. Introduction — The Most Reliable Pump Ever Built
A pump has moving parts. Moving parts wear out. Gravity does not wear out.
That single fact explains why every serious water infrastructure project in human history started with the same question: can we get the source above the point of use? The Romans did not build aqueducts because they lacked ingenuity. They built aqueducts because they understood that a system with no moving parts does not break. The Qanat systems of Persia — hand-dug tunnels running miles through mountain slopes to deliver spring water to desert cities — have been operating continuously for over 2,700 years. Some are still in use today. No pump system in existence has a 2,700-year service record.
Roman aqueducts supplied roughly 1.2 billion liters of water per day to Rome at their peak, serving a population of over one million people (Hodge, 2002). The engineering was sophisticated — inverted siphons to cross valleys, settling basins to remove sediment, distribution castella to regulate flow — but the underlying principle was elementary. Water flows downhill. If you can get it to the top, it will deliver itself to the bottom.
Modern gravity-fed systems use the same physics with better materials. PVC and HDPE pipe replaced lead and terra cotta. Polyethylene tanks replaced stone cisterns. Pressure regulators replaced bronze valves. But the core design has not changed: source at elevation, pipe on grade, storage and distribution below. No electricity. No fuel. No maintenance schedule for a pump that does not exist.
**Who this is for.** If you have rural property with a spring, a year-round creek, or enough elevation to put a rainwater catchment tank above your point of use, you can build a pressurized water system that matches or exceeds municipal supply pressure — for the cost of pipe and fittings. This document covers the hydraulic engineering, construction details, and maintenance protocols to do it from scratch.
**What makes gravity systems fail.** They do not fail from the gravity. They fail from three things: undersized pipe (not enough flow), inadequate head (not enough pressure), and neglected intakes (sediment or biological fouling). Every section that follows is designed to prevent those three failure modes.
2. Source Development — Springs, Streams, and Catchment
Springs
A spring is groundwater reaching the surface. It is the ideal gravity-fed source because the water is already filtered through soil and rock, the flow is usually consistent across seasons (unlike surface water), and the elevation is typically fixed and measurable.
**Spring capping** is the process of enclosing the spring eye (the point where water emerges) in a watertight collection structure that protects the source from surface contamination while allowing groundwater to enter freely.
**Collection box construction:** 1. Excavate around the spring eye to expose the water-bearing stratum. Do not dig below the water-bearing layer — you want to intercept the flow, not drain the aquifer. 2. Build a concrete or stone collection box around the eye. Minimum dimensions: 3 ft × 3 ft × 3 ft interior. The uphill wall must be permeable (dry-stacked stone or perforated concrete block) to allow groundwater entry. The downhill wall, sides, and floor are sealed watertight. 3. Install a screened overflow pipe at the top of the box (sized to handle maximum spring flow without backing up) and a supply pipe outlet 6 inches above the floor (to allow sediment to settle below the intake). 4. Install a drain/cleanout valve at the lowest point for periodic flushing. 5. Cover with a reinforced concrete lid that is vermin-proof and surface-water-proof. The lid should be at least 4 inches above surrounding grade with the soil graded away from the box on all sides. 6. Fence the spring area. Exclude all livestock for a minimum 100-foot radius.
**Measuring spring flow:** Place a container of known volume under the overflow pipe and time how long it takes to fill. A 5-gallon bucket that fills in 60 seconds = 5 gallons per minute (gpm). Measure during the driest month of the year. That is your design flow. Do not design to the wet-season flow — that number will betray you in August.
| Spring Flow (gpm) | Daily Yield (gallons) | Supports | |---|---|---| | 0.5 | 720 | Single household, conservative use | | 1.0 | 1,440 | Single household, normal use | | 2.0 | 2,880 | Household + garden + small livestock | | 5.0 | 7,200 | Household + full garden + livestock herd | | 10+ | 14,400+ | Multiple residences or small farm operation |
Streams and Creeks
Surface water from streams requires more treatment than spring water but is often available in larger volumes. The key challenge is building an intake structure that captures water reliably without capturing debris, sediment, or aquatic life.
**Intake structure options:**
- **Submerged intake with screen:** A screened pipe or box placed in the streambed, connected to a collection chamber on the bank. Screen mesh: 1/4-inch hardware cloth over 1/8-inch stainless screen. Must be cleaned regularly — weekly during leaf fall, monthly otherwise.
- **Coanda screen intake:** A curved stainless steel wedge-wire screen installed at a small dam or weir. Water flows over the curved surface; surface tension pulls clean water through the slots while debris slides off the bottom. Self-cleaning in most conditions. More expensive upfront ($500–$2,000 depending on size) but dramatically reduces maintenance.
- **Infiltration gallery:** A perforated pipe buried in the gravel bed adjacent to the stream. Water filters through the natural gravel before entering the pipe. Provides natural pre-filtration and is invisible/protected from flood damage. Requires a streambed with at least 18 inches of clean gravel.
**Legal note:** Surface water rights vary dramatically by state. In western US states, virtually all surface water is subject to prior appropriation doctrine — you may need a water right permit even for domestic use. In eastern states, riparian rights generally allow reasonable domestic use. Check your state's water rights authority before building any stream intake.
Rainwater Catchment to Elevated Storage
Where no spring or creek exists but elevation is available, rainwater catchment can feed a gravity system. The key is getting the storage tank high enough to generate useful pressure.
**Catchment calculation:** 1 inch of rain on 1,000 square feet of roof = 623 gallons. A 2,000 sq ft roof in an area receiving 30 inches of annual rainfall captures approximately 37,380 gallons per year, or about 102 gallons per day averaged. Actual collection efficiency is 75–85% of theoretical due to first-flush diversion, evaporation, and splash loss.
**Elevation requirement:** The bottom of the storage tank must be above the highest point of use. Every foot of elevation = 0.433 psi at the tap. For a functional shower, you need a minimum of 10 psi (23 feet of head). For comfortable household pressure, target 30–45 psi (70–104 feet of head).
3. Hydraulic Fundamentals — The Math That Makes It Work
Pressure From Head
The fundamental equation:
**P = h × 0.433**
Where:
- P = pressure in pounds per square inch (psi)
- h = vertical elevation difference in feet between water surface and point of use
- 0.433 = weight of a 1-foot column of water, 1 square inch in cross-section, in pounds
This is not an approximation. It is derived directly from the density of water (62.4 lb/ft³) divided by 144 square inches per square foot. It works regardless of pipe diameter, pipe length, or pipe route. A pipe running 200 feet horizontally and dropping 50 feet vertically delivers the same static pressure as a pipe dropping 50 feet straight down: 50 × 0.433 = 21.65 psi.
**Worked example — Spring to house:**
- Spring collection box elevation: 1,480 feet above sea level
- House elevation: 1,390 feet above sea level
- Vertical head: 1,480 − 1,390 = 90 feet
- Static pressure at house: 90 × 0.433 = **38.97 psi**
That is within the 30–50 psi range considered normal for residential plumbing. No pump needed.
Flow Rate and Pipe Sizing
Static pressure tells you what the system delivers at zero flow. As soon as water moves through the pipe, friction steals pressure. The amount of pressure lost to friction depends on three things: pipe diameter, pipe length, and flow rate.
**Hazen-Williams equation** (the standard for pressurized pipe friction loss):
**f = (4.52 × Q^1.852) / (C^1.852 × d^4.87)**
Where:
- f = friction loss in feet of head per foot of pipe
- Q = flow rate in gallons per minute
- C = Hazen-Williams roughness coefficient (150 for HDPE, 150 for PVC, 120 for galvanized steel, 100 for old cast iron)
- d = internal pipe diameter in inches
This equation is ugly. In practice, you use friction loss tables. Here are the values that matter for residential gravity systems:
**Friction loss per 100 feet of pipe (PVC/HDPE, C=150):**
| Flow (gpm) | 3/4" pipe | 1" pipe | 1-1/4" pipe | 1-1/2" pipe | 2" pipe | |---|---|---|---|---|---| | 1 | 0.76 ft | 0.20 ft | 0.07 ft | 0.03 ft | 0.01 ft | | 2 | 2.75 ft | 0.72 ft | 0.24 ft | 0.11 ft | 0.03 ft | | 3 | 5.82 ft | 1.53 ft | 0.52 ft | 0.24 ft | 0.07 ft | | 5 | 15.0 ft | 3.93 ft | 1.33 ft | 0.61 ft | 0.17 ft | | 8 | 35.7 ft | 9.37 ft | 3.18 ft | 1.46 ft | 0.41 ft | | 10 | 53.6 ft | 14.1 ft | 4.77 ft | 2.19 ft | 0.62 ft |
**How to read this table:** At 5 gpm through 1-inch pipe, you lose 3.93 feet of head for every 100 feet of pipe. If your run is 1,000 feet, you lose 39.3 feet of head. If you only had 50 feet of head to begin with, you now have 10.7 feet of head at the house — only 4.6 psi. Not enough. You need bigger pipe.
Worked Example — Full System Design
**Given:**
- Spring: 2 gpm measured flow, 150 feet above house elevation
- Pipeline route: 2,200 feet of pipe (winding through terrain)
- Peak demand: 5 gpm (two fixtures running simultaneously)
- Target pressure at house: 30 psi minimum (= 69.3 feet of head minimum)
**Step 1: Available head.** 150 feet.
**Step 2: Required head at point of use.** 69.3 feet (for 30 psi).
**Step 3: Allowable friction loss.** 150 − 69.3 = 80.7 feet maximum.
**Step 4: Friction loss per 100 feet allowed.** 80.7 ÷ 22 (hundreds of feet of pipe) = 3.67 feet per 100 feet.
**Step 5: Read the table.** At 5 gpm peak demand:
- 3/4" pipe: 15.0 ft/100 ft — far too much loss. Rejected.
- 1" pipe: 3.93 ft/100 ft — close but over budget (3.93 > 3.67). Rejected.
- 1-1/4" pipe: 1.33 ft/100 ft — well within budget. **Selected.**
**Step 6: Actual friction loss.** 1.33 × 22 = 29.3 feet.
**Step 7: Actual pressure at house.** (150 − 29.3) × 0.433 = **52.2 psi.** Comfortable.
**Step 8: Add 10% for fitting losses** (elbows, tees, valves). 29.3 × 1.10 = 32.2 feet total loss. Final pressure: (150 − 32.2) × 0.433 = **51.0 psi.** Still excellent.
Note: The spring only produces 2 gpm, but the system demands 5 gpm peak. This works because you install a storage tank at elevation and the spring fills it continuously. The tank delivers peak flow; the spring fills the tank between peaks. Tank sizing is covered in Section 5.
Minimum Head Requirements by Use
| Application | Minimum Pressure (psi) | Minimum Head (feet) | |---|---|---| | Drip irrigation | 5–15 | 12–35 | | Garden hose (low-pressure nozzle) | 10–20 | 23–46 | | Livestock float valve | 5–10 | 12–23 | | Kitchen sink | 15–20 | 35–46 | | Shower (low-flow head) | 10–15 | 23–35 | | Shower (standard) | 20–30 | 46–69 | | Washing machine | 20 | 46 | | Whole-house residential | 30–50 | 69–115 | | Fire suppression (garden hose) | 40+ | 92+ |
4. Pipeline Design — Getting Water From There to Here
Pipe Materials
**HDPE (High-Density Polyethylene):** The best choice for most gravity-fed installations. Flexible (ships in coils up to 500 feet, reducing joints), resistant to UV and chemical degradation, rated for 50+ years of service life (PPI, 2019). Joins by heat fusion (no glue, no threads — the joint is stronger than the pipe itself). Available in IPS (iron pipe size) and CTS (copper tube size). Use IPS for main supply lines. Pressure ratings: 100 psi for SDR 17, 160 psi for SDR 11. For most gravity systems, SDR 17 is adequate.
**PVC (Schedule 40 and Schedule 80):** Rigid, inexpensive, widely available. Joins with solvent cement (fast and easy). Schedule 40 is rated to 450 psi at 73°F for 1-inch pipe — far more than any gravity system needs. Drawbacks: brittle in cold weather (can crack from impact below 40°F), degrades in direct UV exposure (must be buried or painted), and rigid pipe requires more fittings on uneven terrain (every fitting is a potential leak point and adds friction loss).
**Galvanized Steel:** Legacy material. Still used for exposed above-ground runs where impact resistance matters (livestock areas, creek crossings). Hazen-Williams C factor of 120 when new, dropping to 80–100 as interior corrosion builds scale. Threaded joints are labor-intensive. Do not use for buried runs — corrosion is inevitable below grade.
**Pipe sizing rule of thumb:** Always size one diameter larger than the minimum the calculations allow. The cost difference between 1-inch and 1-1/4-inch HDPE over a 2,000-foot run is roughly $200–$400. The performance difference is dramatic: half the friction loss at the same flow rate. You cannot add head after the system is built. You can always throttle excess pressure with a valve. Undersize the pipe and you live with low pressure forever.
Air Relief Valves
Air collects at high points in the pipeline. Trapped air reduces the effective pipe diameter and creates pressure surges (water hammer). Install automatic air relief valves at every high point in the pipeline profile. These valves open to release air when pressure drops and close when water arrives. Cost: $15–$40 each. Cheap insurance against the most common cause of flow problems in long gravity lines.
Pressure Breaks for High-Head Systems
If total head exceeds the pipe's pressure rating, you need pressure break tanks (also called break-pressure tanks). These are small open-to-atmosphere tanks installed along the pipeline at intervals that keep the pressure in each segment within the pipe's rating.
**Example:** A spring 400 feet above the house. SDR 17 HDPE is rated to 100 psi (231 feet of head). Install a break-pressure tank at approximately 200 feet of head (midway down), creating two 200-foot segments, each well within the 231-foot rating. The tank is a simple box — water enters at one end, exits at the other, and the open top breaks the hydraulic grade line.
Thrust Blocks
At every change of direction (horizontal bends, vertical bends, tees, dead ends), water pressure exerts an unbalanced force that tries to push the fitting off the pipe. For buried pipelines under significant pressure, pour concrete thrust blocks behind fittings to resist this force. Size: minimum 2 ft × 2 ft × 1 ft of concrete bearing against undisturbed soil for systems under 50 psi. Larger for higher pressures or larger pipe diameters. Consult AWWA M23 (PVC Pipe — Design and Installation) for engineered sizing if your system exceeds 80 psi.
Burial Depth
Bury the pipeline below your local frost line. In central Texas, that is 6–12 inches. In Montana, it is 5–6 feet. Your county extension office can provide the local frost depth. Where burial is impractical (rock outcrops, creek crossings), insulate exposed pipe with closed-cell foam insulation and protect it inside a larger-diameter sleeve pipe.
5. Storage — Tank Sizing, Materials, and Elevation
How Much Storage You Need
Tank sizing formula:
**Tank volume = Daily demand × Days of autonomy**
- **Daily demand:** Average US household uses 80–100 gallons per person per day. A water-conscious rural household uses 50–75 gallons per person per day. Add livestock: cattle drink 10–20 gallons/day each; horses 8–12; sheep/goats 2–4; chickens 1/4 gallon per 4 birds.
- **Days of autonomy:** How many days the system must supply demand if the source stops (drought, freeze, intake repair). Minimum: 3 days. Recommended: 7 days. Conservative: 14 days.
**Worked example:**
- Household: 4 people × 60 gallons/day = 240 gallons/day
- Livestock: 10 cattle × 15 gallons = 150 gallons/day
- Garden: 200 gallons/day (drip irrigation, 1/4 acre)
- Total daily demand: 590 gallons/day
- Autonomy: 7 days
- **Tank size: 590 × 7 = 4,130 gallons.** Round up to a standard 5,000-gallon tank.
Tank Materials
**Polyethylene (rotomolded):** The standard for residential and small farm systems. Available from 300 gallons to 10,000+ gallons. UV-stabilized, food-grade, lightweight, affordable ($0.50–$1.00 per gallon of capacity). Service life: 15–25 years. Drawbacks: susceptible to UV degradation if not UV-stabilized (check the rating), can be damaged by falling trees or equipment, and large tanks require level pads.
**Ferrocement:** A thin shell of cement mortar reinforced with layers of wire mesh and steel rod. Extremely strong, long-lasting (50+ years), and costs 30–50% less than polyethylene at volumes above 5,000 gallons (Watt, 1978). Can be built on-site in any shape using local labor and materials (sand, cement, rebar, chicken wire). Drawbacks: requires skilled construction to prevent cracking, cannot be moved once built, and must cure for 28 days before filling.
**Ferrocement tank construction summary (5,000-gallon cylindrical):**
- Dimensions: 8 feet diameter × 14 feet tall (internal)
- Foundation: 6-inch reinforced concrete pad, level to within 1/4 inch
- Armature: #4 rebar vertical at 8-inch spacing, #3 rebar horizontal at 6-inch spacing
- Mesh: 4 layers of 1/2-inch galvanized hardware cloth (chicken wire) wired to armature
- Mortar: 1:3 cement-to-sand ratio, plastered in 3 coats (scratch, brown, finish) totaling 1.5-inch wall thickness
- Interior waterproofing: 2 coats of food-grade cement-based waterproofer
- Inlet, outlet, overflow, and drain fittings cast into the wall during construction
**Stone/masonry:** Traditional and durable but labor-intensive. Appropriate where stone is locally abundant and labor is available. Interior must be plastered and waterproofed. Not recommended for new construction unless aesthetics or material availability strongly favor it.
Elevation Requirements
The bottom of the tank outlet must be above the highest point of use, with enough additional elevation to provide working pressure after friction losses.
**Practical approach:** Survey your property with a transit level, GPS altimeter, or even a long clear tube filled with water (the water level at both ends is equal — the difference in tube position above ground gives you the elevation difference). Identify the highest feasible tank site that is also accessible for construction and has a stable foundation.
If natural elevation is insufficient, you can build a tank stand. A 5,000-gallon tank weighs approximately 41,700 pounds when full. The stand must support this load on stable footings. Concrete piers or steel I-beam frames are standard. Every 10 feet of stand height adds 4.33 psi. A 20-foot tower with a 2,500-gallon tank is feasible but requires engineered structural design — do not improvise structural steel work at this scale.
6. Distribution — Getting Water to Every Point of Use
Branch Lines
From the main storage tank, a trunk line runs to the primary point of use (usually the house). Branch lines tee off the trunk to serve secondary uses: livestock troughs, garden hydrants, outbuildings.
**Sizing branch lines:**
- Livestock trough with float valve: 1/2-inch or 3/4-inch line is adequate (flow demand is low — the float valve meters water in as animals drink)
- Garden hydrant (single hose): 3/4-inch minimum
- Garden hydrant (sprinkler or multiple hoses): 1-inch minimum
- Outbuilding with sink: 3/4-inch
- Secondary residence: size as a separate system using the friction loss calculations from Section 3
Pressure Regulators
If your system delivers more pressure than needed at any point of use, install a pressure-reducing valve (PRV). Household plumbing fixtures are rated for a maximum of 80 psi. Most are happiest at 40–60 psi. A system with 150 feet of head delivers 65 psi — fine for most fixtures. A system with 250 feet of head delivers 108 psi — too much, and will cause premature failure of washing machine hoses, toilet fill valves, and faucet seals.
Install the PRV after the storage tank and before the first point of use. Set it to 50 psi for household plumbing. Cost: $30–$80 for a residential-grade brass PRV.
Frost Protection
- **Bury supply lines below frost depth.** This is the only reliable long-term solution.
- **Insulate above-ground runs.** Closed-cell foam pipe insulation rated to your minimum winter temperature. Cover insulation with UV-resistant jacketing (PVC sleeve or aluminum).
- **Livestock troughs:** Use insulated troughs, or install a small recirculation loop that keeps water moving (moving water freezes at a lower effective temperature than standing water). A float-operated bypass valve that allows a slow trickle to run continuously during freezing conditions works well — the trickle prevents freezing in the supply line, and the overflow drains to a non-critical area.
- **Heat trace cable:** Electric heating cable wrapped around exposed pipe. Effective but requires electricity — which defeats the advantage of a gravity system. Use only for short, critical runs (the line entering the house through the foundation wall, for example) where burial is not possible.
Livestock Watering Systems
Gravity-fed livestock water is the lowest-maintenance watering system that exists. A float valve in a concrete or rubber trough, fed by a gravity line from the main tank, refills itself as animals drink. No electricity, no pump, no solar panel, no battery, no moving parts except the float.
**Design points:**
- Size the trough to hold at least one full day's water demand for the number of animals it serves, even if the supply line is continuously filling. This protects against supply interruptions.
- Install a shutoff valve and union on the supply side of each trough for winter draining and repair.
- Use 3/4-inch minimum supply line for cattle troughs (1-inch preferred). Cattle can drain a trough faster than a small line can refill it, leading to the float valve being held open continuously and the line running at maximum friction loss.
- Protect the supply line from livestock. Bury it, or run it through steel conduit above ground. Cattle and horses will step on, rub on, and chew exposed plastic pipe.
Garden and Irrigation Integration
Gravity systems work well with drip irrigation, which operates at 10–25 psi — achievable with as little as 23–58 feet of head. Standard drip emitters are rated for 15–25 psi. Pressure-compensating emitters maintain consistent flow across a wider pressure range and are worth the small cost premium for gravity systems where pressure varies with tank level.
Sprinkler irrigation requires higher pressure (25–50 psi depending on the sprinkler type) and higher flow rates. With adequate head and pipe sizing, gravity-fed sprinklers are entirely feasible. Impact sprinklers are more tolerant of pressure variation than gear-driven rotors and are the better choice for gravity systems.
7. Filtration and Treatment — Making It Safe to Drink
Spring Water vs. Surface Water
The treatment requirements are fundamentally different.
**Spring water** has been filtered through soil and rock. A properly capped spring with no surface water intrusion typically has low turbidity, low bacterial counts, and no parasites. Treatment may consist of nothing more than a sediment filter and periodic testing. Many rural families drink raw spring water with no treatment at all — and this is often safe when the spring is properly developed and protected. However, testing is the only way to confirm safety, and conditions can change.
**Surface water** (streams, ponds, rainwater) is exposed to animal waste, soil runoff, leaf litter decomposition, and airborne contaminants. Surface water must be treated before human consumption. Always.
Sediment Removal
All gravity systems need sediment management. Even spring water carries fine particles.
- **Settling tank:** A simple tank or chamber upstream of the main storage tank where water velocity drops low enough for suspended particles to settle. Minimum retention time: 1 hour. A 55-gallon drum with inlet at top and outlet at bottom works for low-flow spring systems.
- **Inline sediment filter:** A cartridge filter housing with replaceable 5-micron or 20-micron filter cartridges. Install on the supply line entering the house. Cartridges cost $5–$15 and last 3–6 months depending on water quality.
Slow Sand Filtration
The gold standard for gravity-fed surface water treatment. A slow sand filter is a container filled with graded sand through which water percolates at a slow rate (0.05–0.15 gpm per square foot of filter surface area). A biological layer (schmutzdecke) forms on the sand surface and removes bacteria, protozoa, and fine sediment through biological predation and mechanical straining.
Performance: 90–99% bacteria removal, 99%+ protozoan cyst removal, significant reduction in turbidity and organic matter (WHO, 2017). No chemicals. No electricity. No replacement media (the sand lasts decades — you scrape and wash the top inch when flow rate drops).
**Construction (household scale):**
- Container: 55-gallon food-grade barrel, concrete or ferrocement box, or masonry tank
- Gravel underdrain: 6 inches of 1/4-inch pea gravel over a perforated collection pipe
- Sand bed: 30–36 inches of clean, washed, uniform sand (effective size 0.15–0.35 mm, uniformity coefficient less than 3)
- Supernatant water: maintain 4–6 inches of standing water above the sand surface at all times (the schmutzdecke dies if the sand dries out)
- Flow rate: size the filter so flow does not exceed 0.1 gpm per square foot. For a household using 200 gallons/day with intermittent flow peaks of 3 gpm, a filter surface area of 30 square feet is appropriate (this is a 5.5 ft × 5.5 ft box — substantial, but effective)
UV Treatment
Ultraviolet disinfection kills bacteria and viruses by disrupting DNA. Effective, chemical-free, and instantaneous. UV units sized for household flow rates (2–8 gpm) cost $150–$500 and require annual lamp replacement ($30–$80). They do require electricity (40–80 watts), which can be provided by a small solar panel and battery if the property is off-grid.
UV is not effective on turbid water — particles shield organisms from the light. Always install sediment filtration upstream of a UV unit.
Treatment Decision Matrix
| Source Type | Minimum Treatment | Recommended Treatment | |---|---|---| | Capped spring, no surface water influence | Sediment filter, annual testing | Sediment filter + UV, semi-annual testing | | Spring with possible surface influence | Slow sand filter OR UV + sediment filter | Slow sand filter + UV, quarterly testing | | Stream/creek | Slow sand filter + UV | Slow sand filter + UV + sediment pre-filter, quarterly testing | | Rainwater (roof catchment) | First-flush diverter + sediment filter | First-flush diverter + sediment filter + UV, annual testing |
8. Safety — Protecting the Water and the People
Cross-Contamination Prevention
A gravity-fed system is an open system connected to the environment at the source. Contaminants can enter at the spring box, at the tank, or through any leak in the pipeline that occurs below the hydraulic grade line (negative pressure can suck contaminants into the pipe through cracks).
**Prevention measures:**
- Cap all springs with watertight, vermin-proof enclosures
- Screen all tank openings (inlet, overflow, vent) with fine mesh (window screen minimum, 1/16-inch hardware cloth preferred)
- Install backflow preventers on any connection to a pressurized system (municipal supply backup, well pump backup) to prevent contaminated water from flowing backward into the gravity system
- Never cross-connect a gravity system with a septic system, gray water system, or chemical injection system without an air gap (physical separation between the potable supply and the non-potable system)
Backflow Prevention
If the gravity system connects to any other water source, install a reduced-pressure zone (RPZ) backflow preventer or, at minimum, an atmospheric vacuum breaker at the point of connection. An air gap (the outlet pipe discharging into open air above the flood rim of the receiving tank) is the most reliable backflow prevention — no moving parts, no failure mode.
Overflow Management
Every tank needs an overflow pipe sized to handle the maximum inflow rate. The overflow must discharge to a non-erosive surface (rock pad, splash block, or drainage swale) at least 20 feet from the tank foundation and directed away from any structures, septic systems, or wells.
A continuously overflowing tank wastes water. Install a float valve at the tank inlet to shut off flow when the tank is full, allowing excess spring or stream flow to remain in its natural course.
Water Testing Schedule
| Test | Frequency | What It Tells You | |---|---|---| | Total coliform + E. coli | Every 6 months (spring), quarterly (surface) | Bacterial contamination from animal/human waste | | Nitrates | Annually | Agricultural runoff, septic influence | | pH | Annually | Corrosivity (low pH corrodes copper plumbing) | | Turbidity | After heavy rain events | Sediment load, possible surface water intrusion into spring | | Full panel (metals, organics, minerals) | At initial system startup, then every 3–5 years | Baseline chemistry and any long-term changes |
State-certified labs run total coliform/E. coli tests for $20–$50. Full panels run $100–$300. This is not expensive insurance.
Freezing Protection Checklist
- Pipeline buried below frost line: yes/no
- Exposed pipe sections insulated and jacketed: yes/no
- Tank insulated or in heated enclosure: yes/no
- Livestock troughs have drain valves for winter: yes/no
- Spring box has insulated lid: yes/no
- Overflow pipes discharge freely (not blocked by ice): yes/no
If any answer is "no," address it before the first hard freeze. Frozen pipes in a gravity system do not just stop flow — they can crack pipe and fittings, requiring excavation and repair at the worst possible time.
9. Maintenance — Keeping It Running for Decades
Intake Cleaning
**Spring boxes:** Open the lid quarterly. Remove any accumulated sediment, leaves, or biological growth. Flush the drain valve until water runs clear. Inspect the inlet screen for damage. Verify the overflow is clear and flowing freely.
**Stream intakes:** Clean screens weekly during fall leaf-drop, monthly otherwise. Inspect after every high-water event. Flood debris can relocate, bury, or damage intake structures overnight.
Pipeline Inspection
- Walk the pipeline route twice per year. Look for exposed pipe (erosion), wet spots (leaks), or soil settlement (pipe stress).
- Open air relief valves annually to verify they operate freely.
- If flow rate at the house drops and the tank is full, the problem is almost always at the intake (plugged screen) or in the pipeline (trapped air or partial blockage). Check the intake first — it is the most common failure point by a wide margin.
Tank Cleaning
Drain and clean storage tanks every 2–3 years. Sediment accumulates on the bottom regardless of intake filtration. Use a pressure washer or stiff brush. Inspect the interior walls for cracks, algae growth, or biofilm. Disinfect with a dilute chlorine solution (1/4 cup household bleach per 100 gallons), let stand 4 hours, then drain and refill.
Leak Detection
A slow leak in a buried pipeline can run for months before detection. Monitor your system by checking the tank level daily (a simple float gauge or sight tube on the outside of the tank). If the tank level drops when no water is being used, you have a leak. Isolate sections of the pipeline with valves to narrow the location, then walk the isolated section looking for wet soil.
Winterization
If the system will be shut down for winter (seasonal property): 1. Close the supply valve at the source. 2. Open all drain valves at low points in the pipeline. 3. Open all faucets in the house to drain the distribution plumbing. 4. Drain the storage tank to below the outlet level (or fully if there is any risk of the tank freezing hard enough to crack). 5. Remove and store inline filter cartridges — frozen cartridges crack their housings. 6. Disconnect and drain any UV treatment units.
To restart in spring: close drain valves, open the source valve, let the tank fill, flush each faucet until water runs clear (purging stale water and air), and take a coliform test sample before drinking.
10. Sources
1. Hodge, A.T. (2002). *Roman Aqueducts & Water Supply* (2nd ed.). London: Duckworth. 2. Mott, R.L. & Untener, J.A. (2014). *Applied Fluid Mechanics* (7th ed.). Pearson. 3. World Health Organization (2017). *Guidelines for Drinking-water Quality* (4th ed., incorporating 1st addendum). WHO Press. 4. Plastics Pipe Institute (2019). *Handbook of Polyethylene Pipe* (2nd ed.). PPI. 5. Watt, S.B. (1978). *Ferrocement Water Tanks and Their Construction*. Intermediate Technology Publications. 6. American Water Works Association. *AWWA M23: PVC Pipe — Design and Installation* (3rd ed.). AWWA. 7. Smet, J. & van Wijk, C. (2002). *Small Community Water Supplies: Technology, People and Partnership*. IRC International Water and Sanitation Centre. 8. Jordan, T.D. (1984). *A Handbook of Gravity-Flow Water Systems for Small Communities*. Intermediate Technology Publications. 9. Niskanen, R. (2003). *Spring Development and Protection*. University of Minnesota Extension. 10. USDA Natural Resources Conservation Service. *Agricultural Waste Management Field Handbook*, Chapter 7: Watering Facilities.
`[practical-skills]` `[facility-design]` `[beginner]`