guides
Hand Tool Restoration
A comprehensive guide covering Hand Tool Restoration.
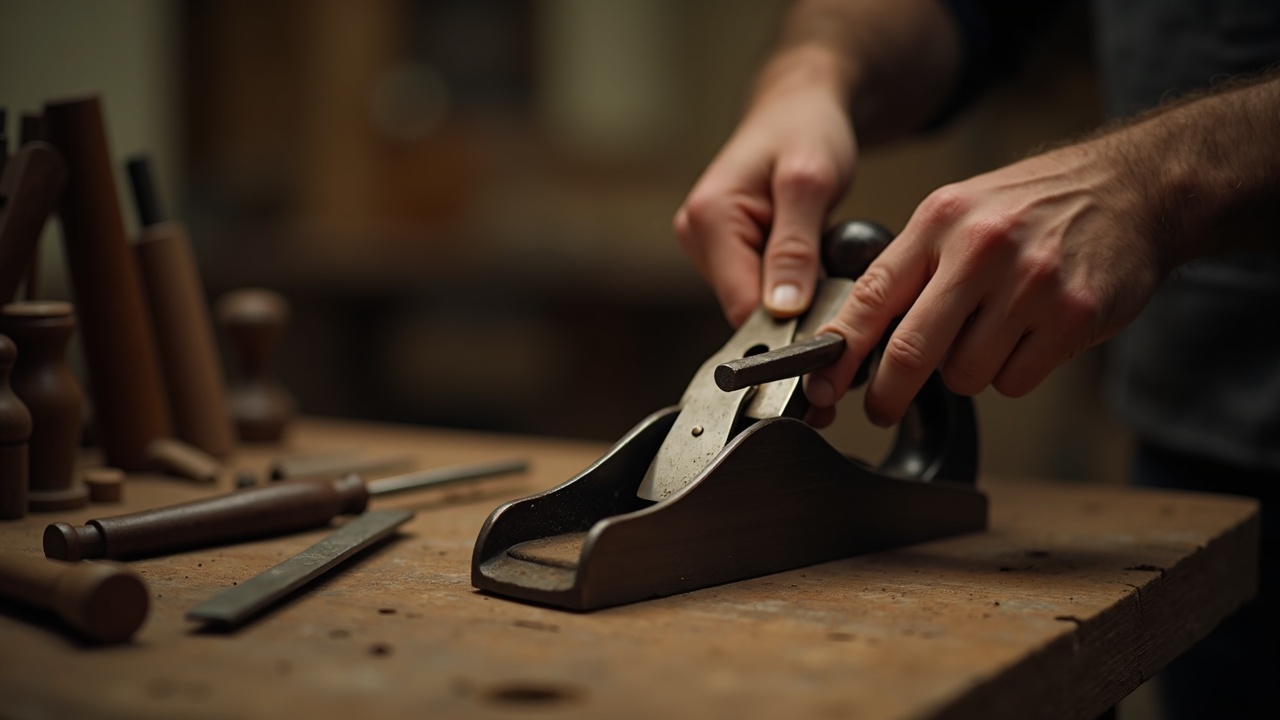
Recovering Superior Steel from the Scrap Pile — A Complete Practical Guide
Nored Farms · Austin, Texas
1. Introduction — Better Steel for Less Money
A hand tool made in 1935 and left in a barn for forty years is not a relic. It is a high-carbon steel instrument forged with methods and materials that modern budget manufacturers cannot economically replicate. The Stanley Rule & Level Company, Disston & Sons, Buck Brothers, Witherby — these operations drop-forged plane irons, chisels, and saw plates from steel with carbon content above 0.95%, then heat-treated them in dedicated hardening shops that ran twenty-four hours a day for decades. The institutional knowledge embedded in those tools — the taper of a saw plate, the camber of a plane iron, the geometry of an axe poll — was refined over generations.
Modern mass production changed the equation. Globalized tool manufacturing prioritizes low unit cost. Castings are thinner. Steel is softer. Heat treatment is faster and less consistent. A $50 bench plane from a big-box store will cut wood, but the iron dulls in minutes on hardwood, the sole is rarely flat from the factory, and the lateral adjustment lever has enough slop to make precise shaving thickness adjustment an exercise in frustration.
A $5 flea market Stanley No. 5 with surface rust and a cracked tote, after two hours of restoration work, will produce shavings that the $50 plane cannot match. The old iron holds an edge longer because the steel is harder. The casting is heavier because the walls are thicker. The machining is tighter because it was done on dedicated fixtures by workers who ran nothing but planes. This is not nostalgia. It is metallurgy.
Hand tool restoration is the cheapest way to build a high-performance tool kit. A full set — smoothing plane, jack plane, four bench chisels, a crosscut saw, and a hatchet — can be sourced for under $40 at estate sales and restored with under $30 in materials. The same quality in new premium tools (Lie-Nielsen, Veritas) costs $800–$1,200. The restored vintage tools will perform within 90% of the premium new tools and, in some cases, outperform them because the original steel alloy responds better to hand sharpening.
This guide covers the complete process: sourcing, assessment, rust removal, restoration by tool type, sharpening systems, and handle work. Every method has been tested. Every recommendation assumes you have a garage, basic hand tools, and no prior restoration experience.
2. Sourcing — Where to Find Tools Worth Restoring
Flea markets are the highest-yield source for restorable tools. Vendors rarely know what they have. A Stanley No. 4 smoothing plane sells for $3–$15 at a flea market. The same plane, cleaned and tuned, sells for $45–$80 in the vintage tool market. Look early — the best tools move in the first hour. Bring a magnet (confirms steel vs. cast iron vs. aluminum), a small flashlight, and a straight edge.
Estate sales produce the best single-source hauls. When a woodworker or farmer's estate is liquidated, entire tool chests appear at once. Prices are set by the estate company, not by tool knowledge. Look for sales that list "workshop" or "garage" contents. Arrive early. Whole chisel sets, drawknife collections, and molding planes surface at estate sales for a fraction of individual resale value.
Farm auctions are the source for heavy tools — axes, adzes, froes, drawknives, post drills, anvils. Farm tools were built to survive abuse. The steel is heavy. The handles are replaceable. A broad axe that has been rehung four times still has the same head it was forged with in 1880. Farm auctions move fast — know your maximum bid before the lot comes up.
Antique stores are the most expensive source but the most curated. Prices are 3–5x flea market rates. The advantage is condition — antique dealers sometimes clean and lightly restore tools before display. If you need a specific plane type or a matching set, antique stores save time at the cost of margin.
Online sources — eBay, Facebook Marketplace, Craigslist — offer volume but require caution. Photographs hide cracks. Sellers misidentify types. Shipping damages handles. Buy online only when you can identify the specific make and model from the photos, and only from sellers with visible return policies. The best online deals are lot sales — "box of old tools" listings where the seller does not know what is inside.
What to Look For
- Plane bodies: Heavy castings with clean cheeks (sides). No cracks at the mouth or around the tote mounting hole. Some surface rust is irrelevant — it comes off. The sole should be relatively flat when held against a straight edge. A bowed sole by 0.010" or less is correctable. Missing knobs and totes are easily replaced or turned.
- Chisels: Look at the steel, not the handle. Handles are consumable. The blade should be full length (not ground down to a stub), free of deep pitting on the flat back, and the bevel should not be ground past the manufacturer's original angle by more than a few degrees. Tang chisels need handles. Socket chisels just need a mallet tap to seat a new one.
- Axes and hatchets: Check the eye (the hole for the handle). Spread eyes — wider at the top than the bottom — indicate overuse with a steel wedge. Check the poll (back face) for mushrooming. Minor mushrooming grinds off. Severe mushrooming with cracks means the steel was overtempered from repeated striking — pass on it. Bit (edge) chips up to 1/8" deep grind out. Deeper chips may not be worth the metal loss.
- Saws: Hold the saw plate at eye level and sight down it. Any visible kink, bow, or wave means the plate needs straightening — doable but a skill in itself. Check the teeth: are they still tall enough to re-sharpen, or has someone ground them to nubs? A saw with 60% of its original tooth height left has decades of sharpenings remaining. Check the handle for cracks at the bolt holes.
What to Avoid
- Cracked castings on planes — no reliable repair exists for cast iron under stress.
- Chrome-plated tools — the plating traps moisture underneath and causes deep pitting. Chrome also indicates a late production era (1960s+) when steel quality declined.
- Tools with brazed or welded repairs on cutting edges — the heat-affected zone destroys the temper.
- Anything marked "Made in India" or "Made in China" in the vintage tool bins — these are recent imports mixed into the pile, not old tools.
- Wooden planes with splits running through the bed (the angled surface the iron rests on). Body splits can be glued, but bed splits change the iron geometry permanently.
3. Assessment — Is This Tool Worth the Time?
Not every old tool is worth restoring. Time is the real cost. A chisel that needs a new handle and a fresh bevel takes thirty minutes. A plane that needs a flattened sole, a lapped chip breaker, a sharpened iron, a new tote, and a replaced lateral lever takes three hours. Before starting, answer three questions:
Is the steel sound? For edge tools (planes, chisels, axes), the cutting edge is everything. Examine the bevel and the flat back. Pitting on the bevel grinds out during sharpening — pits within 1/4" of the edge are normal and will disappear in the first few sharpenings. Pitting on the flat back is more serious. The flat back is a reference surface that must be polished to a mirror. Deep pits (visible craters you can catch a fingernail in) within 1/4" of the edge mean the back will never fully flatten without removing excessive metal. If pitting is only in the first 1/8" of the back near the edge, it will grind out. If it extends 1/2" or more, the tool needs significant lapping time.
Is the geometry intact? A chisel blade bent sideways cannot be straightened without risk of snapping — high-carbon steel is hard but brittle. An axe head with the eye cracked through is done. A plane casting with a hairline crack at the mouth will propagate under use. A saw plate with a kink can be hammer-straightened, but a plate with a crease (a sharp fold line) is permanently deformed.
Are the missing parts replaceable? For planes: knobs, totes, irons, chip breakers, lever caps, and lateral adjustment levers are all available as replacement parts from aftermarket suppliers (Lee Valley, St. James Bay Tool Co.) or from donor planes. For chisels: handles are the only consumable part, and they are easily turned or purchased. For axes: handles are the only consumable — available at any hardware store. For saws: replacement handles can be made from a template, and teeth can be recut from a jointed plate. The one part that cannot be sourced is the body or plate itself.
Decision Matrix
| Condition | Verdict |
|---|---|
| Surface rust, intact geometry, complete parts | Restore — 30 minutes to 1 hour |
| Surface rust, intact geometry, missing handles or small parts | Restore — 1 to 2 hours |
| Heavy rust, pitting on non-critical surfaces, intact edge | Restore — 2 to 3 hours |
| Deep pitting on cutting edge or flat back, within grinding range | Restore with caution — test after initial lapping |
| Cracked casting, split eye, bent blade, creased saw plate | Pass — no reliable repair |
| Chrome plating with sub-surface pitting | Pass — hidden damage unpredictable |
| Brazed or welded cutting edge | Pass — temper is compromised |
4. Rust Removal — Electrolysis, Vinegar, and Mechanical Methods
Rust is iron oxide (Fe₂O₃). It sits on the surface of the steel, occupying more volume than the original iron — which is why rusted surfaces are rough and raised. Removing rust without removing base metal is the objective. Every method involves a tradeoff between speed, metal preservation, and surface finish.
Electrolysis — The Best Method for Heavy Rust
Electrolysis uses direct current to convert iron oxide back to iron at the cathode (the tool) while the sacrificial anode corrodes instead. It removes rust from every surface simultaneously, including inside recesses, threads, and pitting that no wire brush can reach. It does not remove base metal. It does not affect the heat treatment of the steel.
Setup:
- Container: A 5-gallon plastic bucket for small tools, a plastic storage tote for planes and axes. Must be non-conductive. Never use metal containers.
- Power supply: A manual car battery charger set to 6–12V DC at 2–6 amps. Automatic "smart" chargers often will not work — they detect the electrolyte as a fault and shut off. A $20 manual charger from a farm supply store is ideal.
- Electrolyte: Washing soda (sodium carbonate, Na₂CO₃) at 1 tablespoon per gallon of water. Do not use baking soda (sodium bicarbonate) — it works but slower. Do not use salt — it produces chlorine gas.
- Anode: A piece of sacrificial steel — rebar, a coffee can cut open, or a steel plate. The anode corrodes during the process, so use something disposable. Stainless steel anodes work but produce hexavalent chromium (Cr⁶⁺) in the solution — toxic and carcinogenic. Use plain carbon steel.
- Wiring: Connect the positive (+) terminal of the charger to the anode. Connect the negative (−) terminal to the tool. This is critical. Reversing polarity corrodes the tool instead of cleaning it.
⚠ WARNING: Electrolysis produces hydrogen gas at the cathode and oxygen gas at the anode. Work outdoors or in a ventilated garage. Do not smoke or use open flame near the tank. Never seal the container.
Process:
- Suspend the tool in the electrolyte so it does not touch the anode. Use wire or a wooden dowel across the top of the bucket.
- Position the anode so it has line-of-sight to the rustiest surfaces — electrolysis works best in direct paths.
- Connect the charger. Bubbles should form on both the tool and the anode within seconds. If no bubbles form, check polarity and connections.
- Run for 4–24 hours depending on rust severity. Check progress periodically. The rust converts to a black powder that wipes off.
- Remove the tool, scrub with a brass brush or nylon pad under running water. Dry immediately — bare steel flash-rusts in minutes.
- Apply a light coat of oil (camellia oil, 3-in-1, or paste wax) to prevent re-oxidation.
Vinegar Soak — Simple but Slower
White vinegar (5% acetic acid) dissolves iron oxide through chemical reaction. Submerge the tool in undiluted white vinegar for 12–48 hours. The acid attacks rust preferentially but will eventually etch sound metal if left too long. Check every 12 hours. Remove when rust wipes off with a cloth. Neutralize the acid by rinsing in a baking soda and water solution (2 tablespoons per quart), then rinse with clean water and oil immediately. Vinegar works well for light-to-moderate rust and requires no equipment.
Evaporust — Chemical Chelation
Evaporust is a commercial rust remover that uses chelation (chemical bonding to iron oxide molecules) rather than acid dissolution. It is pH-neutral, non-toxic, reusable until spent, and will not etch sound metal even with extended soak times. It is the safest option for tools with fine details, maker's marks, or japanning (original black lacquer finish) that you want to preserve. Soak time is 12–24 hours for moderate rust. Cost is higher than vinegar or electrolysis — approximately $25 per gallon — but one gallon treats dozens of tools before exhaustion.
Wire Wheel — Mechanical Removal
A wire wheel on an angle grinder or bench grinder removes rust through abrasion. It is fast but aggressive. A coarse wire wheel will remove japanning, round over edges, and polish surfaces unevenly. Use only for heavy scale on non-critical surfaces — axe heads, hammer faces, wrench bodies. Never use a wire wheel on a plane sole, chisel flat back, or saw plate — it introduces scratches that become reference surface errors. A brass wire wheel is safer than steel — softer bristles remove rust without cutting into the base metal.
5. Hand Planes — Disassembly Through Tuning
The hand plane is the most complex hand tool to restore and the most rewarding. A properly tuned plane produces a surface superior to sandpaper — burnished, flat to thousandths of an inch, and ready for finish without sanding.
Disassembly
Remove the lever cap by turning the cam lock. Lift out the iron (blade) and chip breaker assembly. Remove the lateral adjustment lever, depth adjustment wheel, and frog (the angled casting the iron sits on) by unscrewing the frog mounting screws from inside the throat. Remove the tote (rear handle) and knob (front grip) by unscrewing the brass nuts accessible from inside the body. Lay everything out and note which screws belong where — frog screws, tote bolt, and knob stud are different threads.
Sole Flattening
The sole is the reference surface. Every cut the plane makes references the sole's flatness. Factory soles were ground flat, but decades of use, storage, and temperature cycling introduce warp. A sole that is concave or convex by 0.005" produces visibly inconsistent shavings.
Method: Adhere 80-grit sandpaper (PSA-backed or spray-adhesive) to a known-flat reference surface. A granite surface plate is ideal — a 12"×18" plate costs $25–$40 at a machine tool supplier. A granite countertop offcut works. Float glass (1/4" or thicker) works but flexes under pressure — use it on a flat table. Thick plate glass from a glass shop is better than hardware-store mirror.
Reassemble the plane with the iron retracted (not projecting through the mouth) and the lever cap tensioned. This is critical — the lever cap tension changes the casting geometry slightly. Flatten the sole with the lever cap loaded.
Draw a grid of pencil lines across the sole. Work the plane back and forth on the sandpaper using even downward pressure. Check the pencil lines — the high spots are where pencil disappears first. Continue until pencil marks disappear uniformly across the entire sole, with particular attention to three zones: directly in front of the mouth, directly behind the mouth, and the toe and heel. These are the contact patches that determine cut quality.
Progress through grits: 80, 120, 220. Finer grits are unnecessary — the sole does not need to be polished, only flat. Expect 20–45 minutes for a typical vintage plane.
Chip Breaker Fitting
The chip breaker (cap iron) mates against the flat back of the plane iron. Its leading edge must seat perfectly flat against the iron — any gap allows shavings to jam between the two. Hold the chip breaker and iron together with the chip breaker screw and sight for light passing through the joint. If you see light, the chip breaker edge needs dressing. Hone the leading edge of the chip breaker on a 1000-grit stone, maintaining the factory angle (approximately 25°), until it seats without gaps. This step alone eliminates 80% of shaving-jamming problems.
Iron Sharpening
The plane iron requires a flat back and a properly angled bevel. Flatten the back first — lay the iron flat on a 1000-grit waterstone and work it back and forth until the first 1/2" behind the cutting edge shows a consistent polish with no pitting or scratches. Progress to 4000-grit, then 8000-grit if available. A polished back is a reference surface — it defines half of the cutting edge.
Sharpen the bevel at 25° primary, with an optional 30° micro-bevel for durability. Use a honing guide for consistency until freehand muscle memory develops. Work through 1000/4000/8000-grit progression. The iron is sharp when it effortlessly slices the fibers of end-grain balsa or cleanly shaves arm hair. Strop on leather loaded with chromium oxide compound for a final polish.
Handle Refinishing
Remove old finish from knobs and totes with a card scraper or sandpaper (120 through 220). Most vintage Stanley handles are rosewood (pre-1935) or stained hardwood (post-1935). If the handle is cracked but still structurally sound, wick thin cyanoacrylate (super glue) into the crack and clamp. If it is broken through, replace it — aftermarket rosewood and cherry totes are available, or turn one on a lathe from the original as a template.
Finish handles with boiled linseed oil (BLO) — three coats, 24 hours between coats, buffed with a cloth after each. BLO soaks into the wood grain, provides grip, and is renewable. Polyurethane and lacquer create a film that blisters and chips with hand sweat and shop conditions. Oil finishes feel better in the hand and are repairable with another coat.
Reassembly and Tuning
- Mount the frog to the body. Adjust the frog position so the mouth opening (gap between the sole and the front of the frog) is approximately 1/32" for a smoothing plane, 1/16" for a jack plane. Tighter mouths reduce tearout. Wider mouths accommodate thicker shavings.
- Seat the chip breaker on the iron with the edge set 1/32" back from the cutting edge for general work, or 1/64" for difficult grain.
- Place the iron and chip breaker assembly on the frog, bevel down. Seat the lateral adjustment lever in the slot.
- Set the lever cap and cam. Tension should be firm enough to hold the iron without chatter, loose enough to allow depth adjustment with the wheel.
- Sight down the sole from the toe. Advance the iron with the depth wheel until the edge just appears as a thin, even line across the mouth. Use the lateral lever to center it.
- Test on scrap. A properly tuned plane produces a continuous, translucent shaving of consistent thickness with minimal effort.
6. Chisels and Gouges — Edge Geometry and Handle Fitting
Chisels are the simplest edge tools to restore. The blade is a single piece of steel with one bevel and one flat back. Restoration is sharpening plus a handle.
Handle Assessment
Tang chisels have a pointed spike (tang) that drives into a handle. The handle is a consumable — when it splits or mushrooms from mallet strikes, it is replaced. Replacement handles are available commercially in beech, ash, and boxwood. Fit by drilling the handle to match the tang diameter, heating the tang with a torch, and driving it into the handle. The heat cauterizes the wood fibers around the tang, creating a tight mechanical fit.
Socket chisels have a hollow cone (socket) that receives a tapered handle. Socket chisels are inherently more robust — the mallet force drives the handle tighter into the socket rather than splitting it. Turn a replacement handle with a matching taper on a lathe, or shape one with a rasp and spokeshave. The handle should seat with hand pressure and tighten under use.
Flattening the Back
The flat back of a chisel is its primary reference surface. When paring, the flat back rides the wood surface and controls depth. If the back is not flat, the chisel dives or lifts unpredictably.
Lap the back on 250-grit sandpaper on a flat reference (same setup as plane sole flattening). Work the first 1" behind the edge until all pitting and mill marks disappear. Progress: 250 → 1000 → 4000 → 8000. The back should show a mirror polish for at least 1/4" behind the edge. This is the most important step in chisel restoration — a poorly lapped back limits cutting precision regardless of bevel quality.
Sharpening Progression
For bench chisels used in general hardwood joinery:
| Step | Grit | Medium | Purpose |
|---|---|---|---|
| 1 | 250 | Diamond plate or coarse waterstone | Establish primary bevel at 25°, remove chips and damage |
| 2 | 1000 | Waterstone | Refine bevel, remove 250-grit scratches |
| 3 | 4000 | Waterstone | Polish bevel, approach working sharpness |
| 4 | 8000 | Waterstone | Final polish, razor edge |
| 5 | Strop | Leather + chromium oxide | Remove wire edge, final alignment |
Use a honing guide to maintain a consistent angle. The Veritas Mk.II or Eclipse-style guide both hold chisels securely. Set the primary bevel at 25°. After reaching 8000-grit, add a 30° micro-bevel with 2–3 strokes on the 8000 stone — this tiny secondary angle dramatically increases edge durability with negligible increase in cutting effort.
For paring chisels (light hand-pressure work only): use a 20° primary bevel with a 25° micro-bevel. Lower angles cut easier but dull faster.
For mortise chisels (heavy mallet work): use a 30° primary bevel with a 35° micro-bevel. Steeper angles resist the levering forces of mortise chopping.
Gouges
Gouges (curved chisels) require slipstones — small shaped stones that match the sweep (radius) of the gouge. Sharpen the outside bevel by rolling the gouge on a flat benchstone while maintaining the bevel angle. Hone the inside channel with a matching slipstone. The intersection of the outer bevel and the inner polish creates the cutting edge. The process is identical to flat chisels in principle — the geometry is just curved.
7. Axes and Hatchets — Hanging, Wedging, and Profiling
An axe head is the most durable of all hand tools. A head forged in 1890 is functionally identical to the day it was made if the edge has not been abused. Restoration means hanging a new handle and re-profiling the edge.
Handle Selection
Hickory is the standard for axe handles and has been for 300 years. The combination of high tensile strength, shock absorption, and flexibility makes it superior to every other available wood. White ash is the second choice — slightly less shock absorption but lighter, which suits hatchets. Never use pine, poplar, or softwood — they shatter under impact. Never use oak — it is stiff and transmits shock to the hands rather than absorbing it.
Select a handle with straight grain running parallel to the handle's length, from end to end, with no diagonal run-out. Grain run-out creates a weak point where the handle will snap under load. Inspect the end grain: tight, parallel lines from front to back indicate a handle split from a straight-grained billet. Wide, wandering grain indicates a sawn handle from a crooked section — weaker under impact.
Hanging the Head
- Fit the eye: The handle shoulder (the top end) must match the axe eye profile. Most axe eyes are oval, wider front-to-back than side-to-side. Rasp and file the shoulder until it slides into the eye with moderate hand pressure. The fit should be snug but not requiring a mallet to seat — you need room for the wedge.
- Mark the depth: Slide the head on and mark the handle where it emerges from the top of the eye. The handle should protrude 1/4" to 3/8" above the eye.
- Cut the kerf: Remove the head. Cut a straight saw kerf down the center of the shoulder, oriented in the same direction as the handle cross-section's narrow dimension. The kerf depth should equal 2/3 of the eye depth. Cut straight — an angled kerf pulls the head off-axis.
- Seat the head: Drive the handle through the eye from the bottom using a wooden mallet or by striking the butt end of the handle on a solid surface. Seat until the handle protrudes the marked distance.
- Drive the wedge: A hardwood wedge (same species as the handle, or harder — oak works for wedges) is driven into the kerf, spreading the shoulder wood against the eye walls. The wedge should be the same width as the kerf, tapered to a thin leading edge, and long enough to reach 2/3 of the kerf depth. Coat the wedge with wood glue (titebond III or equivalent) before driving. Drive until the wedge stops. Cut flush with a saw.
- Cross wedge (optional): For heavy felling axes, drive a small metal wedge perpendicular to the wood wedge. This provides a second expansion axis. Use a purpose-made axe wedge — a small diamond or round steel wedge available at hardware stores.
- Trim and finish: Cut the protruding handle flush with the top of the eye. Apply boiled linseed oil to the exposed end grain to prevent moisture ingress and subsequent loosening.
⚠ WARNING: Test the hang before use. Grip the handle at the butt and swing the axe head-down sharply into a stump or chopping block ten times. If the head shifts at all, remove and re-hang with a better fit. A loose axe head is the most dangerous condition in hand tool use — a thrown head can kill.
Sharpening
Axe sharpening is fundamentally different from chisel sharpening. An axe edge must be convex (a curved profile, not a flat bevel) to prevent the edge from burying in the wood and sticking. This convex profile is called a "rolled" or "compound" bevel.
- File work: Clamp the axe head in a vise (or hold it in your lap on a leather pad). Use a 10" mill bastard file to establish the primary edge geometry. File into the edge (push strokes only — never drag a file backward). Maintain a 20–25° angle for a felling axe, 30–35° for a splitting axe. Work both sides equally, counting strokes to maintain symmetry. Remove all chips and nicks until the edge is a continuous line.
- Stone work: Follow the file with a puck-style sharpening stone (Norton combination puck or equivalent) using circular motions along the edge. The round stone naturally creates the convex profile. Work 120-grit side first, then flip to 240 or 320-grit. Apply light oil or water depending on the stone type.
- Strop: Final edge refinement with a leather strop or a piece of cardboard loaded with chromium oxide. Ten strokes per side. The edge should cleanly slice newsprint.
Do not sharpen an axe to razor thinness. An axe edge takes impact — it needs mass behind the cutting angle to resist rolling and chipping. A properly sharpened axe shaves arm hair but has visible thickness behind the edge, unlike a chisel or plane iron.
8. Saws — Jointing, Setting, and Sharpening
Hand saw restoration is the most specialized skill in this guide. A properly sharpened hand saw cuts faster than a circular saw in many crosscut applications and produces a cleaner kerf. But saw sharpening requires understanding tooth geometry, and the tools required (saw set, saw vise, triangular saw files) are specific to the task.
Crosscut vs. Rip — Geometry Matters
Crosscut teeth are shaped like knife points — they score the wood fibers on both sides of the kerf, then the gullet (valley between teeth) carries out the dust. Each tooth has fleam (an angle across the tooth face, typically 15–25° from perpendicular) and set (the tooth is bent alternately left and right to create a kerf wider than the plate, preventing binding). Crosscut saws cut across the grain.
Rip teeth are shaped like tiny chisels — they scrape the wood fibers along the grain, shearing them at the bottom of the cut. Rip teeth have zero fleam (the file is held perpendicular to the plate) but do have set. Rip saws cut along the grain (with it, not across).
Using the wrong geometry — ripping with a crosscut saw or crosscutting with a rip saw — works, but poorly. Each is optimized for its cut direction.
Jointing
Jointing is the first step in saw sharpening. It levels all teeth to the same height. Clamp a flat mill file in a shopmade holder (a block of wood with a saw kerf to hold the file) and run it along the tops of the teeth from heel to toe. One or two light passes. Every tooth should show a small flat (called a "shiner") on its tip. Teeth that do not have shiners were lower than the average and will be brought to height during sharpening.
Setting
Setting bends each tooth alternately to the left and right. A saw set tool (the Stanley 42X is the classic, still available used) is a plier-like device with an adjustable anvil. Squeeze it on each tooth in sequence — left, right, left, right. The set amount depends on the wood: more set for green or soft wood (wider kerf, less binding), less set for dry hardwood (narrower kerf, cleaner cut). For general-purpose crosscut work in seasoned lumber, set each tooth approximately 0.010"–0.015" from the plate centerline.
Set before sharpening. Filing after setting ensures the cutting edges are clean.
Sharpening
Clamp the saw plate in a saw vise (a dedicated clamp that holds the plate with the teeth projecting above the jaw, close to the teeth to prevent chatter). Use a triangular (three-corner) saw file matched to the tooth size:
| Teeth Per Inch (TPI) | File Size |
|---|---|
| 4–5.5 | 7" regular taper |
| 6–7 | 6" slim taper |
| 8–10 | 5" extra slim taper |
| 11–14 | 4" extra slim taper |
For crosscut: Position the file in the gullet at the fleam angle (typically 20° for general crosscut). File only the teeth set away from you on the first pass, skipping every other gullet. Reverse the saw in the vise and file the remaining teeth from the other side, maintaining the same fleam angle. Count strokes per tooth — 2–3 strokes with light pressure is typically sufficient. The shiner on each tooth should disappear evenly as you file.
For rip: Hold the file perpendicular to the plate (zero fleam). File every other gullet from one side, then reverse and file the remainder. The tooth face should be flat and square to the plate.
After sharpening, lightly run an oilstone along both sides of the plate to remove any burrs from the set teeth. This is called "side jointing" and ensures the set is even.
Handle Repair
Saw handles (totes) are typically beech, apple, or fruitwood, attached with brass or steel bolts through the plate. If the handle is cracked at the bolt holes (the most common failure), wick thin cyanoacrylate into the cracks and clamp for 24 hours. If the handle is broken through, trace the profile onto a 3/4" hardwood blank, bandsaw or coping-saw to shape, file and sand to final profile, and drill for the original hardware. Finish with boiled linseed oil. The original handle dimensions were designed for ergonomics — match them closely.
9. Sharpening Fundamentals — Building a System
Every edge tool in this guide requires sharpening. A sharpening system is not a single stone — it is a progression of abrasives that takes an edge from damaged to working to polished, matched to a strop for final refinement. The system you choose matters less than using it consistently.
Waterstones
Japanese waterstones cut fast because the binder is soft — fresh abrasive particles are constantly exposed as the surface wears. They require flattening after every session with a diamond lapping plate or a dedicated flattening stone (Naniwa or Atoma). They must be soaked before use (5–10 minutes for most synthetic stones). They wear quickly compared to other media. The standard progression: 1000 → 4000 → 8000. A King 1000/6000 combination stone ($25–$35) is the best value entry point. Shapton, Naniwa, and Suehiro offer premium alternatives with harder binders and slower wear.
Oil Stones
Arkansas stones (natural novaculite) and India stones (aluminum oxide) cut more slowly than waterstones but wear almost not at all. An India combination (coarse/fine) paired with a translucent or black Arkansas finishing stone will last a lifetime. They use honing oil (mineral oil or purpose-made honing oil) to float swarf and prevent glazing. Oil stones are the traditional Western sharpening medium and are nearly indestructible. They do not need flattening. The tradeoff is speed — oil stones take 2–3x longer per sharpening cycle than waterstones.
Diamond Plates
Diamond plates (DMT, Atoma, EZE-LAP) use industrial diamond particles bonded to a steel substrate. They cut fast, never need flattening, work with water or dry, and handle every steel type including modern high-alloy steels that glaze natural stones. The standard sizes: coarse (325 mesh / 45 micron), fine (600 mesh / 25 micron), extra-fine (1200 mesh / 9 micron). A single DMT DuoSharp bench stone with coarse and fine sides ($60–$80) handles 90% of sharpening tasks. Add an 8000-grit waterstone or a leather strop for final polish. Diamond plates are the lowest-maintenance option.
Leather Strop
A leather strop is the final step in any sharpening system. Glue a piece of vegetable-tanned leather (smooth side up) to a flat board. Load it with chromium oxide compound (green bar, available from woodworking suppliers for $5–$8). Draw the tool backward across the strop (edge trailing, never leading) at the bevel angle, 10–15 strokes per side. The strop removes the wire edge (a microscopic foil of metal folded over the cutting edge during stone sharpening) and polishes the bevel to a mirror. Stropping alone extends the interval between stone sharpening by 3–5x.
Bevel Angles by Tool Type
| Tool | Primary Bevel | Micro-Bevel | Notes |
|---|---|---|---|
| Smoothing plane iron | 25° | 30° | Fine shavings, hardwood |
| Jack plane iron | 25° | 30° | General work, slight camber |
| Block plane iron | 25° | 30° | End grain, bevel up |
| Bench chisel | 25° | 30° | General hardwood |
| Paring chisel | 20° | 25° | Hand pressure only |
| Mortise chisel | 30° | 35° | Heavy mallet work |
| Carving gouge | 20° | 25° | Varies with sweep |
| Felling axe | 20–25° | Convex | Rolled bevel, no flat facet |
| Splitting axe | 30–35° | Convex | Fat profile for splitting force |
| Hatchet | 25–30° | Convex | General camp work |
| Drawknife | 25° | 30° | Bevel down or bevel up |
10. Handles and Finishing — Wood Selection and Protection
Every tool in this guide eventually needs a handle. The handle is the interface between the user and the steel, and it is a consumable — handles break, shrink, swell, and wear. Choosing the right wood and applying the right finish determines whether a handle lasts one season or twenty years.
Wood Selection
Hickory (Carya spp.) — The standard for impact tools: axes, hatchets, hammers, adzes. Hickory absorbs shock better than any commonly available North American hardwood. Its long interlocking fibers resist splitting under repeated impact. Shagbark hickory (Carya ovata) is the preferred species. Bitternut and pignut hickory are acceptable substitutes. Select straight-grained billets with tight growth rings.
White ash (Fraxinus americana) — The second choice for impact tools and a good choice for shovel and rake handles. Slightly lighter than hickory with nearly equivalent shock absorption. Ash is easier to shape with hand tools than hickory. The emerald ash borer has devastated ash populations in eastern North America — source responsibly and consider alternatives where ash is scarce.
Hard maple (Acer saccharum) — Excellent for plane totes, chisel handles, and mallet heads. Maple is hard (Janka 1450 lbf), dimensionally stable, and turns cleanly on a lathe. It does not absorb shock as well as hickory — do not use for axe handles — but its hardness and fine grain make it ideal for precision tool handles.
Beech (Fagus spp.) — Traditional for European tool handles, wooden plane bodies, and mallet heads. Dense, close-grained, and inexpensive. Beech is the historical default for chisel handles in English and Continental tools. It splits more easily than maple under heavy mallet use but is adequate for bench chisels.
Dogwood (Cornus florida) — Dense, shock-resistant, and historically used for mallet heads, shuttle blocks, and tool handles where extreme hardness is needed. Difficult to source in board lengths — typically turned from branches or small logs.
Osage orange (Maclura pomifera) — The hardest and most rot-resistant North American hardwood. Exceptional for mallet heads, fence-post mauls, and outdoor tool handles. Janka hardness 2620 lbf. Difficult to work when dry — shape while green, then finish after drying.
Shaping
Turn handles on a lathe when possible — the lathe produces concentric, smooth shapes efficiently. For handles without lathe access, rough out with a drawknife on a shaving horse, refine with a spokeshave, and finish with a rasp and sandpaper progression (80 → 120 → 220). Match existing handle profiles when replacing — the original manufacturers optimized the grip shape for the tool's intended use and force direction.
For plane totes: trace the original profile onto the blank. Bandsaw the outline. Shape with rasps and files. The tote should feel natural in the hand with a full grip — no sharp edges, no flat spots that create pressure points. The cross-section is roughly oval, not round — oval grips resist rotation in the hand.
For chisel handles: a gentle barrel shape with a flat or slightly domed striking end for tang chisels. Socket chisel handles are straight-tapered to match the socket bore. A ferrule (a metal ring) at the striking end of tang chisel handles prevents the wood from splitting under mallet blows. Use brass or copper tubing cut to length — 1/2" to 3/4" long, friction-fit or epoxied.
Finishing
Boiled linseed oil (BLO) — The default finish for working tool handles. Apply with a rag, let soak for 15 minutes, wipe off excess, let cure 24 hours. Three coats minimum. BLO penetrates the wood fibers, provides moisture resistance, improves grip, and is reapplied in minutes when it wears. It does not build a film — it becomes part of the wood.
Note: Boiled linseed oil is not actually boiled linseed oil. It is raw linseed oil with metallic drying agents (typically cobalt or manganese compounds) added to accelerate polymerization. "Boiled" is a historical misnomer. Raw linseed oil takes weeks to cure. BLO cures in 24–48 hours.
⚠ WARNING: Rags soaked in boiled linseed oil can spontaneously combust. The polymerization process is exothermic. A wadded-up oily rag in a trash can generates enough heat to ignite. Spread used rags flat on a non-combustible surface (concrete, metal) to dry fully before disposal, or submerge in water in a sealed metal container.
Tung oil — Slightly harder film than BLO, better water resistance. Apply the same way. Pure tung oil (not "tung oil finish," which is usually varnish) cures slowly — 3–7 days between coats. Good for tool handles that see wet conditions.
Paste wax — Applied over oil as a final protective layer. Beeswax/carnauba blends (Renaissance wax, Briwax) fill grain pores, reduce moisture absorption, and create a smooth, low-friction surface. One coat buffed with a cloth. Reapply annually or when the handle feels dry.
Lacquer and polyurethane — Film finishes that sit on top of the wood rather than penetrating it. They create a smooth, sealed surface but crack and peel under impact, temperature cycling, and hand sweat. Film finishes on tool handles eventually fail and must be stripped entirely before refinishing. Oil finishes are overwhelmingly preferred for working tools. Save lacquer for display pieces.
11. Sources
- Schwarz, Chris. Handplane Essentials. Popular Woodworking Books, 2010.
- Leach, Patrick. "Blood and Gore: The Stanley Encyclopaedia." www.supertool.com.
- Sellers, Paul. "Restoring Hand Tools." paulsellers.com.
- Dunbar, Michael. Restoring, Tuning & Using Classic Woodworking Tools. Sterling Publishing, 2002.
- Hack, Garrett. The Handplane Book. Taunton Press, 2003.
- Odate, Toshio. Japanese Woodworking Tools: Their Tradition, Spirit, and Use. Linden Publishing, 1998.
- Klenman, Allan. "Edge Tool Metallurgy." Published proceedings, Early American Industries Association.
- ASM International. ASM Handbook, Volume 1: Properties and Selection — Irons, Steels, and High-Performance Alloys. ASM International, 1990.
- Salaman, R.A. Dictionary of Woodworking Tools, c. 1700–1970. Taunton Press, 1997.
- Kirby, Ian. The Accurate Router. Cambium Press, 2005.
- Charlesworth, David. Furniture-Making Techniques. GMC Publications, 2001.
- US Navy. NAVSEA Technical Manual S9086-VD-STM-010, Chapter 631. Naval Sea Systems Command.
- Japanese Industrial Standards Committee. JIS R6001:1998 — Particle Size for Abrasive Grains.
- Gransfors Bruk AB. The Axe Book: The Lore and Science of the Woodcutter. Gransfors Bruks, 2007.
- Bramwell, Martyn. The International Book of Wood. Simon & Schuster, 1976.
[practical-skills] [beginner]