guides
Hide Tanning
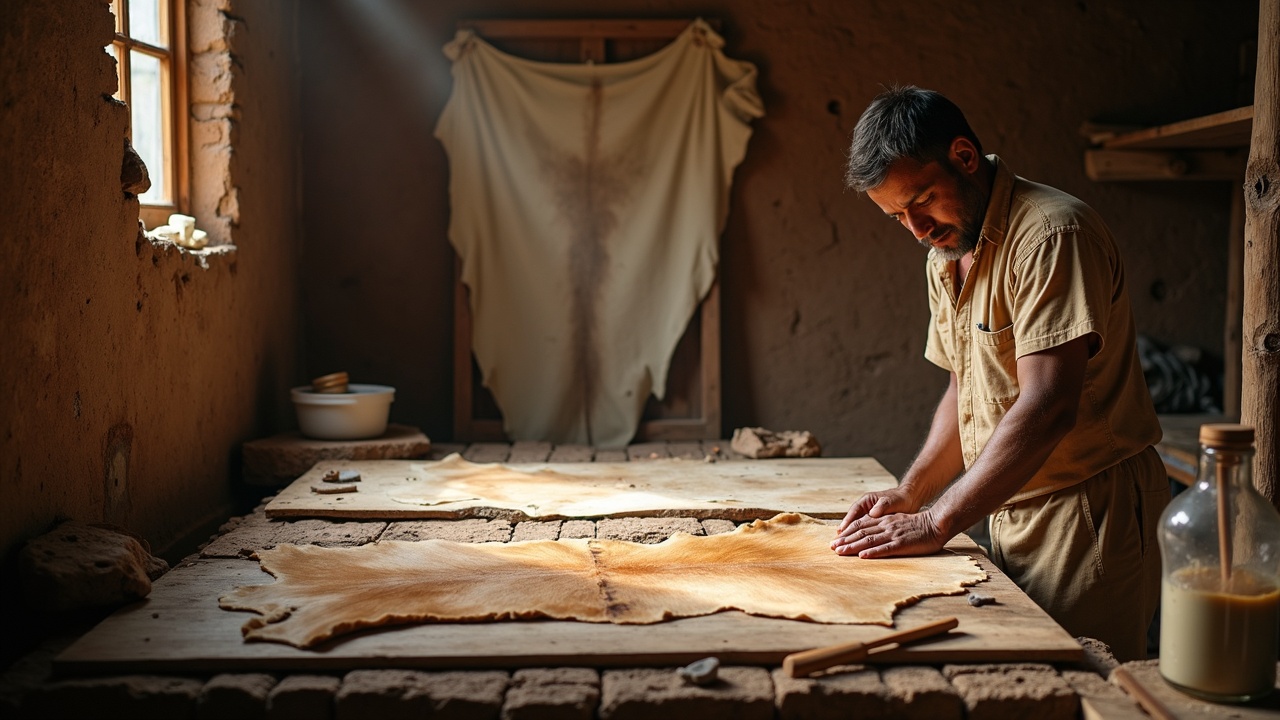
Tan hides into leather: fresh-hide handling, fleshing, bucking and liming for hair removal, bating, and the traditional brain-tanning method step by step.
1. Introduction — The Chemistry of Turning Skin Into Leather
Raw animal skin rots. Leather does not. The difference between the two is a single chemical event: cross-linking of collagen fibers.
Animal skin is roughly 65% water, 33% protein (almost entirely Type I collagen), and 2% fats, minerals, and carbohydrates. Collagen is a triple-helix protein — three polypeptide chains wound around each other like a rope. In raw skin, these collagen fibers are held together by weak hydrogen bonds and some natural covalent cross-links. They are structurally organized but biologically active. Bacteria can digest them. Water can swell and distort them. Heat can denature them.
Tanning introduces new cross-links between collagen fibers that bacteria cannot break, water cannot dissolve, and moderate heat cannot disrupt. The specific cross-linking agent determines the tanning method:
- Brain tanning — Phospholipids (lecithin) from brain tissue coat and lubricate collagen fibers, then aldehyde compounds from wood smoke form covalent cross-links with the amino groups on collagen chains. The result is soft, washable, breathable leather.
- Bark tanning (vegetable tanning) — Polyphenolic compounds (tannins) from tree bark form multiple hydrogen bonds and some covalent bonds with collagen. The result is firm, thick, water-resistant leather that stiffens with age.
- Alum tanning — Aluminum salts form coordination complexes with collagen's carboxyl groups. The result is white, soft leather — but the bonds are weaker and partially reversible in water.
Every civilization that used leather independently discovered at least one of these methods. The Cro-Magnon peoples of Europe were brain-tanning hides 30,000 years ago. Oak bark tanning was practiced in Mesopotamia by 5000 BCE and refined by the Romans into an industrial process. Alum tanning (called tawing) was a medieval European specialty.
The industrial revolution replaced all three traditional methods with chromium tanning, patented in 1858 by Friedrich Knapp. Chrome tanning uses trivalent chromium salts (Cr₂(SO₄)₃) to cross-link collagen in as little as 24 hours — compared to months for bark tanning. Today, approximately 80–85% of global leather production uses chrome tanning. It is fast, cheap, and produces soft, uniform leather.
It is also an environmental disaster. Chrome tanning generates hexavalent chromium waste (a known carcinogen), consumes enormous quantities of water, and produces leather that cannot biodegrade cleanly. The traditional methods described in this guide produce no toxic waste, require no industrial chemicals, and create leather that is — in several measurable respects — superior to chrome-tanned leather for specific applications.
Why learn this now. Hide tanning is one of the most useful skills that almost nobody practices anymore. Every livestock operation, every deer hunter, every small-scale farmer generates hides as a byproduct. The overwhelming majority of these hides are discarded. A single deer hide brain-tanned to completion is worth $150–$300 in finished goods. A single cowhide bark-tanned for saddlery or tooling leather is worth $200–$500. The raw materials for brain tanning cost nothing — the brain comes with the animal. The raw materials for bark tanning cost nothing if you have oak trees. The skills required are not difficult. They are labor-intensive, and they require patience, but the actual techniques are straightforward and forgiving once the underlying chemistry is understood.
2. Fresh Hide Handling — The Clock Starts Immediately
Bacterial decomposition of a raw hide begins within minutes of the animal's death. The hide is warm, moist, and rich in protein — an ideal growth medium for bacteria. At 70°F ambient temperature, a fresh hide will begin to show signs of bacterial damage (hair slippage, foul odor, slimy texture) within 6–8 hours. At 90°F, that window shrinks to 3–4 hours. Once bacterial damage has progressed past the surface, no amount of processing will produce good leather. The collagen structure itself has been partially digested, and the resulting leather will be weak, uneven, and prone to tearing.
Rule: get the hide off the animal and into preservation within one hour. Two hours is acceptable in cool weather. Four hours in summer heat is pushing it.
Salting (Preferred Preservation Method)
Salting is the oldest and most reliable method of preserving a raw hide for later tanning. Salt draws water out of the hide by osmosis, dropping the moisture content below the threshold where bacteria can grow (roughly 15% moisture).
Procedure:
- Lay the hide flesh side up on a clean, slightly inclined surface (a sheet of plywood works). The incline allows brine to drain.
- Apply non-iodized salt generously — 1 pound of salt per pound of hide is the standard ratio. For a deer hide (8–12 lbs), use 8–12 lbs of salt. For a cowhide (40–60 lbs), use 40–60 lbs. Cheap stock salt or solar salt from a feed store works fine. Do not use rock salt with anti-caking agents — some contain ferrocyanide compounds that can stain the hide.
- Rub the salt into every fold, crease, and edge. Pay particular attention to the legs, face, and any thick spots. Unsalted areas will rot.
- Fold the hide flesh-to-flesh (salt sides together), roll loosely, and place on a pallet or rack where brine can drain freely. Do not place directly on concrete — the brine will wick back into the hide.
- After 24 hours, unroll, shake off the wet salt, and re-salt with fresh dry salt. Re-fold and re-roll.
- After 7–10 days of salting, the hide is fully cured and can be stored for months in a cool, dry location. A properly salted hide will feel stiff and dry, not slimy or flexible.
Common mistake: Under-salting. If you can see skin between salt granules, add more. The salt should form a continuous layer at least 1/4 inch thick across the entire flesh surface.
Freezing (Short-Term Only)
Freezing halts bacterial growth completely but does not remove moisture. A frozen hide must be thawed and processed or salted before it deteriorates.
- Fold the fresh hide flesh-to-flesh and place in a chest freezer.
- A frozen hide is good for 6–12 months if the freezer maintains 0°F or below.
- Thaw slowly in a cool location (40–50°F). Never thaw at room temperature — the outer layers will reach bacterial growth temperature while the interior is still frozen, and the outer layers will begin to decompose.
- Process or salt within 2 hours of full thaw.
Freezing is not a substitute for salting. It is a holding method — useful when you do not have time or salt on hand, but a salted hide is more stable and easier to work with than a frozen-and-thawed hide.
Drying (Emergency Only)
Air-drying a raw hide without salt produces rawhide — stiff, board-like, and extremely difficult to rehydrate evenly for tanning. It works in arid climates where humidity is below 20% and temperatures are above 80°F. In humid climates, the hide will decompose faster than it dries. Do not rely on air drying unless you have no salt and no freezer. If you must dry a hide, stretch it on a frame in direct sun and scrape both sides as thin as possible to accelerate drying.
3. Fleshing — Removing Everything That Is Not Skin
Fleshing is the first mechanical processing step. The goal is to remove all subcutaneous fat, connective tissue, and membrane from the flesh side of the hide. Any fat left on the hide will block tanning agents from penetrating the collagen matrix. Any membrane left intact will create hard, stiff spots in the finished leather.
Equipment
Fleshing beam. A smooth, rounded surface — traditionally a half-log with the bark stripped, but a section of 8-inch PVC pipe mounted at waist height works just as well. The beam should be approximately 6 feet long, angled at about 30–40° from horizontal, with the higher end at the worker's waist. The hide drapes over the rounded surface, and the worker pushes downhill with the fleshing knife.
Fleshing knife. A dull, two-handled blade used with a pushing motion. The blade should be dull enough that it will not cut the hide but sharp enough to scrape fat and membrane cleanly. Traditional fleshing knives have a slightly concave edge. A drawknife with the edge deliberately dulled works. In a pinch, a large PVC pipe cut lengthwise (creating a sharp but not razor-sharp scraping edge) will serve for deer-sized hides.
Alternative: pressure washer. A 3,000+ PSI pressure washer with a 15° or 25° nozzle tip will blast fat and membrane off a hide in minutes. This is dramatically faster than hand fleshing but requires care — too close or too much pressure will tear the hide. Keep the nozzle 12–18 inches from the surface and work in overlapping passes.
Procedure
- Drape the hide over the beam, flesh side up, with the neck end toward you.
- Work from the center of the hide outward toward the edges, using firm, downhill pushing strokes with the fleshing knife.
- Remove all visible fat, meat scraps, and the thin translucent membrane (called the fascia or fell). The membrane is the most important thing to remove — it is waterproof and will prevent tanning solution from reaching the collagen beneath it.
- Flip the hide and flesh the other half.
- Check for thin spots. If you can see light through the hide, you have cut too deep. Thin spots will become holes during tanning. Mark them and work around them during subsequent steps.
- On a deer hide, fleshing takes 30–60 minutes by hand. On a cowhide, expect 2–4 hours.
Save the fat. Hide fat rendered over low heat produces excellent leather-conditioning oil and can be used in soap making. Do not discard it.
4. Bucking and Liming — Hair Removal
Hair must be removed before tanning. The hair follicle extends deep into the dermis, and the hair shaft itself is made of keratin — a protein that tanning agents will not cross-link effectively. There are three traditional methods for hair removal, each with different chemistry and different results.
Wood Ash Lye (Bucking)
The oldest and most accessible method. Wood ash dissolved in water creates potassium hydroxide (KOH) — a strong alkali that dissolves the keratin protein holding the hair in the follicle and swells the collagen fibers, opening up the hide structure for tanning.
Preparation:
- Collect hardwood ash (oak, hickory, maple, ash). Softwood ash produces weaker lye due to lower potassium content.
- Fill a bucket or barrel with ash. Pour water through it slowly and collect the drippings — this is raw lye. Traditional test: if the lye water feels slippery between your fingers (saponification of skin oils), it is strong enough. Modern test: pH should be 12–13.
- Alternatively, mix hardwood ash directly into water at a ratio of roughly 1 part ash to 4 parts water by volume. Stir and let settle for 24 hours. Decant the clear liquid.
Procedure:
- Submerge the fleshed hide in lye solution in a non-metallic container (plastic tub, wooden barrel). The hide must be completely submerged and able to move freely.
- Stir and agitate the hide 2–3 times daily.
- Check for hair slip starting at day 3. Pinch a small patch of hair and pull gently. When the hair slides out easily with no resistance and the epidermis (outer skin layer) comes with it, the hide is ready.
- Typical timeline: 4–10 days depending on lye strength, temperature, and hide thickness.
- Remove the hide and scrape all hair and epidermis using the fleshing beam and a dull knife or the back of a draw knife. Work with the grain (from tail to head) for easiest removal.
Warning: Lye is caustic. Wear rubber gloves and eye protection. Splashes on skin cause chemical burns. Flush immediately with water, then vinegar (to neutralize the alkali).
Hydrated Lime (Calcium Hydroxide)
Hydrated lime (Ca(OH)₂) works by the same mechanism as lye — alkaline dissolution of keratin — but produces a more controlled, slower, and more consistent result. It is the method preferred by professional bark tanners because it swells the hide more evenly and produces a plumper grain.
Preparation:
- Mix hydrated lime (available at any hardware store as "mason's lime" or "Type S lime") into water at a ratio of 1 lb per gallon of water. Stir thoroughly. The lime will not fully dissolve — a saturated suspension is fine.
- Some tanners add sodium sulfide (Na₂S) at 1–2% of hide weight to accelerate hair removal. Sodium sulfide is a sharpening agent that attacks the hair root directly. It produces faster results (2–3 days instead of 7–14) but is toxic and produces hydrogen sulfide gas (rotten egg smell). Use only outdoors with respiratory protection.
Procedure:
- Submerge the fleshed hide in the lime paste/solution.
- Stir daily. More frequent stirring produces more even results.
- Check for hair slip starting at day 5. Lime solutions are slower than lye but more predictable.
- Typical timeline: 7–14 days.
- Remove, scrape, and dehair as described above.
Chemical Dehairing (Sodium Sulfide)
For production tanning or when speed matters, sodium sulfide (Na₂S) alone at 3–5% of hide weight dissolved in water will remove hair in 18–48 hours. This is the fastest non-mechanical method but requires caution — sodium sulfide is acutely toxic by ingestion, produces lethal hydrogen sulfide gas if mixed with acid, and is a severe skin and eye irritant. Use only in well-ventilated outdoor settings. This method is mentioned for completeness but is not recommended for beginners.
5. Bating and Drenching — Preparing the Hide for Tanning
After liming or bucking, the hide is swollen, alkaline (pH 12–13), and stiff. It must be neutralized and relaxed before tanning agents can penetrate effectively. This two-step process — drenching and bating — removes residual lime, reduces swelling, and opens the fiber structure.
Drenching (De-liming)
The goal is to reduce the pH of the hide from 12–13 down to 8–9 and remove calcium deposits trapped in the fiber structure.
- Rinse the dehaired hide thoroughly in multiple changes of clean water. At least three rinses, 30 minutes each, with agitation.
- Prepare a drench solution: dissolve 1 oz (28 g) of ammonium sulfate or ammonium chloride per gallon of water. These weak acid salts neutralize residual lime without dropping the pH dangerously low.
- Submerge the hide for 1–2 hours, agitating every 15 minutes.
- Test: cut a small cross-section from the edge of the hide and apply phenolphthalein indicator (or purple cabbage juice as a field substitute). If the center of the cross-section is still pink/purple (alkaline), drench longer. When the color is uniform throughout (neutral), the hide is fully de-limed.
- Rinse again in clean water.
Bating (Enzyme Treatment)
Bating uses proteolytic enzymes to digest non-structural proteins (elastin, keratin remnants, mucopolysaccharides) left in the hide after liming. This softens the hide, removes the last traces of epidermis, and opens up the grain surface to produce a finer, smoother texture.
Traditional bating agents:
- Bird dung (pigeon or chicken manure) — Used for centuries in Europe. Fresh bird dung contains proteolytic bacteria and their enzymes. Mix at approximately 3–5 lbs per gallon of warm water (85–95°F), strain out solids, and submerge the hide for 1–4 hours. Monitor closely — over-bating weakens the hide. The smell is severe. This method works but has been largely replaced.
- Animal pancreas — The pancreas produces trypsin and other proteolytic enzymes. Mash fresh pancreas (available from any butcher) and mix into warm water. Use at roughly one pancreas per deer hide. Submerge 1–3 hours at 85–95°F.
- Commercial bate — Powdered pancreatic enzyme preparations (sold as "bating compound" or "enzymatic bate") are standardized and predictable. Follow manufacturer's directions — typically 0.5–1% of hide weight dissolved in water at 85–95°F for 30–90 minutes.
Verification: A properly bated hide feels soft and pliable when squeezed, and the grain surface shows a fine, even texture when rubbed with a thumb. An over-bated hide feels mushy and spongy — it has lost structural integrity and will produce weak leather.
After bating, rinse thoroughly in clean water. The hide is now ready for tanning.
6. Brain Tanning — The Traditional Method
Brain tanning is the oldest leather-making method practiced by humans. Nearly every indigenous culture worldwide developed some version of it independently. The Lakota, Comanche, and other Plains nations produced brain-tanned deer and buffalo hides that were — and remain — among the finest soft leathers ever made. The famous line is true: every animal has enough brain to tan its own hide. (Except buffalo. Buffalo hides require supplemental brain from another animal due to their thickness.)
Why Brains Work — The Biochemistry
Brain tissue is approximately 60% fat by dry weight. That fat is rich in phospholipids — primarily phosphatidylcholine (lecithin) and phosphatidylethanolamine. Phospholipids are amphiphilic molecules: one end is water-soluble (hydrophilic) and the other end is fat-soluble (hydrophobic).
When brain emulsion is worked into a hide, the phospholipids insert themselves between collagen fibers. The hydrophilic head groups bond to the collagen (which has many polar sites), and the hydrophobic tails face outward, creating a lubricating layer between fibers. This prevents the fibers from bonding to each other as the hide dries — which is what causes untreated rawhide to become stiff and board-like.
The phospholipid treatment alone does not produce true tanning — the cross-links are weak and will wash out in water over time. The smoking step (Section 10) completes the process by depositing aldehyde compounds (formaldehyde, acrolein, and other carbonyl compounds from wood combustion) that form permanent covalent cross-links with the epsilon-amino groups of lysine residues on the collagen chains. This aldehyde cross-linking is the same chemistry used in formal chrome tanning and glutaraldehyde tanning — just delivered by wood smoke instead of a chemical bath.
Brain-tanned and smoked leather is washable. It can be soaked, wrung out, and dried repeatedly without stiffening — because the aldehyde cross-links are permanent and the phospholipid lubrication is locked in place by the cross-linked collagen matrix. Unsmoked brain-tanned leather will stiffen when wet and must be re-worked.
Brain Emulsion Preparation
- Obtain brains. One deer brain (approximately 3–4 oz) tans one deer hide. One beef brain tans 2–3 deer hides. Pig brains work equally well and are often available cheaply from butcher shops. The brains can be used fresh or frozen.
- Cook the brains. Place in a pot with enough water to cover (about 1 quart per brain). Heat to 140–160°F and hold for 10–15 minutes, mashing and stirring until the mixture is a smooth, creamy emulsion resembling thin mayonnaise. Do not boil — boiling denatures the phospholipids and reduces their emulsifying capacity.
- Alternative: egg yolk. Each egg yolk contains approximately 10% lecithin — the same active compound found in brain. Substitute 12 egg yolks for one deer brain. Mix yolks into warm water and whisk until emulsified. Egg yolk brain substitutes produce results indistinguishable from actual brain.
- Alternative: neat's-foot oil + lecithin. Mix 4 oz liquid lecithin (available at health food stores) with 4 oz neat's-foot oil and 1 quart warm water. Blend until emulsified. This is a modern formulation that replicates the traditional brain chemistry.
Working the Brain Into the Hide
- Wring the de-limed, bated, rinsed hide as dry as possible. Twist it around a post or branch and wring until no more water drips.
- Apply brain emulsion to both sides of the hide by hand. Work it in thoroughly with your hands, kneading and squeezing to ensure penetration into the full thickness. The hide should be completely saturated — dripping with brain.
- Fold the hide brain-to-brain (brain side in), roll it up, and place it in a plastic bag or wrap it in a damp towel. Let it sit overnight (8–12 hours minimum) at room temperature. This gives the phospholipids time to migrate between collagen fibers.
- The next morning, wring the hide again and repeat the brain application. A deer hide typically requires 2–3 braining sessions. A thick elk or moose hide may require 4–5. You will know the hide has absorbed enough brain when, after wringing, the hide feels uniformly soft and pliable rather than having stiff spots.
Working the Hide — The Critical Step
This is where the labor is. After the final braining, the hide must be physically stretched and worked continuously as it dries. If the hide dries without being worked, the collagen fibers will re-bond to each other and the hide will stiffen into rawhide despite the brain treatment.
- Wring the hide as dry as possible.
- Begin stretching. Pull the hide in all directions — north-south, east-west, and diagonally. Use your hands, your knees, a staking post, or a cable stretched between two trees. The cable method is traditional for Plains tribes: drape the hide over a taut cable at waist height and pull it back and forth, working every square inch.
- Continue stretching and pulling until the hide is completely dry. For a deer hide in moderate humidity, this takes 4–8 hours of continuous work. The hide will go through a stage where it feels cool and damp, then a stage where it begins to whiten and stiffen at the edges. Those stiffening edges are where you need to focus your effort.
- If you must take a break, re-wet the hide by wringing it in warm water, and resume when ready. A hide that dries stiff can be re-brained and re-worked, but this adds a full day to the process.
- The hide is done when it is uniformly soft, white, and dry throughout — no damp spots, no stiff spots, no translucent areas. It should feel like thick, soft fabric.
7. Bark Tanning — Vegetable Tanning
Bark tanning produces the firm, heavy, durable leather used for saddles, belts, holsters, sheaths, book covers, shoe soles, and any application where rigidity and water resistance matter. It is the oldest continuously practiced tanning method in the Western world and produces the highest-quality leather for tooling, carving, and molding.
Tannin Chemistry
Tannins are polyphenolic compounds produced by plants as a defense against herbivory. They bind to proteins — that is their biological function. In an herbivore's gut, tannins bind to digestive enzymes and dietary proteins, reducing nutrient absorption and creating the astringent, mouth-drying sensation of strong tea, unripe fruit, or red wine.
In tanning, this same protein-binding property is the mechanism. Tannins bind to collagen through a combination of hydrogen bonding, hydrophobic interactions, and some covalent cross-linking. The resulting collagen-tannin complex is resistant to bacterial enzymes, thermally stable (vegetable-tanned leather has a shrinkage temperature of 75–85°C, compared to 65°C for untanned hide), and increasingly water-resistant as the tannin concentration builds up in the hide.
There are two classes of plant tannins:
- Hydrolyzable tannins (gallotannins, ellagitannins) — Found in oak galls, chestnut, sumac, and tara pods. These break down more easily in water and produce lighter-colored leather with a finer grain. Historically preferred for bookbinding and fine leather goods.
- Condensed tannins (proanthocyanidins) — Found in oak bark, hemlock bark, mimosa bark, and quebracho wood. These are more stable, produce darker leather, and build up tannin concentration faster. Preferred for heavy leathers — saddles, harness, sole leather.
Bark Sources and Tannin Content
| Bark Source | Tannin Content (% dry weight) | Leather Color | Best Use |
|---|---|---|---|
| White oak bark | 8–12% | Medium brown | General purpose, saddlery |
| Red oak bark | 6–10% | Reddish brown | Belts, holsters, general |
| Hemlock bark | 8–14% | Dark reddish brown | Heavy leather, sole leather |
| Chestnut wood | 6–10% | Yellow-brown | Fine goods, bookbinding |
| Sumac leaves | 25–30% | Light tan | Fine, supple leather |
| Black willow bark | 10–16% | Tan | General purpose |
| Mimosa bark | 30–42% | Pinkish tan | Fast tanning, commercial |
| Quebracho heartwood | 20–30% | Deep red-brown | Sole leather, heavy harness |
For a homestead operation in the eastern United States, white oak and red oak bark are the most accessible and produce excellent all-purpose leather. Harvest bark in spring when the sap is running — the bark peels easily and tannin content is highest. Strip bark from freshly felled trees or pruning operations. Dead standing timber has lower tannin content.
Bark Liquor Preparation
- Grind or chip the bark. The finer the particle size, the faster the tannin extracts. A chipper-shredder produces good results. Hand-chopping with a hatchet on a block works for small batches. Break the bark into pieces no larger than 1–2 inches.
- Cold extraction (traditional). Pack a barrel or large container with bark chips. Cover with cold or cool water. Let steep for 7–14 days, stirring occasionally. The water will turn dark brown as tannins leach out. Decant the liquor and save it. This first extraction is the strongest.
- Hot extraction (faster). Place bark chips in water and heat to 150–170°F. Hold at this temperature for 4–8 hours. Do not boil — temperatures above 180°F break down hydrolyzable tannins and can produce a muddy, uneven tan. Strain and cool.
- Multiple extractions. The same bark can be extracted 2–3 times. Each extraction is weaker than the last. Label containers by strength: first extraction (strong), second extraction (medium), third extraction (weak). You will use these in sequence.
- Test tannin strength. A rough field test: add a few drops of ferrous sulfate (iron sulfate) solution to a small sample of bark liquor. Strong tannin solutions turn dark blue-black immediately. Weak solutions turn gray-green. A tannin hydrometer (Barkometer) gives more precise readings if you want to standardize — target 4–6° Barkometer for starting solutions, increasing to 10–15° for finishing.
Pit Tanning — The Traditional Method
Pit tanning is slow — 2 to 6 months for a cowhide — but produces the finest vegetable-tanned leather. The slow diffusion of tannin into the hide creates an even, thorough tan with excellent grain and maximum durability.
- Set up tanning vats. Traditionally, these were pits dug in the ground and lined with planks. Plastic tubs, stock tanks, or lined wooden boxes work. You need at least three containers for a rotating system.
- Start with weak liquor. Place the de-limed, bated, rinsed hide in the weakest bark liquor (third extraction or diluted first extraction). The hide must be fully submerged and able to move. Weight it down with a clean stone or plate.
- Handling schedule. Remove the hide every 2–3 days, agitate the liquor, and re-submerge. This prevents uneven tanning and "case hardening" — where the outer surface tans completely and blocks further penetration to the center.
- Progressive strengthening. After 2–3 weeks in weak liquor, move the hide to medium-strength liquor. After another 2–3 weeks, move to strong liquor. Some tanners add a layering step: alternate layers of hide and fresh ground bark in the strong vat, adding bark liquor to cover. The bark in direct contact with the hide releases tannin continuously.
- Timeline. A deer hide (1/16 to 1/8 inch thick) tans in 4–8 weeks. A cowhide for saddlery (1/4 to 3/8 inch thick) takes 3–6 months. Sole leather (3/8 to 1/2 inch) can take 6–12 months. There is no shortcut. Rushing bark tanning by using too-strong solutions produces case-hardened leather — dark and stiff on the outside, raw and weak in the center.
- Completion test. Cut a small sliver from the thickest part of the hide. The cross-section should be uniformly brown throughout — no light or white streak in the center. If a white line persists in the middle, the hide needs more time.
After Bark Tanning
- Remove the hide from the tanning liquor and rinse briefly in clean water.
- Hang to dry slowly in shade. Rapid drying (sun, heat) causes uneven shrinkage and cracking.
- While still slightly damp ("cased"), apply a light coating of tallow, neat's-foot oil, or a tallow-cod oil blend to the flesh side. This is called "fat liquoring" and keeps the leather flexible.
- The leather will continue to firm and darken over the first 6–12 months. Well-made bark-tanned leather improves with age and develops a rich patina.
8. Alum Tanning — Mineral Tanning
Alum tanning (tawing) uses aluminum salts — most commonly potassium aluminum sulfate (KAl(SO₄)₂·12H₂O, common alum) or aluminum sulfate (Al₂(SO₄)₃) — to cross-link collagen. It is the fastest traditional tanning method and the easiest for a beginner. It is also the least durable.
Chemistry
Aluminum ions (Al³⁺) form coordination complexes with the carboxyl groups (-COOH) on collagen's aspartic acid and glutamic acid residues. These bonds are strong enough to stabilize the hide against moderate heat and bacterial attack, but they are partially reversible in water. Alum-tanned leather exposed to prolonged soaking will gradually lose its aluminum salts and revert toward rawhide. For this reason, alum tanning is best suited for projects that will not be exposed to heavy water contact — taxidermy mounts, wall hangings, fur garments, decorative leather.
Procedure
- Prepare the tanning solution. Dissolve 1 lb alum and 4 oz salt (non-iodized) per gallon of water. Warm water (100–110°F) speeds dissolution. Stir until fully dissolved. For a deer hide, prepare 3–5 gallons.
- Submerge the de-limed, bated, rinsed hide in the alum solution. Ensure full submersion.
- Duration: 3–7 days for a deer hide, stirring 2–3 times daily. The hide will whiten and stiffen slightly as aluminum penetrates.
- Completion test. Cut a thin cross-section. The cut surface should be uniformly white throughout. A translucent or gray center indicates incomplete penetration — continue soaking.
- Remove and rinse briefly in clean water.
- Oil the hide. Mix 3 oz neat's-foot oil with 1 oz warm water and a few drops of dish soap (as an emulsifier). Apply to the flesh side while the hide is still damp.
- Work the hide as it dries using the same stretching and pulling techniques described in the brain tanning section. Alum-tanned hides stiffen if dried without working, just like brain-tanned hides.
Combination Tanning: Alum + Salt + Flour
A more durable variation uses a thick paste rather than a solution:
- Mix: 1 lb alum, 1/2 lb salt, 2.5 lbs flour, and enough water to form a thick paste.
- Spread the paste 1/4 inch thick on the flesh side of the hide.
- Fold flesh-to-flesh and roll up.
- Let sit 5–7 days, checking daily and reapplying paste to any bare spots.
- Scrape off paste, rinse, oil, and work dry.
The flour paste holds the alum in contact with the hide longer and more evenly than a solution, producing a more thorough tan. The flour has no tanning function — it is simply a vehicle. This is the method used historically for white leather gloves, book covers, and parchment.
9. Softening and Breaking — The Mechanical Work That Makes Leather Supple
All tanning methods — brain, bark, alum — produce stiff leather if the hide is allowed to dry without mechanical working. Softening is not optional; it is a core process step.
Why Hides Stiffen
When a wet hide dries, collagen fibers that were separated by water come into direct contact with each other. Hydrogen bonds form between adjacent fibers, locking them in place. The result is a rigid structure — rawhide. Tanning agents reduce but do not eliminate this effect. Even a fully tanned hide will stiffen if dried without working, because the outermost fiber surfaces still form inter-fiber hydrogen bonds that restrict movement.
Mechanical working — stretching, pulling, flexing — physically breaks these hydrogen bonds as they form, keeping the fibers separated and mobile. The tanning agent (whether phospholipid, tannin, or alum) fills the spaces between broken fibers and prevents them from re-bonding. The result is soft, flexible leather.
Staking
Staking is the professional term for mechanical softening. The traditional staking tool is a blunt, smooth blade (similar to a fleshing knife but with a rounded edge) mounted vertically on a post at waist height. The hide is pulled back and forth over the blade under tension, flexing every fiber.
DIY staking methods:
- Cable staking. Stretch a 3/8-inch steel cable or heavy rope between two trees or posts at waist height. Pull the hide over the cable in a shoe-shine motion, working every section. This is the method most commonly used by traditional brain tanners.
- Post staking. Mount a smooth 2x4 or fence post vertically. Drape the hide over the top edge and pull downward on alternating sides, working the hide around the post.
- Hand breaking. For small hides (rabbit, squirrel), simply pull and stretch the hide in all directions with your hands, flexing it over your knee until it softens.
- Frame stretching. Lace the damp hide into a wooden frame (like a drum head) and push the center outward with a rounded tool (a softball on a stick works well). Work in overlapping circles, stretching every area. This method is used by many Native American tanners.
When to Start and When to Stop
Start working the hide when it is still damp — not dripping wet, but not dry either. The ideal state is often described as "cased" — uniformly damp throughout, with no surface moisture. For brain-tanned hides, this is immediately after the final wringing. For bark-tanned hides, it is after the brief rinse and initial air-drying to the damp stage. For alum-tanned hides, it is after rinsing and oiling.
Stop when the hide is completely dry and uniformly soft. If any area stiffens, re-dampen that area (a spray bottle works) and continue working. Do not re-soak the entire hide if only small patches are stiff — localized dampening and working will fix spot stiffness without disrupting the rest.
10. Smoking — The Final Preservation Step
Smoking is the final and arguably most critical step for brain-tanned leather. Without smoking, brain-tanned leather will stiffen when wet and require re-working every time it gets soaked. Smoking deposits aldehyde compounds into the collagen matrix that form permanent covalent cross-links — completing the tanning process that brain (phospholipid) treatment alone cannot finish.
Why Smoke Works — The Chemistry
Wood smoke is a complex aerosol containing over 200 identified chemical compounds. The compounds relevant to tanning are:
- Formaldehyde (HCHO) — the primary cross-linking agent. Formaldehyde reacts with the epsilon-amino groups on lysine residues in collagen, forming methylene bridges (-CH₂-) between adjacent collagen chains. These bridges are permanent, covalent, and water-insoluble.
- Acrolein, acetaldehyde, and other short-chain aldehydes — additional cross-linking agents that work by the same mechanism as formaldehyde but produce slightly different bond geometries.
- Phenolic compounds (creosote, guaiacol, syringol) — these do not cross-link collagen but do coat the fiber surface with bactericidal and fungicidal compounds. They are the reason smoked leather resists mold and bacterial decomposition even in humid conditions.
The combination of aldehyde cross-linking and phenolic surface coating is what makes properly smoked brain-tanned leather washable, rot-resistant, and indefinitely durable. Unsmoked brain-tanned leather will eventually decompose in humid environments because the phospholipid treatment does not create permanent cross-links.
Smoking Procedure
- Build a smoke pit. Dig a small pit approximately 12 inches in diameter and 12 inches deep. Line with rocks or a metal can to contain the coals. The pit should produce dense, cool smoke — not heat.
- Prepare the fire. Start a small hardwood fire and burn it down to coals. Push the coals into the pit. Cover the coals with a generous layer of punky (rotten) wood, dry bark chips, or wood shavings. The material should smolder and produce thick smoke, not flame. If flames appear, smother them with more punk wood. The temperature at the hide surface should be below 120°F — heat will shrink and harden the leather. Test with your hand: if you can hold your hand at the hide position comfortably, the temperature is safe.
- Wood selection. Use hardwood exclusively — oak, hickory, maple, alder, cottonwood. Do not use pine, cedar, or other resinous softwoods. Resin deposits on the leather create sticky, dark patches and produce fewer of the aldehyde compounds needed for cross-linking. Punky (partially decomposed) hardwood produces the densest, coolest smoke.
- Set up the hide. Sew the hide into a bag or cone shape with the flesh side inward (facing the smoke). Traditional method: sew the hide into a skirt shape and suspend it above the smoke pit on a tripod of poles. The bottom edge of the hide should be 18–24 inches above the coals. Seal the gap between the hide skirt and the pit with a blanket or jacket to trap smoke inside.
- Smoke duration. Smoke the flesh side for 2–4 hours until the leather is uniformly golden to amber colored throughout its thickness. Check by cutting a small sliver — the smoke color should penetrate at least halfway through. Flip the hide inside-out and smoke the grain side for an additional 1–2 hours.
- Color as indicator. Light straw color = minimal smoking, adequate for light-use items. Golden amber = well-smoked, suitable for garments and outdoor gear. Dark brown = heavy smoking, maximum water resistance and durability but stiffer leather. Most practitioners aim for golden amber.
- Do not over-smoke. Excessive smoking stiffens leather by depositing too much tar and resin on the fiber surfaces. The goal is chemical cross-linking, not surface coating. If the leather feels tacky or waxy, it has been over-smoked.
Smoke and Bark-Tanned Leather
Bark-tanned leather does not require smoking for preservation — the tannin cross-links are permanent and water-stable. However, some tanners lightly smoke bark-tanned leather for color, fragrance, and additional mold resistance. This is optional and cosmetic.
Smoke and Alum-Tanned Leather
Alum-tanned leather benefits significantly from smoking. The aldehyde cross-links from smoke supplement the weaker aluminum-collagen bonds and improve the leather's water resistance. If you alum-tan a hide and plan to use it in any wet application, smoking is strongly recommended.
11. Sources
Hobson, R. (1997). The Craft of the Tanner. The Cressrelles Publishing Company.
Richards, M. (2004). Deerskins into Buckskins: How to Tan with Brains, Soap, or Eggs. 2nd ed. Backcountry Publishing.
Sharphouse, J.H. (1983). Leather Technician's Handbook. Leather Producers' Association.
Covington, A.D. (2009). Tanning Chemistry: The Science of Leather. Royal Society of Chemistry.
Reed, R. (1972). Ancient Skins, Parchments, and Leathers. Seminar Press.
Haines, B.M. (2006). "The Fibre Structure of Leather." Journal of the Society of Leather Technologists and Chemists, 90(1): 1–8.
Kanagy, J.R. (1977). "Vegetable Tanning." in O'Flaherty, F., Roddy, W.T., and Lollar, R.M. (eds.), The Chemistry and Technology of Leather, Vol. 2. Reinhold Publishing.
Wills, G. (2008). "Traditional Brain Tanning Methods: A Biochemical Analysis." North American Archaeologist, 29(2): 117–134.
Fenner, D.E. and Whitmore, R.E. (2003). "Aldehydes in Wood Smoke and Their Role in Collagen Cross-Linking." Journal of the American Leather Chemists Association, 98(5): 172–181.
International Union of Leather Technologists and Chemists Societies (IULTCS). (2015). Official Methods of Analysis for the Leather Industry. IULTCS Secretariat.
Pouliot, D. (2017). The Art and Science of Hide Tanning. Amphora Press.
Tags: [practical-skills] [advanced]