garden-design
Natural Swimming Pool Design
A comprehensive guide covering ---.
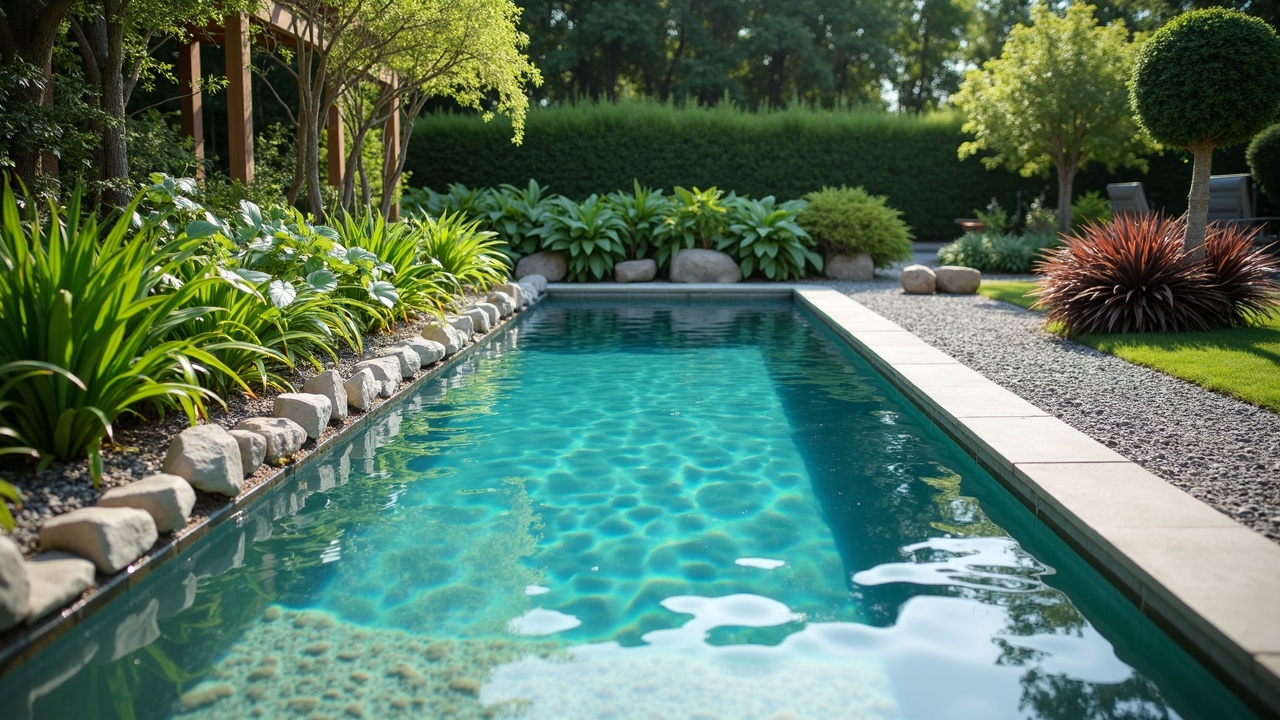
1. Introduction — Swimming Without Chemistry
Every chlorinated swimming pool is a failed ecosystem. The water wants to support life — algae, bacteria, biofilm — and the owner fights that biology with oxidizing chemicals that also happen to irritate eyes, bleach hair, corrode metal, off-gas carcinogenic trihalomethanes, and cost $500–$1,200 per year in consumables. The alternative is not "going without treatment." The alternative is replacing chemical treatment with biological treatment that accomplishes the same result through different mechanisms.
Natural swimming pools — called Schwimmteiche in Germany, where the concept was formalized in the 1980s — use a planted regeneration zone to biologically process the same contaminants that chlorine oxidizes. Swimmer waste (sweat, urine, skin cells, sunscreen) enters the water as dissolved organic carbon, ammonia, and phosphorus. In a chlorinated pool, hypochlorous acid oxidizes these compounds. In a natural pool, bacterial biofilm on gravel substrate metabolizes them, and aquatic plants absorb the resulting nutrients.
The outcome is the same: clear, low-nutrient water that does not support algal growth or pathogen survival. The mechanism is different. And the mechanism matters because it determines every design decision in this document — zone sizing, substrate depth, plant selection, circulation rate, and seasonal management.
Scale of the concept. Germany and Austria have over 6,000 natural swimming pools operating under published engineering standards (FLL, 2011). Public natural pools serve hundreds of swimmers daily. The technology is not experimental. It is mature, documented, and permitted under European bathing water directives. North American adoption has been slower — largely because building codes reference chemical disinfection standards written by the chlorine industry — but the biology does not care about jurisdiction.
What this document covers. Complete design, construction, planting, and management of a private natural swimming pool from raw ground to operational water body. The target is a pool that maintains water clarity below 1 NTU, total phosphorus below 10 µg/L, and fecal coliform below 100 CFU/100 mL without any chemical inputs. Every section includes budget-level and proper-level approaches.
2. How It Works — The Biology of Clean Water
Three biological processes keep a natural pool clean. Understand all three or the design will fail.
Biofilm Nitrification
Swimmers introduce ammonia (NH₃) and urea into pool water through sweat and urine. Ammonia is toxic to aquatic life at low concentrations and feeds algae directly. In a natural pool, Nitrosomonas bacteria colonize gravel substrate surfaces and oxidize ammonia to nitrite (NO₂⁻). Nitrobacter bacteria then oxidize nitrite to nitrate (NO₃⁻). This two-step nitrification process occurs in the biofilm layer — a 1–3 mm thick microbial mat that forms on every submerged surface in the regeneration zone.
Nitrification rate depends on three factors: surface area of substrate (more gravel = more biofilm), water temperature (rates roughly double per 10°C increase between 5–25°C), and dissolved oxygen (nitrification is aerobic — it stops below 1 mg/L O₂). A well-designed regeneration zone with 300 mm of 8–16 mm washed gravel provides approximately 800–1,200 m² of biofilm surface area per m² of regeneration zone footprint when accounting for all gravel surfaces (Kadlec & Wallace, 2009).
Plant Nutrient Uptake
Nitrate and phosphate produced by biofilm metabolism and introduced by swimmers are plant nutrients. Submerged oxygenators (Ceratophyllum, Myriophyllum, Potamogeton) and emergent marginals (Iris, Typha, Phragmites) absorb these nutrients through root uptake and direct foliar absorption. The plants convert dissolved nitrogen and phosphorus into biomass — leaves, stems, roots — which is physically removed from the system when you harvest plant material during seasonal maintenance.
This is the nutrient export mechanism. Without it, nitrogen and phosphorus accumulate in the water column until they exceed the threshold for algal growth. Phosphorus is the critical element because it is the limiting nutrient in freshwater systems. Keep total phosphorus below 10 µg/L and algae cannot bloom regardless of nitrogen concentration, water temperature, or sunlight intensity (Schindler et al., 2008). Every design decision in a natural pool ultimately serves this single goal: keep phosphorus low.
Competitive Exclusion
The regeneration zone establishes a stable microbial and plant community that competitively excludes pathogenic organisms and nuisance algae. Beneficial biofilm bacteria outcompete pathogens for dissolved organic carbon. Submerged plants shade the water column, reducing light available for planktonic algae. Zooplankton (Daphnia, copepods) graze on any algae that do establish. This is not a single mechanism but an ecosystem — the same reason a healthy lake stays clear while a nutrient-loaded retention pond turns green.
3. Design Types — Choosing Your Configuration
Natural swimming pools fall into five categories defined by the German FLL classification system. The choice affects cost, maintenance, aesthetics, and water quality reliability.
Type 1 — Fully Integrated (Swimming Pond)
Swimming zone and regeneration zone share a single water body with no physical separation. Plants grow along the margins and shallow shelves. Swimmers share the water with visible aquatic plants. Lowest construction cost. Highest maintenance effort. Least reliable water quality because swimmers disturb plant roots and sediment. Best suited for large rural properties where the aesthetic goal is "swimmable pond" rather than "pool."
Type 2 — Separated Zones, Surface Connection
Swimming zone and regeneration zone are physically separated by a wall or berm but connected at the water surface. Water flows over or through the dividing wall by gravity. Moderate cost. Better water quality than Type 1 because swimmers cannot disturb the planted zone. Plants are visible but not accessible.
Type 3 — Separated Zones, Subsurface Connection
Swimming zone and regeneration zone are separated by a wall. Water flows between zones through pipes below the waterline, driven by a circulation pump. The regeneration zone functions as a subsurface-flow constructed wetland — water passes through the gravel substrate rather than flowing over the surface. Best water quality of the gravity-fed designs. Plants are in a separate basin that can be any shape or distance from the swimming zone.
Type 4 — Pumped Through Biofilter
Swimming zone is conventional in appearance. Water is pumped through a purpose-built gravel biofilter (which may or may not contain plants). The biofilter can be buried, elevated, or located remotely. Highest construction cost. Best water quality. Most conventional pool appearance. Maintenance is similar to a mechanical filter pool — backwash the biofilter periodically, maintain pump and plumbing.
Type 5 — Hybrid With Secondary Disinfection
Type 3 or 4 design with the addition of UV-C disinfection on the return line. UV at 40 mJ/cm² provides 4-log reduction of E. coli and other pathogens without chemical residual (Hijnen et al., 2006). This configuration meets the most stringent public bathing standards and is the typical design for public natural swimming pools in Europe. For private pools it is optional but recommended if immunocompromised individuals will swim regularly.
Liner vs. Clay-Sealed
EPDM liner. 1.0–1.5 mm ethylene propylene diene monomer rubber. Lifespan exceeds 30 years (Koerner, 2012). Flexible, puncture-resistant, fish-safe. Cost: $8–$15/m². This is the standard choice for private natural pools. Requires protective underlayment (geotextile fabric, 300 g/m² minimum) on all surfaces.
Bentonite clay seal. Sodium bentonite clay applied at 5–10 kg/m² over compacted subsoil, covered with 150 mm of protective soil. Works only in stable clay-rich soils with no ground movement. Cost: $3–$6/m² for materials, but requires significantly more soil work. Failure mode is catastrophic — if the clay layer cracks from ground movement, root penetration, or desiccation during construction, the pool drains. Not recommended for first-time builders. Proven in large agricultural ponds and some European swimming ponds with stable substrates.
4. Sizing — Regeneration Zone Ratios
The regeneration zone is not a decorative feature. It is the water treatment plant. Undersize it and the pool will develop algae problems that no amount of plant selection or pump upgrades can fix.
Minimum Ratios
1:1 ratio (regeneration zone = 100% of swimming area). Standard recommendation for Type 1 and Type 2 designs. A 50 m² swimming zone needs 50 m² of regeneration zone. Total water surface: 100 m². This provides a comfortable margin for a household of 4–6 regular swimmers.
1:0.5 ratio (regeneration zone = 50% of swimming area). Acceptable for Type 3 and Type 4 designs where the gravel substrate functions as a subsurface-flow filter with higher treatment efficiency. A 50 m² swimming zone needs 25 m² of regeneration zone. This works only with proper substrate depth (300 mm minimum) and adequate circulation.
1:0.3 ratio. Possible only with Type 4 biofilter designs that include mechanical pre-filtration (drum filter or sand filter) upstream of the biofilter. Not recommended for DIY builds.
Depth Requirements
Swimming zone. 1.8–2.5 m for diving and comfortable swimming. Deeper is fine. Shallower than 1.5 m heats excessively in summer, accelerating biological oxygen demand and nutrient release from sediment.
Regeneration zone — submerged shelf. 300–600 mm deep. This is where submerged oxygenators root. Gravel substrate fills the full depth. Water flows through the gravel horizontally or vertically depending on design.
Regeneration zone — marginal shelf. 0–200 mm deep. Emergent plants (Iris, Typha, Juncus) root here with crowns at or above waterline. Provides edge habitat, wind protection, and aesthetic framing.
Regeneration zone — deep zone. 800–1200 mm in at least one area. Provides thermal refuge for zooplankton, allows deeper-rooting plants like Nymphaea (water lily), and creates stratification that helps sediment settle.
Volume Calculations
Total system volume should allow a full volume turnover every 6–8 hours. For a 50 m² swimming zone at 2 m average depth (100 m³) plus 50 m² regeneration zone at 0.5 m average depth (25 m³, minus ~40% for gravel volume = 15 m³ water), total water volume is approximately 115 m³. Pump flow rate for 8-hour turnover: 115,000 L ÷ 8 h = 14,375 L/h. A 15,000 L/h pump handles this with margin.
5. Construction — From Hole to Habitat
Excavation
Mark the swimming zone and regeneration zone separately. Excavate the swimming zone to full depth (2.0–2.5 m) with walls sloped at 60–75° (1:0.5 to 1:0.3 ratio, horizontal to vertical). Steeper walls waste less footprint but require more careful liner work. Excavate the regeneration zone to shelf depths: 300–600 mm for the main planted area, 0–200 mm for marginal shelves, and one deep zone at 800–1200 mm.
Soil disposal. A 50 m² × 2 m swimming zone produces roughly 100 m³ of spoil — about 12 dump truck loads. Use clean subsoil to build berms between zones or landscape around the pool. Topsoil goes to garden beds. Do not backfill around the pool with topsoil — organic matter leaching into pool water delivers phosphorus.
Underlayment and Liner
Underlayment. Remove all rocks, roots, and sharp objects from excavated surfaces. Lay 300 g/m² nonwoven geotextile fabric over all surfaces. Overlap seams by 300 mm. This protects the EPDM liner from puncture by stones settling under weight.
EPDM liner. Order in a single sheet large enough to cover the entire pool including regeneration zone, with 600 mm excess on all edges. EPDM comes in sheets up to 15 m × 60 m. For complex shapes, sheets are joined on-site using EPDM seam tape and primer — this requires dry conditions and temperatures above 10°C. Lay the liner loosely into the excavation, pressing it into corners and shelves. Do not stretch it. EPDM shrinks slightly in cold weather; leave slack.
Edge detail. The liner must terminate above maximum water level to prevent wicking. Standard method: run the liner up and over a buried edge beam (timber, concrete, or compacted gravel berm), fold it back under itself, and bury the fold under 200 mm of soil or coping stone. This creates a capillary break that prevents water from wicking out and ground water from leaching in. Exposed liner above waterline degrades faster from UV — cover all exposed EPDM with stone, gravel, or timber edging.
Dividing Wall (Types 2–4)
Build the wall between swimming zone and regeneration zone from concrete block, poured concrete, or stacked sandbags covered with liner. Wall height should be 100–200 mm below the target water level to allow surface flow from swimming zone to regeneration zone (Types 2–3). For Type 4 (pumped systems), the wall can extend to waterline with pipes connecting the zones below.
Gravel Substrate
Material. Washed, angular, limestone or granite gravel. 8–16 mm nominal size. Must be free of fines (no dust, no clay, no organic matter). Fines clog the pore space that biofilm needs. Limestone is preferred where pH is naturally low (below 7.0) because it buffers acidity. Granite is preferred where pH is naturally high (above 8.0). Do not use river gravel — rounded stones have 30–40% less surface area per volume than angular crushed stone.
Depth. 300 mm minimum throughout the regeneration zone planted shelves. This provides the hydraulic conductivity and biofilm surface area needed for treatment. Deeper (400–500 mm) is better for heavily loaded pools (more than 6 regular swimmers).
Volume estimate. 50 m² regeneration zone × 0.3 m depth = 15 m³ of gravel ≈ 22–25 tonnes. Budget $400–$800 for bulk delivery depending on source distance.
Planting Shelves
Within the regeneration zone, create at least three depth zones for different plant guilds:
- 0–100 mm depth: Marginal shelf for emergent plants. 20–30% of regeneration zone area.
- 200–400 mm depth: Main filtration shelf for submerged oxygenators. 50–60% of regeneration zone area.
- 600–1000 mm depth: Deep zone for water lilies and thermal stratification. 10–20% of regeneration zone area.
Transition between shelves with gentle slopes (1:3 or shallower) so gravel does not slide.
6. Plant Selection — The Biological Engine
Plants are not decorative in a natural pool. They are the phosphorus removal system. Select for nutrient uptake capacity, growth rate, climate hardiness, and non-invasiveness. Minimum: three submerged species, three emergent species, and one floating species.
Submerged Oxygenators (200–600 mm depth)
These plants photosynthesize underwater, producing oxygen that supports aerobic biofilm and directly competing with algae for dissolved nutrients and light.
- Ceratophyllum demersum (hornwort). Rootless, free-floating in the water column or loosely anchored in gravel. Extremely fast growing. Tolerates shade. The single most effective submerged plant for natural pools. Hardy to USDA Zone 4.
- Myriophyllum spicatum (Eurasian watermilfoil). High nutrient uptake rate. Dense feathery foliage provides excellent biofilm surface area. Check local invasive species lists — banned in some US states. Use native M. heterophyllum where M. spicatum is restricted.
- Potamogeton crispus (curly pondweed). Tolerates cool water and partial shade. Goes dormant in summer heat above 28°C — pair with warm-season species for year-round coverage.
- Vallisneria americana (wild celery). Grasslike rosettes. Excellent for deep shelves (400–800 mm). Spreads by runners. Hardy to Zone 4.
Planting density: 5–8 plants per m² of submerged shelf area. Allow two growing seasons for full establishment.
Emergent Filtration Plants (0–200 mm depth)
Emergent plants root in saturated gravel with stems and leaves above water. Their root systems provide massive biofilm surface area in the gravel substrate, and their transpiration drives water movement through the root zone.
- Iris pseudacorus (yellow flag iris) or Iris versicolor (blue flag iris). Dense root mass. Moderate nutrient uptake. Attractive flowers. I. versicolor is native to eastern North America and preferred where I. pseudacorus is listed as invasive.
- Typha angustifolia (narrow-leaved cattail). Aggressive phosphorus uptake — among the highest of any wetland plant. Spreads rapidly by rhizomes. Contain in planting baskets or with root barrier to prevent takeover. Do not use T. latifolia (broad-leaved cattail) — too aggressive for pool-scale systems.
- Juncus effusus (soft rush). Compact growth habit. Tolerates partial shade. Good edge plant. Hardy to Zone 4.
- Schoenoplectus lacustris (common clubrush). Deep-water emergent (tolerates 300 mm submersion). Strong vertical form. Excellent nutrient uptake.
- Phragmites australis (common reed). The standard plant for constructed treatment wetlands. Highest biomass production and nutrient uptake of any temperate emergent. However — it spreads aggressively and can puncture liners with its rhizomes. Use only with heavy-duty root barrier (HDPE, 1 mm minimum) or in contained beds. Many natural pool designers avoid it entirely.
Planting density: 4–6 plants per m² of marginal shelf area.
Floating Cover
Floating-leaved plants shade the water surface, reducing light penetration that drives algae growth and reducing water temperature in summer.
- Nymphaea spp. (hardy water lily). Plant in the deep zone (600–1000 mm). Each lily pad shades approximately 0.1 m² of surface. Target 30–50% surface coverage of the deep zone. Varieties bred for small ponds (spread 1–1.5 m) are better than large lake varieties.
- Nuphar lutea (yellow pond lily). More shade-tolerant than Nymphaea. Naturalistic appearance. Hardy to Zone 3.
Do not use: Lemna (duckweed), Azolla (mosquito fern), or Eichhornia (water hyacinth). These floating plants are extraordinarily efficient at nutrient uptake but reproduce so rapidly they become maintenance nightmares, clog pumps, and are banned as invasive species in most jurisdictions.
7. Water Circulation — Moving Water Through Biology
Circulation is what converts a stagnant planted pond into a treatment system. Without flow, the regeneration zone treats only the water immediately surrounding the plant roots. With flow, the entire swimming zone volume passes through the biological filter on a regular cycle.
Pump Sizing
Target: full system volume turnover every 6–8 hours during the swimming season. For a 115 m³ system (example from Section 4), this requires 14,000–19,000 L/h. Use a low-head, high-flow pond pump — not a pool pump. Pool pumps are designed for high head pressure (sand filter resistance) and consume 750–1,500 W. Pond pumps delivering equivalent flow at 0.5–1.0 m head consume 150–400 W.
Energy cost. A 300 W pond pump running 12 hours/day for a 180-day season at $0.12/kWh costs approximately $78/year. A 1,100 W pool pump running the same schedule costs $285/year. The low-head pump pays for its higher purchase price within two seasons.
Pump placement. Submersible pump sits in the deepest point of the swimming zone or in a dedicated pump chamber. Draws water from the bottom of the swimming zone and delivers it to the regeneration zone inlet. Water flows through the gravel substrate by gravity and returns to the swimming zone through a submerged pipe or over the dividing wall.
Skimmer
A surface skimmer is not optional. Floating organic debris — leaves, pollen, insects, sunscreen film — decomposes on the water surface and releases phosphorus directly into the upper water column where light is strongest. A single-opening skimmer box at the downwind end of the swimming zone captures surface debris before it sinks.
Budget approach: Floating weir skimmer connected to the circulation pump inlet. Cost: $80–$200. Requires daily basket cleaning during leaf fall.
Proper approach: Purpose-built pool skimmer box mortared into the pool wall at waterline, plumbed to a leaf basket and then to the pump. Cost: $300–$600 installed. Larger basket capacity, less frequent cleaning.
Bottom Drain
A bottom drain in the deepest point of the swimming zone removes settled sediment — the primary source of internal phosphorus loading. Without a bottom drain, decomposing organic sediment releases phosphorus back into the water column (internal loading), undoing the work of the regeneration zone.
Install a 110 mm anti-vortex drain cover flush with the pool floor, plumbed to the pump intake or to a separate waste line. During routine maintenance, open the bottom drain valve and pump sediment-laden water to waste (garden irrigation is ideal — the water is nutrient-rich). This is a 15-minute task performed 2–4 times per swimming season.
UV-C Disinfection (Optional Secondary)
A UV-C unit on the return line provides secondary pathogen reduction without chemical residual. Size the unit for 40 mJ/cm² dose at maximum flow rate. For a 15,000 L/h system, this typically requires a 55–80 W UV-C lamp.
UV-C does not replace the biological filtration. It provides an additional safety margin for pathogen control, particularly useful if young children or immunocompromised individuals use the pool. It also kills free-floating algae cells that pass through the regeneration zone, improving clarity during the first season before the biological system is fully established.
Cost: $300–$600 for the UV unit, $50–$80/year for lamp replacement (annual). Install inline after the regeneration zone and before water returns to the swimming zone.
8. Seasonal Management — A Pool That Follows the Calendar
A natural swimming pool is a living system. It has seasons. Managing it means working with those seasons rather than maintaining a static chemical balance year-round.
Spring Startup (Water Temp 8–15°C)
- Remove winter debris. Net all accumulated leaves and organic matter from the pool bottom. This material has been releasing phosphorus all winter. Remove it before water warms above 15°C and algae growth accelerates.
- Start circulation. Turn on the pump when water temperature consistently exceeds 8°C. Biofilm nitrification begins slowly at this temperature and accelerates as water warms.
- Inspect plants. Cut back dead emergent stems to 100 mm above waterline. Remove any dead or rotting submerged plant material. Check for rhizome escape from planting containers.
- Test water. Baseline measurements: total phosphorus, nitrate, pH, clarity (Secchi disk or turbidity meter). Target: TP < 20 µg/L at startup (it will decrease as plants grow).
- Expect a spring algae bloom. A temporary green phase lasting 2–6 weeks is normal in established pools. The biofilm has not yet reached full metabolic rate, plant growth has not caught up with nutrient availability, and zooplankton populations are low. Do not panic. Do not add chemicals. The system self-corrects as temperatures rise above 15°C.
Summer Maintenance (Water Temp 18–28°C)
- Skim daily. Remove floating debris before it sinks and decomposes.
- Clean skimmer basket every 2–3 days, daily during cottonwood seed season or heavy pollen.
- Trim submerged plants if growth obstructs the swimming zone. Harvested plant material goes to the compost pile — this is nutrient export. Do not leave trimmings in the water.
- Test water biweekly. Total phosphorus (target < 10 µg/L), pH (target 6.8–8.2), clarity (target < 1 NTU or > 2 m Secchi depth).
- Top up water level as needed to replace evaporation and splash loss. Use municipal water if available (low phosphorus). Well water in agricultural areas may contain elevated nitrate or phosphorus — test before adding large volumes.
- Bottom drain flush every 4–6 weeks. Pump 500–1,000 L of bottom water to garden irrigation until discharge runs clear.
- Do not drain and refill. The biological system took 1–2 seasons to establish. A full water change resets it.
Fall Shutdown (Water Temp 15–8°C)
- Heavy plant harvest. Cut all emergent plants to 100–150 mm above waterline. Remove 50–70% of submerged plant biomass. This is the single most important nutrient export event of the year — the harvested plant material contains phosphorus and nitrogen that would otherwise decompose in the pool over winter.
- Install leaf netting. Stretch fine mesh (10–20 mm) over the entire pool surface before deciduous leaf drop begins. Leaves in the pool are the primary source of winter phosphorus loading.
- Continue circulation until water temperature drops below 5°C, then shut down the pump. Remove the pump if it is not rated for freeze conditions. Store indoors.
- Lower water level 100–150 mm below coping to allow for ice expansion without damaging the edge detail.
Winter and Ice
In climates where the pool freezes, the pool operates as a dormant system. Biological activity drops to near zero below 4°C. The pool water will not turn green under ice because algae require both light and nutrients — the ice and snow cover blocks most light, and cold temperatures suppress biological nutrient release from sediment.
Do not break ice. Breaking ice creates shock waves that can damage the liner and stress or kill overwintering organisms. If you need to maintain a gas exchange opening (recommended for pools with fish or in climates with extended ice cover), use a floating pond de-icer or an aeration bubbler to keep a small area ice-free.
Ice pressure. EPDM liners handle ice expansion without damage if the pool edges slope outward (which they should from proper excavation). Vertical walls are vulnerable to ice thrust — build a slight batter (5–10°) on all walls or place foam ice guards along vertical sections.
9. Water Quality Monitoring — The Numbers That Matter
Four parameters tell you whether the system is working. Test all four regularly and you will catch problems weeks before they become visible.
Total Phosphorus (TP)
Target: < 10 µg/L during swimming season. This is the single most important water quality parameter.
Why: Phosphorus is the limiting nutrient for algae growth in freshwater (Schindler et al., 2008). Below 10 µg/L, algae cannot bloom regardless of nitrogen, temperature, or sunlight. Above 20 µg/L, algae blooms become increasingly likely. Above 50 µg/L, blooms are virtually certain during warm weather.
Testing: Requires a colorimetric test kit capable of measuring in the µg/L (parts per billion) range. Standard pool test kits do not measure phosphorus at this resolution. Use a Hach or LaMotte low-range phosphate kit ($50–$120) or send samples to an environmental lab ($15–$30 per test).
If TP is high: Identify the phosphorus source. Common culprits: decomposing organic debris on the pool bottom (flush the bottom drain), insufficient plant biomass (add plants), topsoil erosion into the pool (fix grading), high-phosphorus fill water (test your water source), or inadequate fall plant harvest.
Total Nitrogen (Nitrate + Ammonia)
Target: Ammonia < 0.5 mg/L, Nitrate < 10 mg/L.
Why: Ammonia indicates incomplete nitrification — the biofilm is not processing swimmer load. Elevated nitrate indicates plants are not absorbing nitrogen fast enough. Both suggest the regeneration zone is undersized or plants need time to establish.
Testing: Standard aquarium or pond test kits work fine for these ranges ($15–$30 for a kit with 50+ tests).
Clarity (Turbidity or Secchi Depth)
Target: Turbidity < 1 NTU, or Secchi depth > 2 m.
Why: Clarity is the user-facing metric. If you can see the bottom clearly, the pool looks clean and is almost certainly clean. Declining clarity is the earliest visible warning of nutrient problems.
Testing: A Secchi disk ($10–$20 DIY from a 200 mm white plate on a marked line) provides a practical field measurement. Lower it into the deepest point until it disappears. Read the depth. Digital turbidity meters ($100–$300) provide more precise measurements.
pH
Target: 6.8–8.2.
Why: pH affects nitrification rates (optimal 7.5–8.0), plant nutrient availability, and swimmer comfort. Natural pools with limestone gravel tend to buffer at pH 7.5–8.0. Granite gravel pools in acidic-soil regions may need monitoring for low pH.
Testing: Standard pH test strips or liquid reagent kits. Same as pool or aquarium kits.
Testing Schedule
| Season | Frequency | Parameters |
|---|---|---|
| Spring startup | Weekly | TP, N, clarity, pH |
| Swimming season | Biweekly | TP, clarity, pH |
| Swimming season | Monthly | Full panel including nitrogen |
| Fall shutdown | Once | TP, N, clarity, pH (baseline for winter) |
10. Sources
- Chyka, P.A., Seger, D., Krenzelok, E.P., & Vale, J.A. (2005). Position paper: Single-dose activated charcoal. Clinical Toxicology, 43(2), 61–87.
- FLL — Forschungsgesellschaft Landschaftsentwicklung Landschaftsbau. (2011). Recommendations for Planning, Construction and Maintenance of Private Swimming and Bathing Ponds. Bonn.
- Headley, T.R., Davison, L., Huett, D.O., & Müller, R. (2012). Evapotranspiration from subsurface horizontal flow wetlands planted with Phragmites australis in sub-tropical Australia. Ecological Engineering, 44, 236–243.
- Hijnen, W.A.M., Beerendonk, E.F., & Medema, G.J. (2006). Inactivation credit of UV radiation for viruses, bacteria and protozoan (oo)cysts in water: A review. Water Research, 40(1), 3–22.
- Kadlec, R.H., & Wallace, S.D. (2009). Treatment Wetlands, 2nd ed. CRC Press.
- Koerner, R.M. (2012). Designing with Geosynthetics, 6th ed. Xlibris.
- Littlewood, M. (2005). Natural Swimming Pools: Inspiration for Harmony with Nature. Schiffer Publishing.
- Marsh, H., & Rodríguez-Reinoso, F. (2006). Activated Carbon. Elsevier.
- Schindler, D.W., Hecky, R.E., Findlay, D.L., et al. (2008). Eutrophication of lakes cannot be controlled by reducing nitrogen input: Results of a 37-year whole-ecosystem experiment. Proceedings of the National Academy of Sciences, 105(32), 11254–11258.
- Vymazal, J. (2007). Removal of nutrients in various types of constructed wetlands. Science of the Total Environment, 380(1-3), 48–65.
- Weixler, R. (2014). The Complete Guide to Natural Swimming Pools. Crowood Press.
- Kircher, W., & Thon, A. (2016). Design and construction of swimming teich/ponds. In Constructed Wetlands for Industrial Wastewater Treatment, ed. Stefanakis, A.I. Wiley.