guides
Pottery and Ceramics
Make fired pottery from local clay: clay science, finding and processing clay, hand building, wheel throwing, and drying through bisque firing.
1. Introduction — Fired Clay Is Permanent
Pottery is one of the oldest human technologies that still works exactly the way it did when it was invented. The oldest known ceramic vessel — from the Xianrendong Cave in Jiangxi Province, China — dates to roughly 20,000 years ago. That pot survived twenty millennia because fired clay does not rot, does not rust, does not decompose. A ceramic vessel buried in a field outlasts every metal, every wood product, and every organic material on the property. The only things that destroy fired ceramics are mechanical impact and freeze-thaw cycling of porous ware that absorbed water.
That permanence is the reason pottery matters on a working homestead. A hand-thrown stoneware crock holds ferments for decades. A set of fired earthenware planters lasts longer than the person who made them. Storage jars, water filters, cookware, drainage tile, roofing tile — all of it comes from the same raw material that exists beneath the topsoil on most properties in temperate climates.
The misconception about pottery is that it requires expensive equipment and years of training. It does not. Humans made functional pottery for 19,000 years before the potter's wheel was invented. The wheel itself is only about 4,000 years old. Kilns with controlled atmospheres are only about 6,000 years old. Before all of that, people dug clay from riverbanks, shaped it by hand, dried it in the sun, and fired it in open pits fueled by wood and dung. The equipment has improved. The chemistry is the same.
What this guide covers. Everything from identifying clay deposits on your property through building a DIY propane-fired kiln and producing food-safe glazed stoneware. Budget and scaled methods for every step. A reader with no prior experience should be able to produce functional, fired, glazed pottery using only this document and locally sourced materials.
2. Clay Science — What Clay Actually Is
Clay is not dirt. Clay is a specific category of hydrous aluminum phyllosilicate minerals formed by the chemical weathering of feldspar-bearing rocks over geological time. The key word is phyllosilicate — sheet silicate. Clay minerals are built from stacked sheets of silicon-oxygen tetrahedra bonded to sheets of aluminum-oxygen-hydroxyl octahedra. These sheets are flat and thin, which is why wet clay feels slippery and why it can be shaped: the sheets slide over each other when lubricated by water.
The four clay types that matter for pottery:
Kaolin (China Clay)
Primary clay — formed in place from the decomposition of feldspar in granite. White or near-white. Low plasticity (hard to shape by hand without additives). High firing temperature: 2,300–2,600°F (Cone 9–14). Low shrinkage. This is the backbone of porcelain. Pure kaolin is too stiff for most hand building but essential as a component in stoneware and porcelain bodies.
Ball Clay
Secondary clay — transported by water from its source, picking up organic material and finer particle size along the way. Gray, tan, or dark due to organic content. Very high plasticity. Fires to a light color once organics burn out. Firing range 2,100–2,400°F. High shrinkage (10–15%). Ball clay is the plasticity additive — it makes a clay body workable. Too much ball clay means excessive shrinkage and cracking.
Fire Clay
Refractory clay found beneath coal seams. Coarse particle size, moderate plasticity. Withstands very high temperatures: 2,600–2,800°F without deforming. Low shrinkage. Used for kiln furniture, kiln bricks, and as an additive to stiffen stoneware bodies. A homestead potter building a kiln needs fire clay for the hot-face bricks.
Earthenware Clay (Common Red Clay)
The most abundant clay on earth. Red, brown, or buff colored due to iron oxide content. Good plasticity. Low firing temperature: 1,700–2,100°F (Cone 06 to Cone 2). Porous after firing unless glazed. This is what most people dig out of their backyard. It makes excellent flower pots, drainage tile, roof tile, and cooking vessels when properly glazed. Terra cotta is earthenware.
Key Properties
Plasticity is the ability of wet clay to hold a shape without cracking. Plasticity comes from fine particle size and the plate-like crystal structure of clay minerals. More plastic clay is easier to shape but shrinks more. Less plastic clay holds its dimensions but cracks during forming.
Shrinkage occurs in two stages. Drying shrinkage (4–8%) happens as water evaporates from between clay particles. Firing shrinkage (3–10%) happens as the clay vitrifies — the silica in the clay body begins to melt and fuse into a glass matrix. Total shrinkage from wet to fired ranges from 8–15% depending on the clay body. Every piece you make needs to be that much larger than your target finished size.
Vitrification is the process of silica melting into glass within the clay matrix during firing. At low temperatures (earthenware range), vitrification is minimal — the fired body is porous. At stoneware temperatures (2,200–2,400°F), vitrification is substantial — the body becomes dense, waterproof, and rings when struck. At porcelain temperatures (2,300°F+), vitrification is nearly complete — the body becomes translucent.
| Clay Type | Firing Temp (°F) | Plasticity | Shrinkage | Color (Fired) | Primary Use |
|---|---|---|---|---|---|
| Kaolin | 2,300–2,600 | Low | Low (3–5%) | White | Porcelain, component |
| Ball clay | 2,100–2,400 | Very high | High (10–15%) | Light buff | Plasticity additive |
| Fire clay | 2,600–2,800 | Moderate | Low (4–6%) | Buff to tan | Kiln brick, refractory |
| Earthenware | 1,700–2,100 | Good | Moderate (6–10%) | Red/brown/buff | Flower pots, tile, cookware |
3. Finding and Processing Local Clay
Most properties in the eastern US, the Gulf Coast, and the interior valleys of Texas have usable clay deposits within a few feet of the surface. The giveaway is sticky, slippery soil that holds water and cracks when dry. Streambeds, road cuts, pond excavations, and construction sites all expose clay layers.
Test Dig
Dig below the topsoil — usually 6–18 inches down, depending on the location. You are looking for a layer that is distinctly different from the organic topsoil above: dense, sticky, uniform in color, and free of roots and gravel. Take a fist-sized sample.
Field plasticity test. Roll the sample into a coil about the diameter of a pencil. Bend the coil into a ring. If it bends smoothly without cracking, the clay has good plasticity for hand building. If it cracks immediately, the clay is too short (too much sand or silt) and will need a plasticity additive like ball clay or bentonite.
Ribbon test. Flatten a ball of moist clay between your thumb and finger, pushing it out into a ribbon. Plastic clay forms a ribbon 3–4 inches long before breaking. Short clay breaks at 1 inch or less.
Slaking
Dry the raw clay completely — spread it on a tarp in the sun or bake it at 200°F. Break it into fist-sized chunks. Place the chunks in a bucket and cover with water. Wait 24–48 hours. The dry clay will absorb water and disintegrate into a slurry — this is slaking. Stir until the mixture is uniform, roughly the consistency of heavy cream.
Screening
Pour the slurry through a screen to remove rocks, roots, gravel, and organic debris. A 30-mesh screen (30 openings per inch) removes the coarse material. For finer work, follow with a 60-mesh or 80-mesh screen. The screened slurry goes into a settling container.
Budget method. A 5-gallon bucket with window screen wire bent over the top works for small batches.
Scaled method. Build a two-tier screening frame from 2x4 lumber with 30-mesh hardware cloth on top and 60-mesh below. Set it over a plastic tub and pour slurry through in batches.
Drying to Working Consistency
Pour the screened slurry onto plaster bats (thick plaster slabs) or into cloth-lined wooden forms. Plaster absorbs water from the clay rapidly — the slurry will reach workable consistency in 12–48 hours depending on thickness and humidity. Without plaster, spread the slurry on clean concrete or in cloth bags and let it dry slowly. Target consistency: firm enough to hold its shape but soft enough to bend without cracking.
Wedging
Wedging is the ceramic equivalent of kneading bread dough. It serves two purposes: homogenize the clay body so there are no hard or soft spots, and compress out air bubbles that would cause explosions during firing.
Ram's head wedging. Cut the clay mass in half, slam one half onto the other, and press them together with a rocking motion. Rotate 90° and repeat. Minimum 30 cycles. The cross-section of the clay should show a spiral pattern (the ram's head) when done correctly.
Spiral wedging. Press the clay mass forward and down in a rotating motion, folding it over itself. This is faster than ram's head wedging for larger masses but harder to learn.
A well-wedged ball of clay, when cut in half with a wire, shows no air bubbles and a uniform, smooth texture throughout.
4. Hand Building
Hand building predates the wheel by at least 15,000 years. Three primary techniques cover virtually every form.
Pinch Pot
Start with a ball of well-wedged clay that fits comfortably in one hand. Press your thumb into the center, leaving at least a half inch of clay at the bottom. Rotate the ball slowly while pinching the walls between your thumb (inside) and fingers (outside), thinning the walls to an even thickness of roughly 1/4 inch. Work from the bottom up. Keep the rim level by pressing it gently on a flat surface.
Pinch pots are small — typically under 6 inches in diameter. They teach wall-thickness control better than any other technique because your fingers are the only tools.
Coil Building
Roll ropes of clay to a uniform diameter — 1/2 inch to 1 inch depending on the size of the piece. Coil building is the primary large-form technique for vessels, planters, and storage containers.
- Roll a base slab about 1/2 inch thick. Cut it to the desired diameter using a needle tool or knife.
- Score the edge of the base with crosshatch marks. Apply slip (liquid clay) to the scored area.
- Lay the first coil on top of the scored edge. Press it firmly into the base.
- Score the top of the first coil, apply slip, and lay the second coil.
- Continue stacking. Smooth the interior joints by dragging a wooden rib or your finger across the coil seams to merge them into a continuous wall.
- To widen the form, place each coil slightly outward. To narrow, place each coil slightly inward.
The exterior coils can be left visible for texture or smoothed flat. Interior seams must always be smoothed — an unmerged interior joint is a stress crack waiting to happen during drying or firing.
Slab Construction
Roll clay to uniform thickness (1/4 to 3/8 inch) using a rolling pin with thickness guides (two strips of wood the target thickness, placed on either side of the clay). Slab construction builds boxes, tiles, plates, trays, and architectural elements.
- Roll the slab on a piece of canvas or cloth to prevent sticking.
- Let the slab stiffen to leather-hard — firm enough to hold its shape when picked up but soft enough to bend without cracking.
- Cut the slab to the required shapes using a template and needle tool.
- Join slabs using score-and-slip: crosshatch both surfaces, apply slip generously, press together firmly, and reinforce the interior joint with a thin coil of clay smoothed into both surfaces.
Critical rule for all hand building: every joint must be score-and-slip. Two pieces of clay pressed together without scoring and slip will separate during drying or firing. There are no exceptions to this.
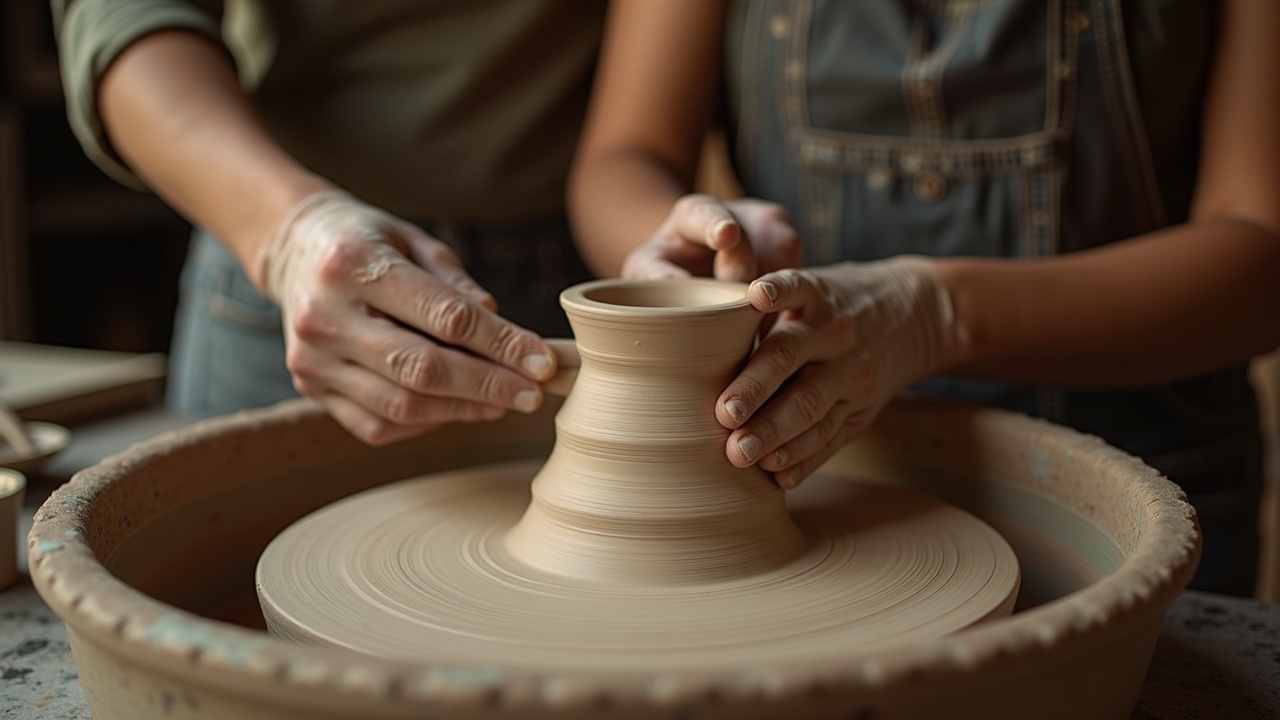
5. Wheel Throwing
The potter's wheel is a flywheel — it stores rotational energy so the potter can use both hands to shape clay rather than holding and rotating the piece. Electric wheels spin at 0–300 RPM with a foot pedal controlling speed. Kick wheels use a heavy flywheel at the bottom, kicked by the potter's foot, with the wheelhead at waist height.
Centering
Place a ball of well-wedged clay firmly on a wet wheelhead. Start the wheel spinning counterclockwise (for right-handed throwers). Wet your hands. Brace your elbows against your body or your thighs. Push the clay into a cone shape by squeezing inward with both hands. Push the cone down into a dome by pressing from the top with your palm. Repeat cone-up, push-down three to five times. The clay is centered when it no longer wobbles as the wheel turns.
Centering is the single hardest skill in wheel throwing and the one that takes the most practice. Until the clay is perfectly centered, every subsequent step produces uneven walls.
Opening
With the clay centered and the wheel spinning at moderate speed, press your thumbs (or two fingers braced together) into the center of the dome, pushing straight down. Leave at least 3/8 inch of clay at the bottom — this is the floor of the piece. Widen the opening by pulling your fingers outward from the center toward the wall.
Pulling Walls
This is where the cylinder forms. Place your inside fingers at the bottom of the interior wall and your outside fingers directly opposite on the exterior. Squeeze gently inward with the outside hand while the inside hand provides support. Pull upward slowly, thinning and raising the wall in one continuous motion from bottom to top. Each pull should thin the wall slightly and raise it an inch or more.
Three to five pulls produce a basic cylinder from a 2-pound ball of clay. More clay requires more pulls. The walls should be even in thickness — approximately 1/4 inch for functional ware.
Shaping
A cylinder is the starting point for every wheel-thrown form. Bowls are cylinders pushed outward. Vases are cylinders narrowed at the top. Plates are cylinders opened wide and flattened. All shaping happens while the wheel spins, using gentle pressure from inside or outside to move the wall.
Trimming
After the piece has dried to leather-hard (usually 12–24 hours depending on humidity), invert it on the wheel and center it. Use a trimming tool (a looped wire or ribbon tool) to remove excess clay from the bottom, define the foot ring, and refine the profile. Trimming is when a heavy, clunky cylinder becomes a graceful pot.
6. Drying and Bisque Firing
More pots are lost to improper drying than to any other single cause. Clay shrinks as it dries. If one part of a pot dries faster than another, differential shrinkage creates stress, and the pot cracks. Thin rims dry before thick bottoms. Handles dry before the body they are attached to. One side facing a window dries before the side in shadow.
Even Drying Protocol
- Cover freshly made pieces loosely with thin plastic (dry cleaner bags work well) for the first 24 hours. This slows drying dramatically and allows moisture to equalize.
- After 24 hours, remove the plastic and let the piece air-dry in a location with no drafts, no direct sunlight, and no heat sources. Uniform air circulation matters.
- For thick pieces (walls over 3/8 inch) or pieces with attachments (handles, spouts, lids), cover for 48–72 hours before exposing.
- Total drying time to bone-dry: 5–14 days depending on humidity, wall thickness, and clay body.
- A bone-dry pot feels room temperature to the touch. A pot that still contains moisture feels cool against your cheek — the evaporating water cools the surface.
Bone-dry clay is extremely fragile. Handle it as little as possible. It has no structural strength until it is fired.
Bisque Firing
Bisque firing is the first firing. It converts fragile, bone-dry clay into a hard, porous ceramic body that can be handled, dipped in glaze, and moved around without disintegrating.
Temperature. Bisque firing for earthenware and stoneware clay bodies runs to Cone 06 — approximately 1,830°F (999°C). For porcelain, Cone 04 — approximately 1,945°F (1,063°C).
Rate of climb. The critical danger zone is between room temperature and 400°F. Any residual moisture in the clay converts to steam at 212°F. If the temperature rises too fast, steam pressure cracks the pot from the inside — the dreaded explosion. The rule: hold below 200°F for at least one hour to ensure all free water is driven off, then ramp no faster than 150°F per hour until 1,000°F. After 1,000°F, the rate can increase to 200–300°F per hour.
Quartz inversion. At 1,063°F (573°C), the crystalline quartz in the clay body undergoes a sudden volume change as it converts from alpha-quartz to beta-quartz. This happens on the way up and again on the way down. The kiln must not be opened or cooled too rapidly through this temperature range on either heating or cooling. Cracking at exactly this temperature is a diagnostic signature of cooling too fast.
| Bisque Firing Schedule | Temperature | Rate | Time at Temp |
|---|---|---|---|
| Water smoking | Room temp → 400°F | 50–100°F/hr | Hold at 200°F 1 hr |
| Organic burnout | 400°F → 1,000°F | 100–150°F/hr | — |
| Quartz inversion zone | 1,000°F → 1,100°F | 100°F/hr (slow) | — |
| Final ramp | 1,100°F → 1,830°F | 200–300°F/hr | Hold 15–30 min |
| Cooling | 1,830°F → 1,100°F | Natural (kiln closed) | — |
| Through quartz inversion | 1,100°F → 900°F | Slow (kiln closed) | — |
| Final cool | 900°F → room temp | Open kiln at 200°F | — |
Do not open the kiln above 200°F. The thermal shock of cool air on hot ceramic cracks every piece near the door.
7. Glazing — Applied Glass Chemistry
A glaze is a thin layer of glass fused to the surface of a ceramic body. Every glaze is made of three things:
- Glass former — silica (SiO₂). This is the actual glass. Quartz, flint, or silica sand provides it.
- Flux — a material that lowers the melting point of silica. Pure silica melts at 3,100°F, far too hot for any practical kiln. Fluxes bring the melting point down to a usable range. Common fluxes: sodium (soda ash, soda feldspar), potassium (potash feldspar), calcium (whiting/calcium carbonate), lithium (spodumene), boron (Gerstley borate, frit).
- Stabilizer — alumina (Al₂O₃). Without alumina, molten glaze runs off the pot like water. Alumina stiffens the melt so it stays where you put it. Kaolin and feldspar provide alumina.
Every commercial glaze, every ancient recipe, every modern studio formula is a variation on this triangle: silica to make glass, flux to melt it, alumina to hold it in place.
Glaze Application Methods
Dipping. Mix glaze to a thick cream consistency. Hold the bisque-fired piece with tongs or your fingers and dip it into the glaze bucket. Pull it out, rotate, and re-dip to cover any finger marks. This is the fastest and most uniform method for round forms.
Brushing. Apply with a wide, soft brush in three coats, each at right angles to the last. Brushing produces visible brush strokes unless the glaze is formulated with a suspension agent (CMC gum). Useful for decorative effects and for glazing specific areas.
Pouring. Hold the piece over a bucket and pour glaze over it from a cup. Rotate to cover. Pouring works well for the inside of tall, narrow forms that cannot be dipped.
Spraying. Requires a spray booth with exhaust ventilation. Produces the most uniform coat. Used primarily in production settings. Not practical for homestead work without purpose-built equipment.
Wax Resist
Before glazing, apply melted paraffin wax or commercial wax resist to the bottom of every piece — the foot ring and the entire bottom surface. Glaze that reaches the bottom of a pot will fuse it permanently to the kiln shelf during firing. Removing a pot glued to a shelf usually destroys both.
Food Safety — Lead-Free Glazes
Lead oxide was the traditional low-fire flux for thousands of years. It produces brilliant, smooth, colorful glazes at earthenware temperatures. It also leaches into food and drink, particularly in acidic conditions (vinegar, citrus, wine, tomato). Lead glazes on functional ware are a genuine health hazard.
Rule: all functional ware must use lead-free glaze. Commercial food-safe glazes are labeled as such. For custom formulations, avoid any ingredient containing lead (red lead, white lead, galena, litharge). At stoneware temperatures (Cone 6 and above), lead is unnecessary — calcium, sodium, and potassium fluxes produce excellent results without toxicity.
Other metals to watch for in functional ware glazes:
- Barium carbonate — toxic if unfired; safe if fully incorporated into a mature glaze melt. Risky for beginners.
- Copper oxide — safe in oxidation-fired glazes; can leach in reduction-fired glazes at low temperatures. Test before using on food ware.
- Cadmium and selenium — used for bright red and orange glazes. Toxic. Not for food surfaces.
When in doubt, use a commercial food-safe glaze from a reputable supplier and fire it to the recommended temperature. Underfired glaze does not mature, does not form a stable glass, and can leach.
8. Kiln Types
A kiln is an insulated box that gets hot. Every kiln design in history is a variation on that idea. The differences are fuel source, atmosphere control, and maximum temperature.
Electric Kiln
The most common studio kiln. Heating elements (nichrome or kanthal wire coils) line the interior walls. Fires in oxidation atmosphere only (plenty of oxygen). Clean, consistent, programmable with a digital controller. Maximum temperature typically Cone 10 (2,345°F) for kanthal elements, Cone 8 (2,280°F) for nichrome. Requires 240V electrical service for kilns larger than test size. Operating cost: approximately $15–$50 per firing depending on kiln size and local electricity rates.
Advantages: precise temperature control, automatic shut-off, no combustion exhaust, can be used indoors with adequate ventilation.
Disadvantages: no reduction atmosphere (limits some glaze effects), element replacement costs ($100–$300 every 50–200 firings), electricity cost, size limited by available amperage.
Gas Kiln (Natural Gas or Propane)
Burns gas through burner ports. Can fire in either oxidation (excess air) or reduction (restricted air, producing carbon monoxide in the kiln atmosphere). Reduction atmosphere creates distinctive glaze effects impossible in electric kilns — copper reds, celadon greens, carbon trapping. Maximum temperature: Cone 10+ easily.
Advantages: reduction firing capability, lower fuel cost per firing than electric at scale, faster firing possible.
Disadvantages: requires outdoor placement or purpose-built chimney, combustion exhaust, more attention during firing, less precise temperature control without instrumentation.
Wood-Fired Kiln
The original kiln fuel. Wood ash from the fire deposits on the pottery and melts into a natural ash glaze — the signature aesthetic of wood firing. Firing takes 12–72 hours depending on kiln size and target temperature. Requires enormous quantities of wood (a cord or more per firing for a large kiln). Labor-intensive: the fire must be fed constantly.
Advantages: ash glaze effects unavailable from any other method, deep historical connection, uses a renewable fuel.
Disadvantages: extremely labor-intensive, requires large wood supply, smoke output substantial, long firing cycle.
Pit Firing
The oldest method. Pots are placed in a pit in the ground, surrounded by combustible material (wood, dung, sawdust, leaves), and burned. Temperature is uncontrolled and rarely exceeds 1,500°F. Produces porous, smoke-blackened ware. Not suitable for functional food ware unless the vessels will be used only for dry storage. Beautiful decorative surfaces.
Raku Firing
A specialized technique where glazed ware is pulled from the kiln at peak temperature (approximately 1,800°F) with long metal tongs and placed into a container of combustible material (sawdust, newspaper) that ignites on contact. The lid is closed, creating a heavy reduction atmosphere. The thermal shock and carbon penetration produce metallic lusters, crackle patterns, and dramatic surface effects. Raku ware is porous, fragile compared to stoneware, and not food-safe. It is a decorative technique.
9. DIY Kiln Construction — Fire Brick Kiln with Propane Burner
A homestead potter needs a kiln that fires to at least Cone 06 (1,830°F) for bisque and ideally to Cone 6 (2,232°F) for stoneware glaze firings. A propane-fired kiln built from insulating fire brick meets both requirements at a materials cost of $400–$800.
Materials
| Item | Quantity | Approximate Cost |
|---|---|---|
| Insulating fire brick (IFB), K-23 or K-26 rated | 100–150 bricks | $2–$4 each |
| Hard fire brick (for floor, 2 layers) | 20–30 bricks | $3–$5 each |
| High-temperature morite or refractory cement | 1–2 buckets | $25–$40 each |
| Kiln shelf (silicon carbide or cordierite) | 2–3 shelves | $30–$60 each |
| Kiln posts (various heights) | 12–18 posts | $3–$8 each |
| Propane burner — venturi type, 60,000–100,000 BTU | 1–2 burners | $80–$200 each |
| Propane tank (20 lb or 100 lb) | 1 | $30–$200 |
| Pyrometric cones (Cone 06, Cone 6, Cone 10) | Assorted | $15–$25 |
| Thermocouple with digital readout (Type K) | 1 | $50–$150 |
| Angle iron or steel channel for frame | 20–30 linear ft | $30–$60 |
| Ceramic fiber blanket (for lid, 1 inch) | 1 roll | $40–$80 |
Design
The simplest effective design is a top-loading catenary arch kiln or a front-loading updraft box kiln. For a first build, the updraft box is simpler.
Interior dimensions. 18 inches wide x 18 inches deep x 24 inches tall provides roughly 4.5 cubic feet of firing chamber — enough for a dozen mugs or 3–4 medium bowls per firing.
Wall construction. Stack K-23 insulating fire brick in a running bond pattern (staggered joints) with refractory cement at the joints. Wall thickness: one brick width (4.5 inches) is adequate for Cone 6 firing. For Cone 10, double the wall to two brick widths or add 1 inch of ceramic fiber blanket on the exterior.
Floor. Two layers of hard fire brick laid flat. Hard brick on the floor withstands the weight of kiln furniture and resists damage from dropped glaze.
Burner port. Cut a rectangular opening at the base of one wall, sized to match the burner nozzle. The burner fires horizontally into the kiln. The flame path should enter tangentially — angled along the wall rather than aimed directly at the ware. This creates a circular flame path inside the kiln and heats more evenly.
Flue. A 4-inch opening in the top or rear of the kiln allows combustion gases to exit. The flue can be as simple as spacing two top-course bricks apart. A damper (a flat piece of kiln shelf slid over the flue opening) controls draft. Closing the damper restricts airflow and creates a reduction atmosphere.
Lid. A steel frame filled with ceramic fiber blanket, hinged at the back. Alternatively, a slab of insulating fire brick set on top. The lid must seal but need not be airtight — a small gap is acceptable.
Construction Steps
- Level the site. Place the kiln on a concrete pad, patio pavers, or a bed of compacted gravel. The kiln must be level. It must be outdoors or in a well-ventilated open structure. Minimum 10 feet from any combustible building wall.
- Lay the floor. Two layers of hard fire brick, dry-stacked (no morite needed for the floor). Check level.
- Build the walls. Dry-stack or mortar K-23 bricks in running bond. Leave the burner port opening on one side at floor level. Leave the flue opening at the top of the opposite wall or in the lid.
- Install the burner. Mount the venturi burner on a stand aimed at the burner port. Connect to the propane tank with a high-pressure regulator rated for the burner's BTU output. The burner should sit 2–4 inches back from the port so it draws secondary air into the flame.
- Build the lid. Weld or bolt a steel angle-iron frame slightly larger than the kiln opening. Line the underside with 1 inch of ceramic fiber blanket held in place by stainless steel pins (pushed through the blanket into drilled holes in the frame).
- Install thermocouple. Drill a 1/4-inch hole through the wall at mid-height. Insert the thermocouple probe so the tip extends 2 inches into the firing chamber. Connect to the digital readout placed outside the kiln.
- Cure the kiln. First firing is a slow cure to drive moisture from the bricks and mortar. Fire to 500°F over 4 hours, hold 1 hour, cool naturally. Second cure fire to 1,000°F over 4 hours. Third cure fire to 1,500°F. After the cure cycle, the kiln is ready for use.
Safety
- Propane is heavier than air. Never fire in an enclosed space, a basement, or a pit. The kiln must have open air circulation underneath and around it.
- The exterior of the kiln will reach 300–500°F during a high fire. Keep children, animals, and combustibles away. A 4-foot clear zone minimum.
- Wear welding-grade eye protection (shade 3 or higher) when looking through the peephole at temperature. Infrared radiation at kiln temperatures causes cataracts with repeated exposure.
- Have a fire extinguisher rated for gas fires (Class B) within 20 feet.
- Never leave a gas kiln firing unattended during the first 2 hours when the kiln atmosphere is establishing.
10. Functional Ware — Making Pottery You Can Eat From
The difference between a decorative pot and a functional pot is that the functional pot must not poison you, must not crack when filled with hot liquid, and must not absorb food and harbor bacteria.
Food-Safe Requirements
- Mature glaze. The glaze must be fired to its intended temperature. An underfired glaze has an open, porous surface that can leach metals and harbor bacteria. A properly fired glaze is a continuous glass layer with no pinholes, crawling, or bare spots.
- Lead-free formulation. Covered in Section 7. No exceptions for food-contact surfaces.
- No crazing. Crazing is a network of fine cracks in the glaze surface caused by a mismatch between the thermal expansion of the glaze and the clay body. A crazed surface allows moisture and bacteria to penetrate. If a glaze crazes, adjust the formula (reduce the flux or increase silica) or switch to a different glaze.
- Vitrified body preferred. Stoneware and porcelain fired to maturity are vitrified — the body itself is waterproof even without glaze. Earthenware is porous and depends entirely on the glaze for its moisture barrier. For food ware, stoneware is the safer choice.
Thermal Shock Resistance
A mug filled with boiling water. A baking dish moved from oven to counter. A teapot rinsed with cold water while still warm. All of these create thermal stress. Thermal shock resistance depends on:
- Wall thickness uniformity. Thick and thin spots in the same wall create differential expansion. Thin spots expand faster than thick spots, and the interface cracks.
- Clay body composition. Bodies with some grog (pre-fired clay ground to granules and mixed back in) have better thermal shock resistance because the grog particles interrupt crack propagation.
- Glaze fit. A glaze in slight compression on the body (glaze has slightly lower thermal expansion than the body) resists thermal shock better than a glaze in tension.
Testing
Lemon juice test. Place a few drops of lemon juice on the glazed surface. Leave 24 hours. Wipe clean. If the glaze surface is etched, stained, or dulled where the lemon juice sat, the glaze is not sufficiently acid-resistant for food use.
Boiling water test. Fill the finished piece with boiling water. Let it sit for 10 minutes. Pour it out and immediately fill with ice water. Repeat three times. If the piece survives without cracking or crazing, it has adequate thermal shock resistance for kitchen use.
Absorption test (for the body, not the glaze). Weigh a bisque-fired, unglazed test tile. Soak it in water for 24 hours. Weigh it again. Absorption = (wet weight − dry weight) / dry weight × 100. Mature stoneware absorbs less than 2%. Earthenware absorbs 5–15%. Below 2% absorption, the body is considered vitrified and suitable for food ware even if a glaze defect occurs.
11. Sources
- Rice, Prudence M. Pottery Analysis: A Sourcebook. University of Chicago Press, 2nd edition, 2015. — Standard reference for clay mineralogy, forming techniques, and firing science.
- Rhodes, Daniel. Clay and Glazes for the Potter. Revised edition, Chilton Book Company, 1973. — The foundational text on glaze chemistry for studio potters. Every formula in the glaze section derives from principles Rhodes codified.
- Olsen, Frederick L. The Kiln Book. 3rd edition, University of Pennsylvania Press, 2001. — Comprehensive kiln design reference covering gas, wood, electric, and experimental kilns with construction drawings.
- Hamer, Frank and Janet Hamer. The Potter's Dictionary of Materials and Techniques. 6th edition, A&C Black, 2015. — Definitions and explanations for every material and process in ceramics.
- Cardew, Michael. Pioneer Pottery. Oxford University Press, 1969. — Field manual for building and firing kilns in developing regions using locally sourced materials. Most relevant to the DIY kiln section.
- Shepard, Anna O. Ceramics for the Archaeologist. Carnegie Institution of Washington, Publication 609, 1956. — Archaeological perspective on clay science, temper, forming, and firing. Source for earliest ceramic vessel dating.
- Wu, Xiaohong, et al. "Early Pottery at 20,000 Years Ago in Xianrendong Cave, China." Science, vol. 336, no. 6089, 2012, pp. 1696–1700. — Primary source for the 20,000-year dating of the oldest known ceramic vessel.
- Chappell, James. The Potter's Complete Book of Clay and Glazes. Revised edition, Watson-Guptill, 2004. — Practical glaze recipe collection with mixing instructions and firing schedules.
- Troy, Jack. Wood-Fired Stoneware and Porcelain. Chilton Book Company, 1995. — Reference for wood-fired kiln design, firing schedules, and ash glaze formation.
- Zakin, Richard. Ceramics: Mastering the Craft. 2nd edition, Krause Publications, 2001. — Intermediate-to-advanced forming and firing techniques with troubleshooting diagnostics.