garden-design
Root Cellar Construction
Tags: `[practical-skills]` `[facility-design]` `[advanced]`
Tags: [practical-skills] [facility-design] [advanced]
1. Introduction — Passive Refrigeration Using the Earth's Thermal Mass
Every piece of land with soil deeper than the frost line sits on top of a free, perpetual cooling system. The ground at 4–6 feet below grade in the temperate United States holds a temperature between 50°F and 57°F year-round — summer and winter, drought and deluge. This temperature stability exists because soil is a massive thermal battery: it absorbs heat slowly and releases it slowly, damping the wild swings of surface air temperature into a nearly flat line at depth.
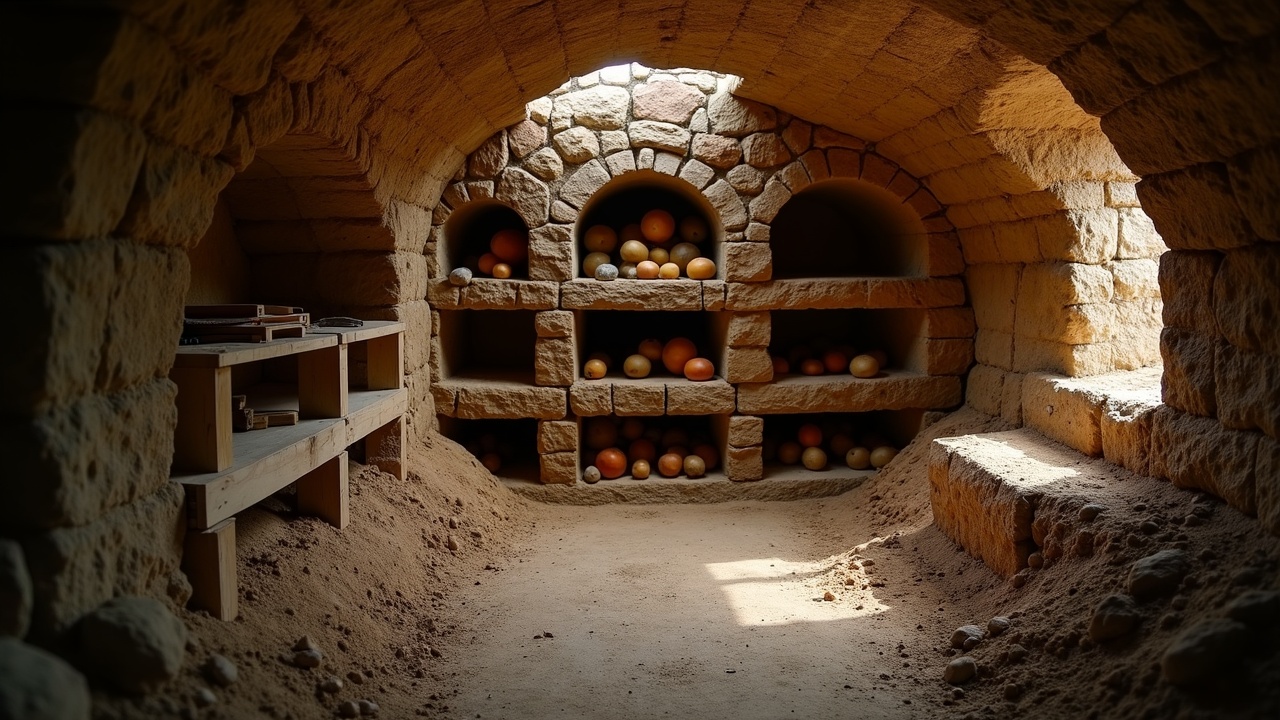
A root cellar is a structure designed to capture that thermal stability and use it to store food. The concept is older than any building technique still practiced — Australians were storing food in underground pits 40,000 years ago, and every agricultural civilization from Mesopotamia to colonial New England built some version of the same idea. The physics are simple. Surround a storage space with enough earth and thermal mass, ventilate it properly, and you get a space that holds 32–40°F in winter and 50–60°F in summer with no energy input whatsoever.
The USDA's Handbook 66, which governs commercial cold storage of fruits and vegetables, specifies optimal storage conditions for most root vegetables at 32°F and 95% relative humidity. Apples store best at 30–32°F and 90% humidity. Potatoes at 38–40°F and 90% humidity. Cabbage at 32°F and 95% humidity. These are the exact conditions a well-designed root cellar produces naturally in climates with cold winters. Commercial cold storage spends enormous sums reproducing what a hole in a hillside does for free.
What killed the root cellar was not technology — it was architecture. When American houses moved from unheated fieldstone basements to heated, finished basements in the mid-20th century, the thermal bridge between the house and the earth was broken. A heated basement stays at 65°F, which is useless for food storage. Simultaneously, suburban lots shrank to the point where a separate underground structure was impractical. The refrigerator filled the gap. But for anyone with even a quarter-acre of land and a slope or a backhoe, the root cellar remains the single most cost-effective food storage system ever devised.
Cost context. A walk-in root cellar built into a hillside with poured concrete walls runs $3,000–$8,000 in materials for a 8x10-foot interior. A buried culvert cellar using a repurposed corrugated steel pipe costs $1,500–$4,000. A basement conversion — insulating and ventilating a corner of an existing unheated basement — costs $200–$800. All three store 1,000–3,000 pounds of produce through a full winter. The equivalent commercial cold room with refrigeration equipment, insulated panels, and electrical service starts at $15,000.
2. Site Selection — Drainage, Slope, Frost Line, and Soil Type
Site selection is where root cellars succeed or fail. A well-sited cellar in mediocre soil outperforms a beautifully built cellar in a bad location every time. Four factors dominate.
Slope and Orientation
The ideal site is a north-facing hillside. North-facing slopes receive the least direct solar radiation in the Northern Hemisphere, which keeps soil temperatures cooler in summer. A hillside also allows a walk-in design: you excavate horizontally into the slope, which means the roof, walls, and floor are all surrounded by earth. This is the highest-performing configuration because it maximizes the ratio of earth contact to exposed surface area.
If no hillside is available, the next best option is a flat site where you can excavate downward and berm earth over the top. This works well but requires more drainage engineering because you are putting a structure below grade in flat terrain — water has nowhere to go unless you route it.
South-facing slopes are the worst option. They absorb summer heat all day and can push soil temperatures at shallow depth above 65°F, which is too warm for most root vegetable storage.
Frost Line
Your local frost line determines how deep the structure needs to be to achieve stable temperatures. The International Building Code publishes frost depth data by region:
| Region | Approximate Frost Depth |
|---|---|
| Gulf Coast (TX, LA, FL) | 6–12 inches |
| Mid-South (TN, NC, AR) | 12–24 inches |
| Mid-Atlantic (VA, PA, MD) | 24–36 inches |
| Upper Midwest (MN, WI, MI) | 42–72 inches |
| Northern Plains (ND, MT) | 60–80+ inches |
The ceiling of your root cellar should be at or below the frost line. The floor should be at least 18 inches below it. In practice, this means most root cellars in the continental US need a minimum of 3 feet of earth cover over the roof, and the floor should be 6–8 feet below finished grade.
Drainage
Water is the number one killer of root cellars. A cellar that collects water becomes a cistern, not a food storage facility. Evaluate drainage before anything else:
- Soil type. Sandy loam and gravelly soils drain well and are ideal. Heavy clay holds water against the walls and requires extensive drainage infrastructure. Pure sand drains too fast and provides poor thermal mass.
- Water table. The floor of the cellar must be at least 2 feet above the seasonal high water table. Dig a test hole to the planned floor depth in spring (when water tables peak) and monitor it for a week. If water seeps in, the site is too wet or the design needs to go shallower.
- Surface drainage. Grade all surrounding terrain to slope away from the cellar entrance at a minimum 2% slope for 10 feet in every direction. Install a swale or French drain uphill of the cellar to intercept surface runoff before it reaches the structure.
Proximity
Build within reasonable carrying distance of the house — you will visit the cellar multiple times per week in winter. A 100-foot walk is convenient. A 500-foot walk in January sleet is not. But do not build directly against a heated structure; the heat will bleed through shared walls and raise cellar temperatures.
3. Design Types — Four Approaches from Simple to Permanent
Type 1: Walk-In Hillside Cellar
The gold standard. Excavate horizontally into a north-facing slope, construct walls and ceiling of poured concrete or concrete block, install a proper door at the face, and backfill with earth over the top and sides. The result is a room surrounded on five sides by earth with only the door face exposed.
- Pros: Best temperature stability, easiest ventilation (natural draft from low door to high rear vent), most durable, largest practical storage volume.
- Cons: Requires a suitable hillside, heaviest construction, highest material cost.
- Typical size: 8x10 to 10x12 feet interior, 7-foot ceiling.
- Cost range: $4,000–$10,000 in materials.
Type 2: Buried Culvert Cellar
A corrugated steel or concrete culvert pipe (typically 6–10 feet diameter) buried horizontally with 3–4 feet of earth cover. One end is sealed with a concrete or wood bulkhead; the other end is fitted with an insulated door. Interior shelving lines both walls.
- Pros: Fast construction (the pipe is the structure), excellent earth contact, relatively affordable, extremely strong against soil loading.
- Cons: Limited interior height in smaller diameters, curved walls complicate shelving, steel culverts must be coated to prevent corrosion, condensation management is critical.
- Typical size: 8-foot diameter x 12–16 feet long.
- Cost range: $1,500–$5,000 depending on culvert source.
Type 3: Basement Conversion
Partition an unheated corner of an existing basement with insulated stud walls, install ventilation to the exterior, and use the existing below-grade walls and floor as the thermal mass. This only works in basements that are not heated — a finished, heated basement is too warm.
- Pros: Lowest cost, no excavation, no waterproofing (the basement already handles that), convenient access from inside the house.
- Cons: Temperature depends on basement conditions, typically warmer than a true root cellar (40–50°F rather than 32–40°F), works best in climates with cold winters, limited size.
- Typical size: 6x8 to 8x10 feet.
- Cost range: $200–$1,000.
Type 4: Above-Grade Insulated / Bermed Cellar
For sites with high water tables or shallow bedrock where excavation is impractical. Build a heavily insulated structure at grade level, then berm earth against the walls and over the roof to at least 3 feet of depth. Essentially, you build the cellar and then bury it.
- Pros: Works on flat, wet, or rocky sites; no deep excavation; can be built with standard construction skills.
- Cons: Highest exposed surface area, most vulnerable to summer heat, requires the most insulation, drainage around the base is critical to prevent frost heave.
- Typical size: 8x10 feet.
- Cost range: $3,000–$8,000.
4. Construction — Excavation, Walls, Floor, Roof, Waterproofing, and Drainage
This section covers the walk-in hillside cellar as the primary reference design. Adapt dimensions and methods for other types as needed.
Excavation
Excavate into the hillside to create a cavity approximately 2 feet wider and 2 feet longer than the intended interior dimensions (to accommodate wall thickness). The floor should be excavated 6–8 inches deeper than finished floor height to allow for a gravel drainage bed.
- Slope the excavation floor toward the rear or one side at 1/4 inch per foot to a sump point. This is your gravity drain for any water that infiltrates.
- Leave a shelf at the top of the excavation on each side for roof bearing if using precast concrete planks.
- Avoid over-excavating. Disturbed soil behind the walls settles differently than undisturbed soil and creates channels for water. Cut clean and build walls tight against the excavation face.
Walls
Three options, ranked by durability:
Poured concrete (best). 8-inch walls with #4 rebar at 16-inch centers both ways. Use a minimum 3,500 PSI mix with a water-reducing admixture for denser, more waterproof concrete. Poured walls are monolithic — no joints to leak. Strip forms after 48 hours minimum, cure for 7 days before backfilling.
Concrete masonry units (CMU / cinder block). 8-inch or 12-inch block laid with Type S mortar. Fill every core with grout and place #4 rebar vertically at 48-inch centers. Apply two coats of masonry waterproofing to the exterior face before backfilling. CMU walls are strong in compression but weaker than poured concrete against lateral soil pressure, so 12-inch block is preferred for depths over 6 feet.
Stone. Traditional but labor-intensive. Dry-laid stone (no mortar) works for low-pressure applications where the cellar is not deeply buried. Mortared stone with a rubble core is stronger. Stone walls should be a minimum of 16 inches thick. They provide excellent thermal mass but are the hardest to waterproof.
Floor
Do not pour a concrete floor unless you want moisture problems. The floor of a root cellar should be permeable to allow the earth's natural moisture to rise into the space, maintaining the high humidity that produce requires.
Preferred floor: 4–6 inches of clean, washed gravel (3/4-inch crushed stone) over compacted subgrade. The gravel provides drainage, keeps feet dry, and allows moisture to migrate upward. If the subgrade is poorly drained, install a 4-inch perforated drain pipe in a gravel-filled trench at the base of each wall, sloped at 1/4 inch per foot to daylight or a sump.
If the site is excessively wet, you can pour a concrete floor over a drainage layer, but you will then need to introduce moisture artificially (wet burlap on the floor, pans of water) to keep humidity above 85%.
Roof
The roof must support the weight of 3–4 feet of earth cover plus live loads (foot traffic, equipment, snow). This is not a light-duty structure.
Poured reinforced concrete (preferred). 6-inch minimum thickness with #5 rebar at 12-inch centers both ways, supported by the tops of the walls. For spans over 8 feet, increase to 8 inches or add a center beam. The concrete roof is the most durable option and doubles as waterproofing substrate.
Precast concrete planks. Faster than pouring in place. Planks are set on the wall tops and the joints are grouted. Requires crane access to the site.
Treated timber with concrete topping. Pressure-treated 6x8 or 8x8 beams spanning the walls, covered with 2-inch treated decking, then a 3-inch concrete topping slab. This is lighter than a full concrete roof and easier to build without heavy equipment, but has a shorter lifespan (30–50 years versus 100+ for concrete).
Waterproofing
Apply waterproofing to all exterior concrete and masonry surfaces before backfilling. Two-step process:
- Dampproofing coat. Apply a bituminous (asphalt-based) dampproofing compound to all exterior wall and roof surfaces. This is the baseline moisture barrier.
- Waterproof membrane. Over the dampproofing, apply a sheet membrane (60-mil EPDM rubber or self-adhering bituminous membrane) on the roof and upper wall areas where hydrostatic pressure is greatest. Lap all seams at least 6 inches and seal with manufacturer-specified adhesive.
On the roof, install a drainage mat (dimpled polyethylene sheet) over the membrane before backfilling. This channels water laterally off the roof rather than letting it pool against the membrane.
Backfill and Drainage
Backfill against the walls with free-draining material — crushed stone or pit-run gravel — for the first 12 inches against the wall, then native soil for the remainder. The gravel layer acts as a drainage plane, conducting water down to the footing drain rather than letting it press against the waterproofing.
Install a French drain (4-inch perforated pipe in gravel-filled trench) at the base of each exterior wall, sloped to daylight downhill. On a hillside, also install a curtain drain 6–10 feet uphill of the cellar to intercept subsurface water before it reaches the structure.
5. Ventilation — Temperature and Humidity Control Without Electricity
Ventilation is the control system of a root cellar. Without it, you have a cold, damp hole that fills with carbon dioxide from respiring produce, develops mold, and fluctuates in temperature with no means of adjustment. With proper ventilation, you can regulate temperature within a 5°F window and maintain humidity between 85–95% — matching commercial cold storage.
The Two-Vent System
Every root cellar needs a minimum of two vents: one low intake and one high exhaust.
Low intake vent. Positioned near floor level on the coldest side of the cellar (typically the door wall or a north-facing wall). This vent introduces cool outside air. Run a 4-inch or 6-inch PVC or galvanized steel pipe from the exterior, entering the cellar within 12 inches of the floor. Extend the exterior end at least 12 inches above finished grade and cap it with a screened rain cap to keep out precipitation and rodents.
High exhaust vent. Positioned at ceiling level on the opposite side of the cellar from the intake. This vent exhausts warm, humid air driven upward by convection. Run a 4-inch or 6-inch pipe from the ceiling through the earth cover, extending at least 24 inches above finished grade. Cap with a screened rain cap.
How Convective Airflow Works
Warm air rises. In a root cellar, the produce itself generates small amounts of heat through cellular respiration. This heat warms the air near the produce, which rises to the ceiling and exits through the high exhaust vent. As it exits, it draws cooler outside air in through the low intake vent. This creates a continuous, passive convection loop — no fan required.
The temperature difference between the interior air (warmed by produce and earth) and the exterior air (cold in winter) drives the airflow rate. Larger temperature differentials produce stronger draft. In summer, when exterior air may be warmer than interior air, the convection reverses or stalls. Close the vents partially or fully in summer to prevent warm air intrusion.
Managing Temperature
- Target range: 32–40°F for most root vegetables in winter. 45–55°F is acceptable for short-term storage of most crops.
- Too warm: Open both vents fully during cold nights. Close them during warm days. In extreme cases, open the door on cold nights to flush the space with cold air, then close everything at dawn.
- Too cold (approaching freezing): Close the intake vent partially or fully. Leave the exhaust vent cracked to allow CO2 and ethylene to escape. If freezing is persistent, place jugs of water inside — the water's latent heat of fusion releases energy as it freezes, buffering the air temperature at 32°F.
- Install a min/max thermometer inside the cellar and check it daily during the first full year. After one season, you will know exactly how much vent adjustment each weather pattern requires.
Managing Humidity
- Target range: 85–95% relative humidity for most root vegetables.
- Too dry (below 80%): Sprinkle water on the gravel floor. Place pans of water on the floor. Dampen burlap sacks and drape them over shelving or hang them from the ceiling.
- Too humid (above 95%, visible condensation on ceiling and walls): Increase ventilation to exchange humid interior air with drier exterior air. This is most effective when outside air is cold and dry. If condensation persists, check for water infiltration through walls or floor — that is a construction problem, not a ventilation problem.
Install a hygrometer alongside the thermometer. A simple dial hygrometer costs under $15 and removes all guesswork from humidity management.
6. Shelving and Storage Layout — Separation, Airflow, and Organization
Shelving Design
- Material: Untreated hardwood slats (oak, maple, locust) or rot-resistant softwood (cedar, redwood). Avoid pressure-treated lumber — the chemicals can leach into produce at high humidity. Metal wire shelving (stainless steel or epoxy-coated) works well and allows maximum air circulation.
- Construction: Shelves should be slatted or wire mesh, never solid. Air must circulate around and under every container. Leave at least 1 inch between the wall and the back of the shelving to prevent moisture trapping and allow airflow.
- Spacing: 14–18 inches between shelf levels for most produce. Bottom shelf at least 4 inches off the floor.
- Depth: 16–24 inches deep. Deeper shelves make it hard to access items at the back.
Storage Containers
- Root vegetables (carrots, beets, turnips, parsnips): Store in bins or boxes layered with damp sand, sawdust, or peat moss. The packing material maintains contact humidity around the roots, preventing desiccation. Do not wash roots before storage — the soil film protects them.
- Potatoes: Store in burlap sacks, wooden crates, or baskets in complete darkness. Light exposure causes greening (solanine production), which is toxic. Cover with burlap if shelving is open.
- Onions and garlic: Require lower humidity (60–70%) than root vegetables. Store in mesh bags or braids hung from ceiling hooks in the driest, most ventilated area of the cellar — typically near the exhaust vent.
- Apples and pears: Store on shelves in single layers, not touching. Wrap individual fruits in newspaper for long-term storage to slow ethylene transfer between fruits and prevent one rotten apple from spoiling its neighbors.
- Canned goods and preserves: Store on upper shelves where temperature is slightly warmer and more stable. Glass jars tolerate root cellar conditions well. Check lids for rust annually.
Ethylene Separation
This is the most important storage rule and the most frequently ignored. Ethylene gas (C2H4) is a ripening hormone produced by certain fruits — especially apples, pears, and tomatoes. Ethylene accelerates spoilage in ethylene-sensitive vegetables: carrots lose bitterness but go limp, potatoes sprout prematurely, cabbage yellows and drops leaves.
Keep ethylene producers physically separated from ethylene-sensitive crops. The best approach is to store apples and pears on one side of the cellar (near the exhaust vent, so ethylene exits the space) and root vegetables on the opposite side (near the intake vent, where fresh air enters). If the cellar is small, store apples in a separate enclosed container or a partitioned section with its own ventilation path.
| Category | Crops | Notes |
|---|---|---|
| Ethylene producers (store near exhaust) | Apples, pears, tomatoes, peaches, plums | Wrap individually if storing near sensitive crops |
| Ethylene sensitive (store near intake) | Carrots, potatoes, cabbage, broccoli, leafy greens | Keep in sealed bins with damp packing material |
| Ethylene neutral | Onions, garlic, beets, turnips, squash | Flexible placement; onions prefer lower humidity |
7. Crop Storage Guide — Temperature, Humidity, and Expected Shelf Life
The following table covers the most commonly root-cellared crops. All data derived from USDA Handbook 66 (The Commercial Storage of Fruits, Vegetables, and Florist and Nursery Stocks) and the Bubel root cellaring literature.
| Crop | Optimal Temp (°F) | Optimal Humidity (%) | Expected Storage Life | Notes |
|---|---|---|---|---|
| Potatoes | 38–40 | 90–95 | 4–6 months | Total darkness required. Below 36°F converts starch to sugar. |
| Carrots | 32–34 | 95–98 | 4–6 months | Pack in damp sand or sawdust. Remove tops before storage. |
| Beets | 32–34 | 95–98 | 3–5 months | Leave 1 inch of stem. Pack like carrots. |
| Turnips | 32–34 | 90–95 | 4–5 months | Wax coating extends life. Strong odor — separate from fruits. |
| Parsnips | 32–34 | 95–98 | 4–6 months | Improve in flavor after frost. Pack in damp sand. |
| Rutabagas | 32–34 | 90–95 | 4–6 months | Wax-dipped for commercial storage. Damp sand works at home scale. |
| Cabbage | 32–34 | 90–95 | 3–4 months | Wrap in newspaper. Odor transfers — isolate from other crops. |
| Onions | 32–36 | 60–70 | 6–8 months | Must be fully cured before storage. Hang in mesh bags. |
| Garlic | 32–36 | 60–70 | 6–8 months | Cure 2–3 weeks before storage. Keep dry. |
| Winter squash | 50–55 | 50–70 | 3–6 months | Needs warmer, drier conditions than most root crops. |
| Pumpkins | 50–55 | 50–70 | 2–3 months | Same conditions as winter squash. Stem intact extends life. |
| Apples | 30–32 | 90–95 | 4–6 months | Ethylene producer. Wrap individually. Separate from vegetables. |
| Pears | 30–32 | 90–95 | 2–3 months | Pick slightly underripe. Ripen at room temp as needed. |
| Celery | 32–34 | 95–98 | 2–3 months | Stand upright in container with moist sand at base. |
| Horseradish | 30–32 | 95–98 | 10–12 months | Pack in damp sand. Extremely long keeper. |
| Leeks | 32–34 | 90–95 | 2–3 months | Stand upright in bucket of damp sand. |
| Salsify | 32–34 | 95–98 | 2–4 months | Pack in damp sand like carrots. |
| Sweet potatoes | 55–60 | 85–90 | 4–6 months | Require curing at 80–85°F for 10 days before storage. Do not refrigerate. |
| Kohlrabi | 32–34 | 95–98 | 2–3 months | Remove leaves. Pack in damp material. |
| Celeriac | 32–34 | 95–98 | 3–4 months | Pack in damp sand. Trim roots but do not peel. |
| Brussels sprouts | 32–34 | 90–95 | 3–5 weeks | Pull whole stalk and stand in bucket of water. |
| Endive / Escarole | 32–34 | 90–95 | 2–3 weeks | Replant in sand in cellar for extended storage. |
| Grapes | 31–32 | 85–90 | 1–2 months | Lay in single layer. Do not stack. |
| Dried beans | 32–50 | 40–60 | 12+ months | Must be fully dry before storage. Sealed containers. |
| Nuts (in shell) | 32–40 | 65–75 | 12+ months | Store in mesh bags or baskets for air circulation. |
8. Common Problems — Diagnostics and Fixes
Condensation on Ceiling and Walls
Cause: Warm, humid air contacting cold surfaces (summer), or inadequate ventilation allowing humidity to exceed 95%. Fix: Increase ventilation during cool, dry periods. In summer, keep vents closed during the day and open only at night. If condensation drips onto produce, install a drip channel (a V-shaped piece of galvanized flashing) on the ceiling to route condensation to the walls rather than directly onto food. A pitched ceiling (sloped toward the walls rather than flat) prevents drip points.
Mold
Cause: Stagnant air + humidity above 95% + organic matter. Mold spores are always present; they grow when conditions favor them. Fix: Improve air circulation — add a small battery-powered fan if convective ventilation is insufficient. Remove and discard any moldy produce immediately. Wash shelving annually with a white vinegar solution (1:1 with water). Do not bleach — bleach residue off-gasses in enclosed spaces. Check ventilation pipes for blockages (bird nests, ice, debris).
Rodent Entry
Cause: Mice and rats are drawn to any concentrated food source. They can enter through gaps as small as 1/4 inch. Fix: Screen all ventilation pipe openings with 1/4-inch hardware cloth — not window screen (mice chew through it) and not chicken wire (too large). Seal all joints between wall and floor, wall and ceiling, and around pipe penetrations with hydraulic cement or steel wool packed with caulk. Keep the door threshold tight — a metal sweep or rubber gasket eliminates the gap. Place snap traps (not poison) inside the cellar at entry points. Poison kills rodents inside the walls where they decompose and contaminate the space.
Freezing
Cause: Intake vent left open during extended sub-zero weather, or insufficient earth cover over the roof. Fix: Close the intake vent when exterior temperatures drop below 20°F. Monitor interior temperature daily in deep winter. If freezing is chronic, the cellar needs more thermal mass: add earth cover to the roof, insulate the door more heavily, or install a light bulb on a thermostat (a 60-watt incandescent bulb in a ceramic fixture, wired to a thermostat set at 33°F, provides enough heat to prevent freezing in a 10x10 cellar during cold snaps — this is the one exception to the "no electricity" principle).
Excess Heat (Summer)
Cause: Insufficient earth cover, south-facing orientation, solar exposure on the door face, or inadequate depth below grade. Fix: Keep all vents closed during daytime in summer. Open vents only during the coolest hours (midnight to dawn). Add earth cover to the roof if less than 3 feet. Plant deciduous trees or install a shade structure on the south and west sides. If summer temperatures consistently exceed 55°F inside, the cellar is too shallow for the climate — it can still store squash, onions, and canned goods (which tolerate warmer conditions) but will not hold root vegetables through summer.
Ethylene Damage
Cause: Apples or other ethylene producers stored alongside sensitive crops. Fix: Physically separate ethylene producers from sensitive vegetables. If separation is not possible, increase ventilation to flush ethylene out of the space continuously. Store apples near the exhaust vent.
Off-Odors
Cause: Decomposing produce, turnip or cabbage volatiles, or poor ventilation. Fix: Inspect all stored produce weekly and remove anything showing soft rot. Store strong-smelling crops (turnips, cabbage, onions) in closed containers or separate from milder crops. Adequate ventilation prevents odor buildup.
9. Maintenance Schedule
Weekly (during storage season)
- Check min/max thermometer and hygrometer. Record readings.
- Inspect all produce for spoilage. Remove anything soft, moldy, or showing rot.
- Adjust vents based on weather forecast and interior conditions.
- Check rodent traps. Reset or replace as needed.
Monthly
- Inspect vent pipes for blockages (ice in winter, insects or bird nests in summer).
- Check floor drainage — no standing water should be present anywhere.
- Re-dampen sand or sawdust packing material if it has dried out.
- Wipe down any shelving showing mold spots with vinegar solution.
Annually (late summer, before storage season begins)
- Remove all remaining produce and packing materials.
- Scrub all shelving with white vinegar solution. Allow to dry completely.
- Replace sand or sawdust packing material with fresh stock.
- Inspect walls and ceiling for cracks, water stains, or efflorescence (white mineral deposits indicating water movement through concrete). Patch cracks with hydraulic cement.
- Inspect waterproofing at the door threshold and any pipe penetrations. Reseal as needed.
- Clear all drainage — flush French drains with a hose, clean the sump, verify daylight outlets are clear.
- Check vent screens for damage. Replace any torn or corroded hardware cloth.
- Inspect the door seal and insulation. Replace worn gaskets.
- Grade the area around the cellar entrance — soil settles over time and can reverse drainage slopes. Re-grade to maintain a positive slope away from the entrance.
Every 5 Years
- Inspect roof membrane and drainage mat (if accessible). Look for root penetration, membrane degradation, or crushed drain mat.
- Re-coat exterior masonry waterproofing at any accessible points.
- Assess structural condition of walls and roof. Look for spalling concrete, rusted rebar exposure, or wall displacement.
10. Sources
- USDA. The Commercial Storage of Fruits, Vegetables, and Florist and Nursery Stocks. USDA Handbook 66, revised 2016. — Primary reference for all crop storage temperature, humidity, and shelf life data.
- Bubel, Mike and Nancy. Root Cellaring: Natural Cold Storage of Fruits and Vegetables. Storey Publishing, 1979 (revised 1991). — The definitive homestead-scale reference for root cellar design, construction, and crop storage.
- U.S. Energy Information Administration. Residential Energy Consumption Survey (RECS). 2020. — Refrigerator energy consumption data.
- International Ground Source Heat Pump Association. Ground Temperature Data. Oklahoma State University. — Deep soil temperature data by region and depth.
- USDA Plant Hardiness Zone Map. USDA Agricultural Research Service, 2023 revision. — Regional climate data and frost depth reference.
- International Building Code. Table R403.3(1): Minimum Depth of Frost Protection. International Code Council, 2021. — Frost line depth by region.
- USDA Natural Resources Conservation Service. Conservation Practice Standard 378: Pond. 2005. — Referenced for excavation, drainage, and grading standards applicable to below-grade structures.
- Damerow, Gail. The Backyard Homestead Guide to Building. Storey Publishing, 2014. — Construction techniques for homestead-scale underground structures.
- National Weather Service. Frost Depth Observations. NOAA. — Historical frost penetration data by monitoring station.
- Eliot Coleman. Four-Season Harvest. Chelsea Green Publishing, 1999. — Practical context for extending storage seasons using passive structures.