garden-design
Stone Masonry and Dry Stack Construction
A comprehensive guide covering ---.
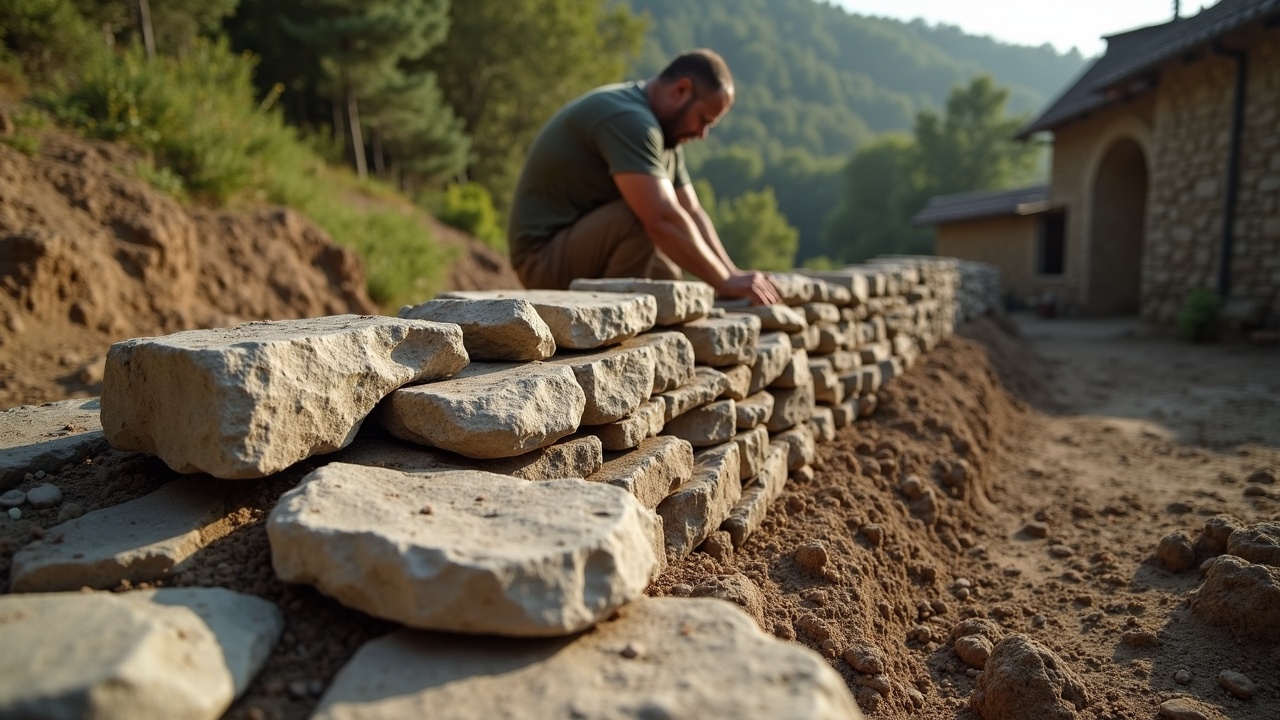
1. Introduction — The Oldest Building Technique That Still Outperforms
Every building material invented in the last 200 years is a substitute for stone. Concrete substitutes for stone. Cinder block substitutes for stone. Brick substitutes for stone. The substitutes exist because stone is heavy, slow to work, and demands skill. None of them exist because they are better. A dry-stacked stone wall built correctly will stand for a thousand years without maintenance. No modern material makes that claim. The oldest standing structures on earth — the megalithic temples of Malta, the walls of Jericho, the Inca stonework at Sacsayhuaman — are stone. They predate mortar. They predate the wheel. They still stand.
Two fundamental approaches divide the craft. Dry stack construction uses no mortar — stones are shaped and placed so that gravity and friction hold the wall together. Mortared stonework uses lime or cement mortar to bond stones. Both have specific applications where they excel, and the competent mason understands both.
Dry stack is not a primitive version of mortared work. It is a separate discipline with its own engineering principles. A dry stack wall flexes with ground movement. A mortared wall resists movement until it cracks. In seismically active ground, on expansive clay soils, on slopes that shift seasonally — dry stack outperforms mortar. The Great Wall of China used dry stack in its earliest sections. So did every stone sheep fold in Scotland, every terrace wall in the Andes, and every field boundary in Ireland. These walls have survived centuries of freeze-thaw, livestock pressure, and neglect because the technique is self-healing: when one stone shifts, its neighbors adjust.
Mortared stonework excels where rigidity matters — foundations that must bear concentrated loads, chimneys that must contain combustion gases, walls that must resist hydraulic pressure. Mortar also allows the use of irregular stone that would be unstable in dry stack. The two techniques are complementary, not competing.
This manual covers both. The goal is a reader who can assess a site, select stone, and build a structure that will outlast everything else on the property.
2. Stone Types — Properties, Uses, and What to Look For
Stone selection determines everything downstream. The wrong stone for the application creates more work, weaker structures, and uglier results. Five categories cover nearly every masonry application in North America.
Limestone
The most forgiving masonry stone. Limestone is sedimentary, formed from compressed marine organisms, and it cleaves in relatively flat planes. Hardness varies enormously — soft limestone (like Texas Hill Country cream limestone) cuts with a hand saw. Dense limestone (like Indiana limestone used in the Empire State Building) requires carbide tooling. Compressive strength ranges from 1,800 to 28,000 psi depending on density.
For the homestead builder, limestone's virtues are availability and workability. It shapes easily with a hammer and chisel. It stacks predictably because of its natural bedding planes. It weathers gracefully. Its primary limitation is acid sensitivity — limestone dissolves slowly in acid rain, and in high-rainfall acidic environments it erodes noticeably over decades. In alkaline or neutral climates (most of the American South and West), this is irrelevant.
Best uses: Retaining walls, foundations, fence posts, building walls, fireplace surrounds. The all-purpose masonry stone.
Sandstone
Sedimentary stone formed from compressed sand grains. Color ranges from cream to red to brown depending on iron content and binding minerals. Sandstone splits along bedding planes even more predictably than limestone, producing naturally flat faces that make excellent wall stone with minimal shaping.
The critical variable with sandstone is the binding agent. Silica-bound sandstone (quartzite) is extremely hard and durable — compressive strength up to 20,000 psi. Clay-bound sandstone is soft, porous, and disintegrates under freeze-thaw cycling. Test any sandstone before committing to a project: soak a sample in water for 24 hours, then freeze it. If it spalls or crumbles, it is clay-bound and unsuitable for structural work or any application exposed to weather.
Best uses: Wall veneer, flagstone paving, steps, dry stack walls in mild climates. Avoid for chimneys — most sandstone cannot handle sustained heat.
Granite
Igneous stone — formed from cooled magma. Extremely hard (compressive strength 14,000–40,000 psi), extremely dense, extremely durable. Granite resists freeze-thaw, acid rain, abrasion, and essentially everything else the natural world throws at it. The tradeoff is workability. Shaping granite by hand is brutal labor. It does not cleave predictably along planes the way sedimentary stones do. Splitting granite requires drilling a line of shallow holes and driving feather-and-wedge sets — a slow, precise process.
Fieldstone granite — rounded cobbles and boulders deposited by glacial action — is abundant across New England, the Upper Midwest, and the Pacific Northwest. These stones are already shaped by nature but their rounded surfaces make dry stacking difficult without significant chinking.
Best uses: Foundations, bridge abutments, steps, thresholds, any application requiring extreme durability and load-bearing. Overkill for garden walls unless it is free and local.
Fieldstone
Not a geological type but a construction category. Fieldstone is whatever stone lies on or near the surface — limestone, granite, sandstone, basalt, gneiss, whatever the local geology provides. It is unshaped, uncut, and ungraded. Every old farm in rocky country has fieldstone walls built by generations of farmers clearing their fields and stacking the results at the property line.
Fieldstone masonry requires the widest skill set because the mason must work with whatever the land offers. Round stones, flat stones, wedge-shaped stones, massive boulders, fist-sized chunks — a fieldstone wall uses all of them. The key skill is selection and placement, not shaping. A good fieldstone mason spends more time choosing the next stone than placing it.
Best uses: Garden walls, property boundaries, raised beds, retaining walls. The most economical masonry material because the land provides it free.
Flagstone
Flat stone — typically limestone, sandstone, or slate — naturally split into slabs 1 to 3 inches thick. Flagstone is the paving stone. Its natural flat surfaces need no finishing for walkways, patios, and step treads. Thickness determines span: 1-inch flagstone needs continuous support (sand or mortar bed), 2-inch flagstone can span 4–6 inches between supports, and 3-inch flagstone can span up to 12 inches.
Best uses: Patios, walkways, step treads, hearth stones, countertops. Not a wall-building stone — too thin for structural courses.
Quick Reference: Stone Selection
| Stone Type | Compressive Strength (psi) | Workability | Freeze-Thaw Resistance | Cost (per ton, quarry pickup) |
|---|---|---|---|---|
| Limestone (soft) | 1,800–6,000 | Excellent | Good | $25–$60 |
| Limestone (dense) | 8,000–28,000 | Good | Excellent | $40–$100 |
| Sandstone (silica-bound) | 8,000–20,000 | Good | Excellent | $35–$80 |
| Sandstone (clay-bound) | 1,500–4,000 | Excellent | Poor | $20–$50 |
| Granite | 14,000–40,000 | Poor | Excellent | $50–$150 |
| Fieldstone (mixed) | Varies | Moderate | Varies | Free–$30 |
| Flagstone | Varies by type | N/A (paving) | Varies | $200–$600 per pallet |
3. Tools — What You Need and What You Think You Need
Stone masonry requires fewer tools than most trades. The essential kit fits in a 5-gallon bucket. Everything beyond the essentials is a productivity multiplier, not a requirement.
Essential Tools
Stone hammer (3–4 lb). The primary shaping tool. A stone hammer has a flat face on one side and a chisel edge on the other. The flat face knocks off large protrusions. The chisel edge scores lines for controlled breaks. Do not substitute a ball-peen hammer or a claw hammer — the steel is wrong, the weight distribution is wrong, and the face geometry is wrong. A proper stone hammer costs $30–$60 and lasts decades.
Chisel set. Three chisels cover everything: a 2-inch flat chisel (called a bolster or brick chisel) for splitting, a 1-inch point chisel for detail work and cleaning joints, and a pitching chisel (wide, beveled) for removing large sections along a scored line. Carbide-tipped chisels hold their edge far longer than plain steel and are worth the cost difference. Full set: $40–$80.
Mason's line and pins. Nylon string stretched between steel pins driven into mortar joints or wedged into stone. This is the alignment reference. Every course gets checked against the line. Without it, walls wander. Cost: under $15.
Levels. A 4-foot spirit level for checking plumb and level on each course. A 2-foot level for checking individual stones. A torpedo level for tight spots. Digital levels are convenient but not necessary — the bubble has worked for 400 years.
Pointing trowel. For mortared work only. A narrow trowel (4–5 inches) for filling and finishing mortar joints. The wide mason's trowel used for brickwork is too large for most stone joints. Cost: $12–$25.
Productivity Multipliers
Angle grinder with diamond blade. Turns a 20-minute hand-shaping job into a 2-minute cut. Essential for hard stone (granite, dense limestone). A 4.5-inch grinder with a segmented diamond blade handles most cutting. Wear eye protection, hearing protection, and a respirator — stone dust is silica, and silicosis is permanent.
Hand-crank or hydraulic stone splitter. For large stones that need clean breaks along a predetermined line. Drill a line of holes, insert feather-and-wedge sets, tighten sequentially. The stone breaks along the drilled line. Rental cost: $50–$100/day. Purchase: $200–$800 depending on capacity.
Stone tongs / stone clamp. For lifting and placing stones over 80–100 lbs. Grips the stone mechanically so it can be lifted with a chain hoist, tractor, or skid steer. Prevents back injuries and crushed fingers. $40–$120.
Wheelbarrow with pneumatic tire. Moving stone by hand is the bottleneck in every masonry project. A solid-tire wheelbarrow on rough ground is punishment. Pneumatic tires absorb the jolts that dump loads and destroy wrists.
4. Dry Stack Principles — Two Over One, One Over Two
The fundamental rule of dry stack masonry has one sentence: every vertical joint must be crossed by the stone above it. Two stones below, one stone above spanning the joint. One stone below, two stones above with the joint offset. This is bond pattern, and it is the difference between a wall and a pile. Every other principle in dry stack descends from this one.
The Three Stone Types in Every Dry Stack Wall
Face stones (through stones / tie stones). Stones long enough to run from the front face to the back face of the wall. A through stone locks the two faces of the wall together and prevents the faces from bulging outward under load. Minimum one through stone per 10 square feet of wall face. More is better. The Dry Stone Walling Association of Great Britain recommends through stones at every 36 inches of height and every 36 inches of horizontal run.
Building stones. The bread-and-butter stones that make up most of the wall. These sit on the face with their longest dimension running into the wall — not along the wall face. This is counterintuitive. New builders want to lay stones with their flat face showing, running lengthwise along the wall. This creates a veneer, not a wall. Building stones oriented inward tie the mass of the wall together.
Hearting. Small stones, wedge-shaped stones, and chips packed into the center cavity between the two faces of a double-wall structure. Hearting is not fill — it is structural. Properly placed hearting prevents internal settling and transfers load between face stones. Never use soil, sand, or gravel as hearting. These materials wash out, settle, and create voids. Only stone hearting is permanent.
Batter
Batter is the inward lean of the wall face from bottom to top. A dry stack wall is wider at the base than at the top. Standard batter for a freestanding wall is 1 inch of setback for every 6 inches of height (roughly 1:6 ratio, or about 10 degrees from vertical). A 4-foot-tall wall built 24 inches wide at the base finishes about 16 inches wide at the top.
Batter serves two purposes. First, it moves the center of gravity inward, resisting overturning. Second, it creates a face that sheds water instead of holding it. A plumb wall traps water in joints. A battered wall drains every joint by gravity.
Build a batter frame — two boards cut to the wall's profile (wider at bottom, narrower at top) connected by cross-braces. Set one at each end of the wall. Stretch the mason's line between them at each course height. Build to the line.
Foundation Course
Every dry stack wall begins below grade. Excavate a trench to undisturbed soil — minimum 6 inches below finished grade, deeper in freeze-thaw climates (below the frost line if the wall is structural). Set the largest, flattest stones in the trench as the foundation course. These stones do not need to be beautiful. They need to be stable. Level them carefully — every error in the foundation course compounds as the wall rises.
Coping
The top course of a dry stack wall is the coping. It takes the most abuse — rain, snow, freeze-thaw, foot traffic from people sitting on the wall, livestock rubbing against it. Coping stones should be the heaviest, most tightly fitted stones in the wall. Set them with their weight centered over the wall mass. In regions with severe freeze-thaw, set coping stones on edge (vertically) rather than flat — this creates a sharper drainage angle and reduces water penetration into joints.
Building Sequence
- Excavate foundation trench. Compact the base.
- Set batter frames at each end. String the mason's line.
- Lay foundation course — largest, flattest stones, leveled carefully.
- Build both faces simultaneously, course by course. Never build one face ahead of the other.
- Pack hearting as each course rises. Do not leave voids.
- Place through stones at regular intervals — minimum one per 10 sq ft of face.
- Check plumb and batter against the batter frame at every course.
- Set coping course. The heaviest stones go on top.
5. Mortared Stonework — Mortar Selection, Joints, and Weep Holes
Mortar turns a flexible dry stack wall into a rigid monolith. This is an advantage when rigidity is needed (foundations, chimneys, load-bearing walls) and a liability when it is not (retaining walls on active slopes, garden walls on expansive clay). Choose the technique to match the application, not the other way around.
Mortar Selection: Lime vs. Portland
Lime mortar (hydraulic lime or lime putty mixed with sand) was the standard mortar for all of human history until the 1880s. It sets slowly (days to weeks for initial set, months to full cure), remains slightly flexible after curing, and is softer than most building stone. This softness is the point. When a wall moves, the mortar absorbs the stress instead of the stone. The mortar cracks, not the stone. And lime mortar is self-healing — water dissolves free lime, which migrates into cracks and recrystallizes, sealing them. This process, called autogenous healing, has been documented in lime mortar structures over 2,000 years old.
Lime mortar mix: 1 part hydraulic lime to 2.5–3 parts sharp sand. No Portland cement. The sand must be angular (sharp sand or mason's sand), not rounded (play sand). Rounded grains produce weak mortar.
Portland cement mortar (Type N, S, or M) sets fast (hours), cures hard, and bonds aggressively to stone. It is stronger than most building stone in compressive strength — and that is the problem. When a wall built with Portland mortar moves, the stone cracks before the mortar does. Repairing cracked stone is far more difficult than repointing cracked mortar.
Portland mortar is appropriate for foundations, chimneys, and any application where the wall sits on a stable footing and will not experience significant differential movement. It is inappropriate for above-grade walls on expansive soils, for veneer over frame construction (which moves seasonally), and for historic restoration (where it will damage original stone).
Type N mortar (1 part Portland : 1 part lime : 6 parts sand) is the best general-purpose compromise for most above-grade stone masonry. It has moderate strength, moderate flexibility, and good workability.
Joint Profiles
The shape of the finished mortar joint affects both appearance and weather resistance.
| Joint Profile | Weather Resistance | Appearance | Best For |
|---|---|---|---|
| Flush | Moderate | Clean, modern | Interior walls, protected exteriors |
| Raked (recessed) | Poor | Shows stone edges | Decorative walls, sheltered locations |
| Struck (angled, draining outward) | Good | Traditional | Exterior walls in wet climates |
| Beaded | Moderate | Decorative | Formal stonework, restoration |
| Grapevine (lined) | Moderate | Historic | Colonial restoration |
For exterior walls in any climate with rain and freeze-thaw, use a struck joint or a flush joint. Never use a raked joint on an exterior wall — the recess traps water, which freezes and pries the mortar out.
Weep Holes
Any mortared stone wall that contacts soil or retains water needs weep holes. A weep hole is an unpointed vertical joint — a gap left open at the base of the wall to let water drain from behind the wall. Space weep holes every 32–48 inches along the base course, minimum 4 inches above finished grade. Insert a short piece of 3/8-inch rope or cotton wick into the open joint to act as a wick, drawing moisture through even when the gap is not actively draining.
6. Retaining Walls — Drainage, Geotextile, and Batter
Retaining walls fail for one reason: water. Not overloading, not poor stone, not bad mortar — water. Hydrostatic pressure behind a retaining wall builds faster than most people expect. One cubic foot of saturated soil exerts roughly 62.4 pounds of lateral force per foot of depth. A 4-foot retaining wall with no drainage holds back over 500 pounds of water pressure per linear foot of wall during a heavy rain. That pressure finds the weakest point and pushes through it.
Drainage System
Every retaining wall needs a drainage plane behind it. The standard assembly, from the soil side inward:
- Undisturbed soil or compacted fill — the material being retained.
- Geotextile fabric — a permeable landscape fabric that separates the backfill drainage material from the native soil. Without geotextile, fine soil particles migrate into the drainage gravel and clog it within 5–10 years. This is the single most common cause of retaining wall failure in walls under 20 years old.
- Drainage gravel — 6–12 inches of clean, washed 3/4-inch crushed stone behind the wall from the base to within 6 inches of the top. This layer collects water and channels it downward to the drain.
- Perforated drain pipe — 4-inch perforated PVC or corrugated pipe at the base of the gravel layer, sloped at minimum 1% (1/8 inch per foot) to daylight at the end of the wall. The pipe collects water from the gravel layer and discharges it away from the wall.
- Stone wall — the retaining structure itself.
Wrap the geotextile fabric around the drainage gravel and over the top before backfilling with topsoil. This creates a fully encapsulated drain that cannot clog.
Batter Angle by Height
Retaining walls require more aggressive batter than freestanding walls because they resist lateral soil pressure in addition to gravity.
| Wall Height | Minimum Base Width | Recommended Batter | Foundation Depth |
|---|---|---|---|
| 2 ft | 16 inches | 1:8 (7°) | 6 inches below grade |
| 3 ft | 20 inches | 1:6 (10°) | 8 inches below grade |
| 4 ft | 24 inches | 1:5 (11°) | 12 inches below grade |
| 6 ft | 30 inches | 1:4 (14°) | 18 inches below grade |
| 8 ft+ | Engineer required | Engineer required | Below frost line |
Walls over 4 feet tall in most jurisdictions require engineering approval. Walls over 6 feet almost universally require a permit and engineered design. Do not guess on tall retaining walls — the failure mode is sudden, catastrophic, and can injure or kill people downslope.
Dry Stack vs. Mortared Retaining Walls
Dry stack retaining walls are superior to mortared retaining walls in most residential applications under 4 feet. The joints act as weep holes along the entire face of the wall, eliminating hydrostatic pressure buildup. The wall flexes with seasonal soil movement instead of cracking. And repairs — when a stone shifts or settles — require removing and resetting a few stones, not demolishing and rebuilding a mortared section.
Mortared retaining walls are appropriate when the wall must also serve as a foundation (e.g., a retaining wall supporting a terrace with a structure on it) or when local code requires mortared construction.
7. Stone Foundation Construction
Stone foundations carried the weight of every significant building in the Western world until the 1920s. Portland cement concrete replaced stone not because concrete was stronger — properly laid stone is stronger — but because concrete required less skilled labor and faster construction timelines. A stone foundation built correctly will outlast the building it supports.
Site Preparation
Excavate to undisturbed soil below the frost line. In central Texas, that means 12 inches minimum. In Minnesota, 42 inches. In Maine, 48 inches. The frost line depth is non-negotiable — a foundation above the frost line will heave and crack.
The footing trench should be 6–8 inches wider than the planned foundation wall on each side. This creates a shelf for the base course stones to bear on undisturbed soil rather than on backfill.
Foundation Wall Construction
- Footing course. The largest, flattest stones available. Lay them across the full width of the trench on compacted subgrade. Level meticulously. This course does not need to be mortared if the stones are large enough to be individually stable.
- Wall courses. Build the foundation wall to the planned above-grade height using the two-over-one bond pattern. For a structural foundation, use mortar (Type S or Type M — the high-strength types). Minimum wall thickness: 16 inches for single-story structures, 20 inches for two-story.
- Waterproofing. The exterior face of the foundation below grade needs waterproofing. Traditional method: two coats of hot bitumen (asphalt emulsion) applied directly to the stone face. Modern alternative: peel-and-stick waterproofing membrane. Both work. The membrane is cleaner and easier but more expensive.
- Drainage. Perforated drain pipe at the footing level, surrounded by drainage gravel, connected to daylight or a sump. Same drainage assembly described in the retaining wall section.
- Backfill. Backfill against the foundation with drainage gravel to 12 inches below finished grade, then topsoil above that. Never backfill with clay directly against the foundation — clay holds water against the wall and hydrostatic pressure cracks mortar joints.
Sill Plate Connection
The transition from stone foundation to wood frame requires a sill plate — typically a pressure-treated 2x8 or 2x10 laid flat on top of the foundation wall. Anchor the sill plate with J-bolts set 6 inches deep into mortared joints, spaced every 4–6 feet. Set the sill plate on a bed of mortar, shimming as needed for level. Apply sill seal (closed-cell foam gasket) between the stone and the wood to prevent air infiltration and moisture wicking.
8. Fireplace and Chimney — Firebox Proportions, Smoke Shelf, Flue Sizing
A fireplace is the most demanding application of stone masonry. It combines structural load-bearing, thermal stress cycling, gas containment, and draft management in a single assembly. A fireplace that smokes, backdrafts, or cracks is almost always a proportion problem — the relationship between firebox size, throat size, smoke shelf geometry, and flue cross-section was solved empirically centuries ago. The rules are not guidelines. They are physics.
Firebox Proportions (Rumford Rules)
Count Rumford (Benjamin Thompson) published the definitive fireplace proportions in 1796. They remain correct. A Rumford fireplace radiates more heat into the room and smokes less than any other design because the geometry focuses radiant energy forward while maintaining strong draft.
- Firebox width equals firebox height. A 36-inch wide firebox is 36 inches tall.
- Firebox depth equals one-third of the width. A 36-inch wide firebox is 12 inches deep.
- Rear wall width equals one-third of the front opening width. The firebox narrows from 36 inches at the front to 12 inches at the rear wall.
- The angled side walls (called covings or splays) connect the wide front opening to the narrow rear wall at approximately 135 degrees to the rear wall. These angled surfaces reflect radiant heat into the room.
The shallow depth is the Rumford's defining feature. Modern fireplaces are too deep — they trap heat inside the firebox instead of radiating it into the room. A 12-inch deep firebox in a 36-inch wide opening feels counterintuitive. Trust the geometry. The physics works.
Throat and Smoke Shelf
The throat is the narrow opening at the top of the firebox where combustion gases transition into the smoke chamber and flue. Throat dimensions:
- Width: Equal to the firebox width (36 inches for a 36-inch firebox).
- Depth (front to back): 4 inches. This narrow dimension accelerates the gas flow (Venturi effect), creating a strong upward draft.
- Height above firebox floor: Equal to the firebox height.
The smoke shelf is a flat ledge directly behind the throat, at the same height as the throat. The smoke shelf catches cold air falling down the chimney (downdraft) and redirects it upward into the rising column of hot gases. Without a smoke shelf, cold downdrafts push smoke directly into the room. The smoke shelf should be the full width of the firebox and 6–10 inches deep.
Flue Sizing
The cross-sectional area of the flue must equal at least 1/10 of the area of the firebox opening. This is the 10:1 rule, and violating it causes smoking.
- A 36-inch wide by 36-inch tall firebox opening = 1,296 square inches.
- Minimum flue cross-section = 129.6 square inches.
- A 12x12 inch nominal flue tile (actual interior about 11.5x11.5 = 132 sq in) works.
- A 13-inch round flue tile (area = 133 sq in) also works.
For chimneys shorter than 15 feet, use the 8:1 rule instead (flue area = 1/8 of opening area) to compensate for reduced draft in short chimneys.
Chimney Height
The chimney must extend at least 3 feet above the point where it exits the roof and at least 2 feet above any roof ridge, wall, or structure within 10 feet. This is both building code and physics — insufficient height produces insufficient draft.
Materials
The firebox interior (the surface exposed to direct flame) must be firebrick — not natural stone, not regular brick, not concrete block. Firebrick is rated to 2,300°F. Natural stone spalls and cracks at sustained fireplace temperatures. Limestone in particular explodes when heated rapidly due to calcination of the calcium carbonate. Use firebrick for the firebox, refractory mortar for the firebrick joints, and natural stone for the surround, mantel, and chimney exterior.
The flue liner must be clay flue tile or stainless steel liner. Unlined masonry chimneys are a fire hazard — combustion gases migrate through mortar joints into the surrounding structure.
9. Paths, Patios, and Steps
Flatwork — the collective term for horizontal stone surfaces — follows different rules than vertical masonry. Drainage replaces bond pattern as the primary concern. A path or patio that holds water is a path or patio that heaves in winter, grows algae in summer, and becomes a liability year-round.
Paths
Base preparation. Excavate 6–8 inches below finished grade. Compact the subgrade with a plate compactor or hand tamper. Lay 4 inches of compacted road base (crushed limestone screenings or Class II road base), compacting in 2-inch lifts. Top with 1 inch of coarse sand, screeded flat with a board.
Stone placement. Set flagstone pieces into the sand bed, tapping each stone level with a rubber mallet. Leave joints of 1/2 to 1 inch between stones. For a formal path, cut stones to fit tightly. For an informal path, leave wider joints and plant creeping thyme, chamomile, or moss between stones.
Joint fill. Sweep polymeric sand into joints and mist with water per manufacturer's instructions. Polymeric sand hardens when wet and resists washout, ant infiltration, and weed growth. Alternative: dry mortar mix (4 parts sand, 1 part Portland) swept into joints and misted. This sets harder than polymeric sand but cracks more readily with thermal movement.
Slope. Every path needs cross-slope for drainage — minimum 1/4 inch per foot, sloped away from structures. A 3-foot-wide path adjacent to a house should drop 3/4 inch from the house side to the outer edge.
Patios
Same base preparation as paths, with two additions:
- Edge restraint. A patio needs a rigid edge to prevent lateral stone migration. Options: a buried stone border course set in concrete, metal or plastic paver edging staked every 12 inches, or a raised stone wall border.
- Control joints. For mortared stone patios larger than 10x10 feet, install control joints every 8–10 feet in both directions. A control joint is a continuous gap (1/2 inch wide, filled with flexible sealant) that allows the slab to expand and contract without cracking the mortar. Dry-laid patios on sand do not need control joints — the joints between stones provide the expansion relief.
Steps
Stone steps have three critical dimensions:
- Tread depth: Minimum 12 inches, measured from the front edge (nosing) to the riser behind it. Deeper is better — 14–16 inches feels generous and safe.
- Riser height: 6–7.5 inches. Taller risers are exhausting. Shorter risers feel awkward. The 6–7 inch range matches human stride biomechanics.
- The 25-inch rule: Tread depth plus twice the riser height should equal approximately 25 inches. A 14-inch tread with a 5.5-inch riser: 14 + (2 x 5.5) = 25. This ratio produces steps that feel natural to climb without thinking about foot placement.
Construction. Excavate a stepped trench following the slope. Set the bottom riser stone on compacted base, level and plumb. Set the first tread stone on top of the riser, extending at least 1 inch beyond the riser face (this overhang is the nosing — it creates a shadow line that makes the step edge visible in low light). Each subsequent riser sits on the rear portion of the tread below it. This overlapping assembly locks the steps into a self-supporting structure.
For steps wider than 4 feet, use a single slab tread stone for each step — no joints across the tread. A jointed tread concentrates load at the joint and cracks under foot traffic. If a single slab is not available for the required width, build the steps narrower or source larger stone.
Drainage. Pitch each tread 1/4 inch per foot toward the front edge (the nosing side) so water drains off the step face instead of pooling on the tread surface.
10. Sources
- Allen, Edward, and Joseph Iano. Fundamentals of Building Construction: Materials and Methods. 7th ed. Hoboken, NJ: Wiley, 2019.
- Couzens, Reginald, and Vincent Hussey. The Handbook of Geology. London: Spring Books, 1966.
- Dry Stone Walling Association of Great Britain. Dry Stone Walling: A Practical Handbook. Milnthorpe, UK: DSWA, 2004.
- Harley, Alexis, and Karl Harley. The Natural Building Companion. White River Junction, VT: Chelsea Green, 2012.
- Kern, Ken. The Owner-Built Home. New York: Scribner, 1975.
- McRaven, Charles. Stonework: Techniques and Projects. Pownal, VT: Storey Publishing, 1997.
- McRaven, Charles. Building With Stone. Pownal, VT: Storey Publishing, 1989.
- Rumford, Count (Benjamin Thompson). "Chimney Fireplaces, with Proposals for Improving Them to Save Fuel." Collected Works, 1796.
- Vivian, John. Building Stone Walls. Pownal, VT: Storey Publishing, 1978.
- U.S. Department of Housing and Urban Development. Residential Structural Design Guide. 2nd ed. Washington, DC: HUD, 2017.
- International Code Council. International Residential Code. 2021 ed. Washington, DC: ICC, 2021.
- Architectural Graphic Standards. 12th ed. Hoboken, NJ: Wiley, 2016. Chapter 4: Masonry.