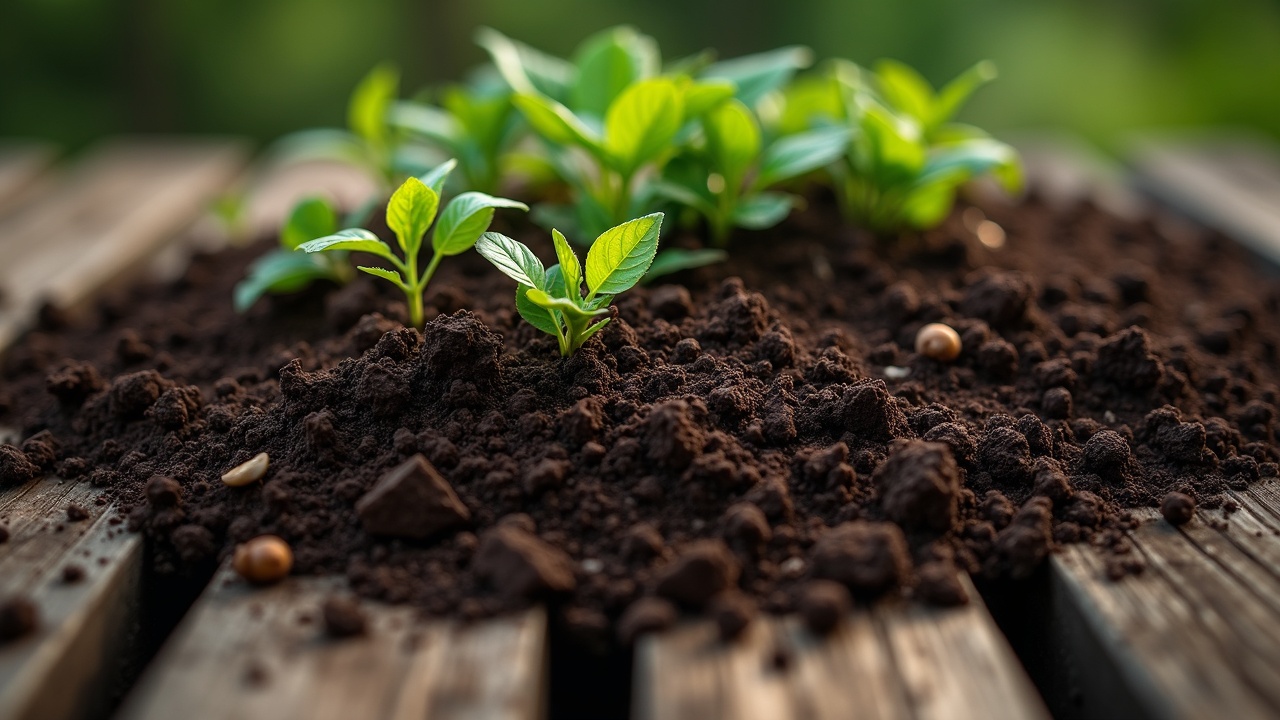
plants
Terra Preta Soil Creation
Terra Preta Soil Creation - comprehensive guide from Nored Farms.
Content Extraction Summary
Hook Options
- Amazonian terra preta soils created 2,000+ years ago still outperform adjacent virgin rainforest soil by 300-400% in crop yield — and they appear to regenerate themselves, growing darker and deeper over centuries without human intervention.
- Raw biochar applied directly to soil strips nitrogen from the root zone for 6-18 months, starving crops instead of feeding them. The charging step that prevents this takes 2 weeks and costs nothing.
- A single gram of properly made biochar contains surface area equivalent to a tennis court (250-300 m2), and every pore becomes a permanent microbial apartment building that no tillage, flood, or drought can destroy.
Key Mechanism
Biochar's carbon lattice structure — created when organic matter pyrolyzes between 400-700C in oxygen-limited conditions — produces a honeycomb of micropores (< 2 um), mesopores (2-50 um), and macropores (> 50 um). Micropores hold water and dissolved nutrients through capillary action. Mesopores house bacteria. Macropores shelter fungal hyphae and protozoa. The carbon lattice carries a net negative surface charge (high CEC) that electrostatically holds positively charged nutrients — ammonium, calcium, magnesium, potassium — preventing leaching while keeping them plant-available through ion exchange. This structure resists microbial decomposition because the aromatic carbon rings formed during pyrolysis are thermodynamically stable, persisting in soil for centuries to millennia.
Misconception to Correct
Most people treat biochar as a soil amendment — something you add and it improves things. Raw biochar is closer to a sponge full of empty hotel rooms. It has enormous capacity to hold nutrients and biology, but at application it is empty. Worse, it actively adsorbs nitrogen and other nutrients from surrounding soil to fill those empty sites, temporarily robbing plants of fertility. The critical step is charging: saturating the biochar with nutrients and inoculating it with biology before it ever touches the soil. Ancient Amazonians did this by composting biochar with kitchen waste, fish, bones, and human waste for months before incorporation. Skip the charging step and you get 6-18 months of nitrogen depression followed by eventual improvement — or you can charge it in 2 weeks and skip the depression entirely.
Practical Application
Produce biochar from woody waste using a TLUD or cone kiln, crush to 2-10mm particle size, soak in diluted urine (1:10) or compost tea for 14 days, mix 1:1 with finished compost, and incorporate into the top 6-8 inches of soil at 5-10% by volume. Expect measurable yield improvement within the first growing season and compounding returns for decades. Once established, the biochar-soil matrix becomes self-reinforcing: microbial communities stabilize, CEC increases over time as surfaces oxidize, and the pore structure permanently improves water retention and drainage simultaneously.
Citation-Ready Claims
- [Biochar] -> [Persists in soil 1,000-10,000+ years due to aromatic carbon stability] -> [Glaser & Birk, 2012, "State of the scientific knowledge on properties and genesis of Anthropogenic Dark Earths in Central Amazonia (terra preta de Indio)," Geochimica et Cosmochimica Acta]
- [Biochar surface area] -> [200-400 m2/g depending on feedstock and pyrolysis temperature] -> [Lehmann & Joseph, 2015, Biochar for Environmental Management, 2nd Edition, Routledge]
- [Terra preta CEC] -> [150-200+ cmol/kg vs 5-20 cmol/kg in adjacent Oxisols] -> [Glaser et al., 2001, "The 'Terra Preta' phenomenon: a model for sustainable agriculture in the humid tropics," Naturwissenschaften 88:37-41]
- [Biochar nitrogen immobilization] -> [6-18 months depression in plant-available N when uncharged biochar applied] -> [Deenik et al., 2010, "Charcoal volatile matter content influences plant growth and soil nitrogen transformations," Soil Science Society of America Journal 74:1259-1270]
- [Pyrolysis temperature 400-700C] -> [Optimal range for stable aromatic carbon with retained CEC; below 400C volatile matter causes N immobilization, above 700C CEC drops] -> [Lehmann & Joseph, 2015]
- [Korean Natural Farming LAB-biochar integration] -> [Lactic acid bacteria inoculant colonizes biochar pore structure, accelerating charging and suppressing pathogens] -> [Cho & Cho, 2010, "Natural Farming: Agriculture Materials," Cho Global Natural Farming]
Creating Self-Regenerating Soil: Terra Preta from First Principles
*Pure Euphoria Botanicals . Nored Farms . Austin, Texas*
1. Introduction and History
The most fertile soil ever documented was not created by nature. It was engineered by pre-Columbian Amazonians who solved a problem that still defeats modern agriculture: how to build permanently fertile soil in a climate that destroys organic matter in months.
Tropical Oxisols — the default soil of the Amazon basin — are ancient, heavily weathered, acidite, and nearly devoid of plant-available nutrients. Cation exchange capacity (CEC) in typical Oxisols runs 5-20 cmol/kg. Organic matter decomposes in weeks under tropical heat and humidity. Any nutrient applied to the surface leaches into the water table within a season. By every standard measure, these are terrible agricultural soils.
Yet scattered across the Amazon are patches of deep black earth — terra preta de Indio — that have remained fertile for 2,000 to 7,000 years. CEC in terra preta reaches 150-200+ cmol/kg, ten to forty times higher than surrounding soil (Glaser et al., 2001). Carbon content runs 9% compared to 1-2% in adjacent Oxisols. Phosphorus levels are 200-400 times higher. These soils produce crop yields 300-400% above surrounding land, and local farmers sell terra preta at premium prices — knowing the excavated patches regenerate within 20 years.
**The persistence is the mystery.** Normal soil organic matter turns over in years to decades. Terra preta carbon persists for millennia. Glaser and Birk (2012) established that the mechanism is pyrogenic carbon — charcoal produced by low-temperature burning of organic waste, mixed with bone, pottery shards, fish remains, and human waste, then composted and incorporated into soil over generations. The charcoal does not decompose because pyrolysis converts labile carbon into thermodynamically stable aromatic ring structures. The porous charcoal matrix then becomes permanent housing for soil microorganisms and a permanent reservoir for nutrient exchange.
This is not mystical ancient wisdom. It is applied chemistry and microbiology that anyone with a steel drum, woody waste, and compost can replicate.
**Modern terra preta creation follows the same principles:** produce biochar through oxygen-limited pyrolysis, charge it with nutrients and biology, incorporate it into soil, and let microbial communities establish in the pore network. The result is a soil amendment that improves every season and lasts longer than any building you will ever construct.
2. Source Materials
Biochar Feedstock
Any lignocellulosic biomass produces biochar. Quality varies with feedstock carbon content and ash mineral profile.
| Feedstock | Carbon Content | Ash Content | Notes | |-----------|---------------|-------------|-------| | Hardwood (oak, mesquite, pecan) | 75-85% | 1-3% | Highest quality, densest pore structure | | Softwood (pine, cedar, juniper) | 70-80% | 1-5% | Good quality, faster pyrolysis, higher resin = more volatiles | | Bamboo | 70-80% | 2-5% | Excellent pore structure, fast-growing feedstock | | Crop residues (corn stover, rice hulls) | 40-60% | 10-20% | Higher mineral content, lower carbon stability | | Nut shells (pecan, walnut) | 75-85% | 1-3% | Dense, excellent biochar, limited volume | | Bone | 15-20% | 60-75% | Not true biochar — calcium phosphate amendment, combine with wood biochar | | Manure | 30-50% | 20-40% | High nutrient content but low carbon stability, better as charging agent |
**Best practice for Texas Hill Country:** Use cleared cedar (Ashe juniper), mesquite, and pecan prunings. These are waste materials from pasture management that currently get burned in open piles — converting them to biochar captures 50% of the carbon instead of releasing it all as CO2.
Charging Materials
Raw biochar must be saturated with nutrients and biology before soil application. Charging agents:
- **Urine (diluted 1:10 with water):** Immediate nitrogen, phosphorus, potassium. Free. The fastest single-ingredient charging method.
- **Compost tea:** Aerobically brewed from finished compost for 24-48 hours. Provides diverse microbial inoculant.
- **Fish hydrolysate:** Nitrogen, phosphorus, trace minerals, amino acids. Commercial or DIY from fish waste.
- **Bone meal:** Slow-release phosphorus and calcium. Grind fine and mix directly into crushed biochar.
- **Worm castings:** High-diversity microbial inoculant, humic acids, plant growth hormones.
- **Korean Natural Farming LAB (lactic acid bacteria):** Fermented rice wash inoculant. Colonizes biochar pore structure rapidly, suppresses pathogenic bacteria and fungi through competitive exclusion and pH depression (Cho & Cho, 2010).
- **Wood ash (sparingly):** Potassium, calcium, magnesium. Raises pH — use only if soil is acidic. Never exceed 5% by volume of the biochar-compost mix.
Microbial Inoculants
The biology matters as much as the chemistry. Target organisms:
- **Mycorrhizal fungi:** Arbuscular mycorrhizae (AM) for vegetables and grasses, ectomycorrhizae for trees. Commercial inoculants or native soil from under established trees.
- **Lactic acid bacteria (LAB):** Korean Natural Farming protocol — collect from fermented rice wash, culture in milk, dilute and apply to biochar.
- **Bacillus species:** Phosphorus solubilizers and nitrogen fixers. Present in most quality compost and worm castings.
- **Trichoderma:** Beneficial fungus that colonizes biochar pores and suppresses root pathogens. Available as commercial inoculant.
- **Native soil microbiome:** A handful of soil from under a healthy, undisturbed forest provides thousands of species no commercial product can match. Add 1 cup per 5 gallons of biochar during charging.
3. Equipment Needed
Biochar Production — DIY Methods
**TLUD (Top-Lit Updraft) Gasifier — Best for small batches (5-20 gallons per burn)**
Build from two nested steel drums (55-gallon outer, 30-gallon inner) or steel paint cans for micro-batches. The inner drum holds feedstock with holes drilled around the bottom for primary air. The outer drum creates a chimney effect. Fire is lit at the top of the feedstock and burns downward — the pyrolysis front moves through the material in a controlled wave, producing clean-burning syngas from the top while charring material below.
Materials:
- Two steel drums (30-gal + 55-gal, or 5-gal + 15-gal for testing)
- Hole saw or drill with 3/8" bit (drill 20-30 holes in bottom 4" of inner drum)
- Metal snips for cutting chimney opening in outer drum lid
- 4" stove pipe (optional, improves draft)
- Welding gloves, steel tongs
Cost: $30-60 from salvage drums. Free if you have steel drums on the ranch.
**Cone Kiln (Kon-Tiki style) — Best for medium batches (50-200 gallons per burn)**
An inverted cone dug into the ground or fabricated from sheet steel. The cone shape creates a natural draft that pulls air across the top of the burning pile, combusting volatiles above the char bed while limiting oxygen at the bottom where charring occurs. Fastest open-air method with acceptable quality.
Materials:
- Cone-shaped pit (3-5 ft diameter, 2-3 ft deep) or fabricated steel cone
- Water source for quenching (garden hose)
- Shovel, rake
Cost: Free if dug into soil. $100-300 for fabricated steel cone.
**Retort Kiln — Best for large batches and highest quality**
A sealed chamber heated externally. Feedstock never contacts flame. Volatiles are piped out and burned to provide process heat, making the system self-fueling after startup. Produces the most consistent biochar with lowest volatile matter content and lowest PAH contamination.
Materials:
- Steel drum or box with sealed lid and gas outlet pipe
- External firebox (brick, cinder block, or steel)
- Gas return pipe from drum outlet to firebox
- Temperature probe (thermocouple + digital reader, $20-40)
Cost: $100-300 DIY. Commercial retorts: $2,000-15,000.
Processing Equipment
- **Crushing:** Biochar must be broken to 2-10mm particle size. Stomp in a burlap sack, run over with truck on gravel, or use a garden chipper/shredder. Do NOT powder it — dust blows away and lacks macropore structure.
- **Screening:** 1/4" hardware cloth over a bucket. Oversized pieces go back for re-crushing.
- **Charging vessel:** Any non-reactive container — plastic drum, IBC tote, trash can, or pit lined with plastic sheeting. Must hold biochar + liquid with room for stirring.
- **Soil testing:** pH meter ($15-30), EC meter ($15-30), and a baseline soil test from your county extension office ($15-30). Test before and after terra preta application.
4. Setup and Preparation
Why Raw Biochar Depletes Nitrogen
This is the single most common failure point. Fresh biochar has enormous surface area covered in empty adsorption sites — each site carries a negative charge that wants to bind a positively charged ion. When raw biochar contacts soil, it immediately adsorbs available ammonium (NH4+) and other cations from the soil solution. Plants starve.
Deenik et al. (2010) measured 6-18 months of nitrogen depression in soils receiving uncharged biochar, with the severity proportional to volatile matter content. Biochar produced below 400C retains more volatile organic compounds that further immobilize nitrogen through microbial processing.
**The fix is simple: charge the biochar before application.** Fill those adsorption sites with nutrients before the biochar enters the soil.
Charging Protocol (2-Week Method)
1. **Crush biochar** to 2-10mm. Remove any pieces larger than a walnut. 2. **Fill charging vessel** with crushed biochar to 2/3 full. 3. **Add charging liquid.** Choose one or combine: - Urine diluted 1:10 with water (most accessible, highest N) - Compost tea brewed 24-48 hours - Fish hydrolysate diluted per label instructions - Worm casting tea (1 lb castings per 5 gallons water, aerated 24 hours) 4. **Submerge biochar completely.** Liquid should cover biochar by 2 inches. 5. **Stir daily** for the first 3 days. This ensures liquid penetrates all pore spaces. 6. **Add LAB inoculant** on day 3 if using Korean Natural Farming protocol (see below). 7. **Drain excess liquid on day 14.** The biochar should be moist but not dripping. Saved liquid is excellent foliar feed diluted 1:20. 8. **Mix charged biochar 1:1 by volume with finished compost.** This provides the full-spectrum biology and additional slow-release nutrients.
The finished product should smell earthy, not sour. Sour smell indicates anaerobic conditions — spread out to dry partially and remix.
Korean Natural Farming LAB Integration
Korean Natural Farming's lactic acid bacteria (LAB) protocol integrates directly with biochar charging. LAB colonizes biochar's mesopore spaces rapidly and provides three functions: competitive exclusion of pathogenic bacteria, pH reduction that favors beneficial fungi, and enzymatic breakdown of organic matter that accelerates nutrient cycling.
**Producing LAB:**
1. Cook rice. Save the cloudy wash water from the first rinse. 2. Fill a jar 2/3 with rice wash water. Cover with breathable cloth. Store in a dark place at 68-80F for 5-7 days. 3. A sour-smelling, slightly cloudy liquid develops — this is dominated by Lactobacillus species. 4. Strain off the liquid. Mix 1 part LAB liquid with 10 parts milk (any kind). Cover. Wait 5-7 days. 5. A yellow serum separates below white curds. The serum is concentrated LAB. The curds are protein — feed to livestock or compost. 6. Mix LAB serum 1:1 with crude brown sugar or molasses for storage. Refrigerated, this keeps 6-12 months.
**Application to biochar:** Add LAB serum at 1:1000 dilution to the charging liquid on day 3 of the 2-week charging protocol. The LAB colonizes biochar pore structures and establishes a stable population that persists after soil incorporation.
5. Process Steps
Step 1: Producing Biochar (TLUD Method)
1. **Select feedstock.** Dry hardwood cut to 1-3" diameter pieces. Moisture content below 20% (dry for 2+ weeks under cover). Wet feedstock wastes energy driving off water instead of pyrolyzing. 2. **Load inner drum.** Pack loosely — air must flow through the material. Leave 3-4" of headspace. 3. **Nest inner drum inside outer drum.** The gap between walls creates the updraft chimney. 4. **Light the top.** Use a small amount of kindling on top of the feedstock. The fire burns downward. 5. **Monitor smoke color.** White/gray smoke = water evaporation and early volatile release. Blue/transparent smoke = clean syngas combustion. Black smoke = incomplete combustion (reduce air flow). 6. **Target temperature: 450-600C** in the pyrolysis zone. If you have a thermocouple, insert it through the side of the inner drum at mid-height. Without a thermometer, the burn is done when smoke ceases and the remaining material glows dull red. 7. **Quench.** Seal the drum to starve oxygen (lid on, vents closed) or spray water until hissing stops. Do NOT dump the hot char onto the ground — it will re-ignite in air. 8. **Cool completely before handling.** Biochar retains heat for hours. Test by touching with bare hand — if too hot to hold, it is too hot to store.
**Expected yield:** 20-30% by weight, 40-50% by volume. A full 30-gallon drum of feedstock produces roughly 12-15 gallons of biochar.
**Pyrolysis temperature matters:**
| Temperature Range | Carbon Stability | CEC | Surface Area | Volatile Matter | Best For | |-------------------|-----------------|-----|--------------|----------------|----------| | 300-400C | Low | High | Low (< 100 m2/g) | High (> 20%) | Not recommended — unstable char, high N immobilization | | 400-500C | Moderate | High | Moderate (100-250 m2/g) | Moderate (10-20%) | Good all-purpose biochar, high nutrient retention | | 500-600C | High | Moderate-High | High (200-350 m2/g) | Low (5-10%) | Best balance of stability and function | | 600-700C | Very High | Moderate | Very High (300-400+ m2/g) | Very Low (< 5%) | Maximum carbon sequestration, lower CEC | | > 700C | Very High | Low | Decreasing | Minimal | Approaches activated carbon — too inert for agricultural use |
**Target: 450-600C for agricultural biochar.** This range produces stable aromatic carbon with retained CEC and surface area sufficient for microbial colonization. Lehmann and Joseph (2015) established this as the optimal window for soil amendment applications.
Step 2: Crushing and Screening
1. Allow biochar to cool completely. 2. Transfer to a burlap sack or heavy-duty bag. 3. Crush with a mallet, stomp, or drive over with a vehicle on a hard surface. 4. Screen through 1/4" hardware cloth. Pieces larger than 10mm go back for re-crushing. 5. Remove dust and fines below 1mm — these fill pores of larger pieces and blow away in wind. Use as minor addition to potting mixes. 6. Target particle size: 2-10mm. This range provides accessible macropores for fungal hyphae while maintaining structural integrity in soil.
Step 3: Charging (2-Week Protocol)
Follow the charging protocol detailed in Section 4. The biochar must be fully charged before soil application.
Quick-reference ratios:
- **Biochar to liquid:** 1 part biochar to 1.5 parts liquid by volume (biochar should be submerged)
- **Urine charging:** 1 part urine to 10 parts water, then add to biochar
- **Compost tea charging:** Undiluted fresh-brewed compost tea poured directly over biochar
- **LAB addition:** 1 mL LAB serum concentrate per 1 liter charging liquid, added day 3
Step 4: Mixing with Compost
After draining on day 14: 1. Mix charged biochar 1:1 by volume with finished compost. 2. Add bone meal at 2 cups per 5 gallons of mix if phosphorus is needed (soil test will tell you). 3. Add mycorrhizal inoculant per product instructions — sprinkle directly into the mix, not on top of soil. 4. Add 1 cup forest soil per 5 gallons of mix for native microbiome diversity. 5. Mix thoroughly. The final product should be dark, crumbly, earthy-smelling, and uniformly moist.
Step 5: Soil Incorporation
**Garden bed application:** 1. Spread the biochar-compost mix over the bed surface at 1-2 inches depth. 2. Incorporate into the top 6-8 inches by broadforking or light tilling. 3. Water deeply to settle the material into soil pores. 4. Mulch the surface with 2-4 inches of organic mulch (wood chips, straw, leaves). 5. Wait 2 weeks before planting to allow microbial communities to stabilize.
**Application rates:**
- **Garden beds:** 5-10% biochar by volume in the root zone (top 8 inches). For a 4x8 raised bed, this is approximately 10-20 gallons of charged biochar-compost mix.
- **Field scale:** 2-10 tons per acre, incorporated into the top 6 inches. Start at the low end and increase based on soil test results.
- **Tree planting holes:** Mix 10-20% charged biochar by volume with backfill soil.
**Do NOT exceed 20% biochar by volume.** Higher concentrations can reduce soil water-holding capacity by creating too much macropore space and can overcorrect pH in already-neutral soils.
Step 6: Maturation
Terra preta is not finished at application. The system matures over 1-3 years as:
- Fungal networks integrate biochar particles into stable aggregates
- Biochar surface chemistry changes — fresh biochar surfaces oxidize over months, increasing CEC by 20-50% within the first year (Cheng et al., 2008)
- Microbial communities shift from bacterial-dominated to fungal-dominated as the system stabilizes
- Earthworm populations increase and redistribute biochar particles through the profile
- Root exudates feed biochar-dwelling microbes, creating a positive feedback loop
**First season:** Expect modest improvement — 10-30% yield increase. The biology is still establishing. **Second season:** Significant improvement — 30-80% yield increase as microbial networks mature. **Third season and beyond:** Full terra preta function — self-sustaining nutrient cycling, drought resistance, disease suppression.
6. Safety and Common Problems
PAH Contamination
Polycyclic aromatic hydrocarbons (PAHs) form during incomplete pyrolysis, particularly at temperatures below 400C or when oxygen infiltrates the pyrolysis chamber. PAHs are carcinogenic and persistent in soil.
**Prevention:**
- Maintain pyrolysis temperature above 450C
- Ensure oxygen-limited conditions (sealed retort or proper TLUD operation)
- Avoid burning treated lumber, painted wood, or pressure-treated wood — these produce toxic compounds beyond PAHs
- Black, sooty char with a strong creosote smell indicates high volatile matter and likely PAH contamination. Good biochar rings when dropped, breaks cleanly, and smells faintly smoky — not tarry.
**Testing:** IBI (International Biochar Initiative) certified labs test for PAHs. Cost is $100-200 per sample. Worth doing for your first few batches to validate your process.
Nitrogen Lock
Symptoms: plants yellow from the bottom up (classic N deficiency), poor growth despite adequate watering and sunlight, occurring 2-8 weeks after biochar application.
Cause: uncharged or under-charged biochar adsorbing soil nitrogen.
Fix: side-dress with fast-release nitrogen — blood meal (12-0-0), feather meal (13-0-0), or diluted urine (1:20). The nitrogen depression is temporary but can cost a growing season if not addressed.
Prevention: full 2-week charging protocol before application. Always.
pH Overcorrection
Biochar is typically alkaline (pH 7.5-10 depending on feedstock and temperature). Applying large quantities to already-neutral or alkaline soil can push pH above 8.0, locking out iron, manganese, zinc, and boron.
**Prevention:**
- Test biochar pH before application. Hardwood biochar at 600C typically runs pH 8.5-9.5.
- Test soil pH before and 30 days after application.
- If soil pH is already above 7.0, limit biochar application to 5% by volume and consider acidifying the charging liquid with vinegar or citric acid.
- Acidic feedstocks (pine, conifer bark) produce lower-pH biochar — use these if your soil tends alkaline.
Fire Hazard
Biochar production involves high temperatures and combustible materials.
- Never produce biochar during burn bans, high wind, or dry conditions near structures or dry vegetation.
- Keep a charged garden hose or fire extinguisher within reach during every burn.
- Never leave a burn unattended. TLUD burns take 2-4 hours, cone kiln burns 1-3 hours.
- Store finished biochar in metal containers or moist (above 30% moisture). Dry biochar dust is combustible.
- Cool biochar completely before storing in enclosed spaces — smoldering char in a sealed container produces carbon monoxide.
Dust Inhalation
Dry biochar dust is a fine particulate irritant. Wear an N95 mask when crushing, screening, and handling dry biochar. Wet the material before handling when possible. Charging inherently solves this — wet biochar does not dust.
7. Waste Handling and Byproduct Integration
Terra preta creation is fundamentally a waste-stream integration system. The original Amazonians built terra preta from what modern operations call waste.
Kitchen Waste
Vegetable scraps, fruit peels, coffee grounds, eggshells — compost these and use the finished compost as the biological component of the biochar-compost mix. Do not add raw kitchen waste directly to biochar — it must decompose first to avoid attracting pests and creating anaerobic conditions.
Animal Manure
Chicken, rabbit, goat, cattle, horse manure — all function as both charging agents and compost components. Chicken and rabbit manure are high-nitrogen and can be used as direct charging liquid (diluted 1:20) or composted and mixed with charged biochar.
**Hot composting manure to 140-160F for 3+ days kills pathogens and weed seeds.** Do not skip this step with raw manure, especially from omnivores.
Crop Residues
Corn stalks, bean vines, tomato plants, cover crop biomass — dry and pyrolyze the woody portions into biochar. Compost the green, soft portions. This closes the nutrient loop: carbon from crop residues becomes biochar, nutrients from decomposition charge the biochar, and the charged biochar returns to grow the next crop.
Pyrolysis Byproducts
TLUD and retort kilns produce syngas and wood vinegar (pyroligneous acid) as byproducts.
- **Syngas:** Combusted in the kiln for process heat. No separate handling needed.
- **Wood vinegar (condensed from retort exhaust):** Diluted 1:200 with water, it functions as a foliar spray that stimulates plant immunity and suppresses fungal pathogens. Collect by running the retort exhaust pipe through a cold-water condenser coil. The condensate separates into three layers — discard the top tar layer and bottom heavy oils, keep the middle aqueous layer. Age for 3+ months before use to allow volatile phenols to break down.
Ash
Wood ash from the firebox (not from inside the pyrolysis chamber) is potassium-rich and strongly alkaline. Use sparingly on acidic soils at 5-10 lbs per 100 sq ft. Do not combine with biochar application if soil pH is already above 6.5.
8. Long-Term Management
Self-Regeneration Mechanism
The most remarkable property of terra preta is its apparent self-regeneration. Brazilian farmers report that excavated terra preta patches recover within 15-20 years. The mechanism is not fully understood, but the leading hypothesis involves three interconnected processes:
1. **Biochar as microbial habitat:** The stable pore structure provides permanent protected sites for microorganisms. Even when surface organic matter is removed, the biochar-dwelling community survives and re-colonizes new organic inputs rapidly. 2. **Root-microbe feedback:** Plants growing in biochar-amended soil exude more carbon compounds into the rhizosphere (Lehmann et al., 2011). These exudates feed biochar-dwelling microbes, which in turn mineralize nutrients for plant uptake — creating a positive feedback loop. 3. **Fungal network integration:** Mycorrhizal hyphae thread through biochar macropores and extend into surrounding soil, creating a nutrient transport network that becomes more efficient over time as hyphal density increases.
CEC Dynamics Over Time
Fresh biochar CEC is moderate. Over months to years, surface oxidation and microbial weathering increase the density of carboxyl and phenol groups on biochar surfaces, increasing CEC by 20-50% within the first 1-3 years (Cheng et al., 2008). This is why terra preta soils show higher CEC than can be explained by their biochar content alone — the biochar surfaces have been chemically aged.
**Practical implication:** Terra preta gets better with time. Unlike comite, lime, fertilizer, and every other soil amendment that degrades and must be reapplied, biochar-based soil improvement is cumulative and permanent on any human timescale.
Microbial Community Evolution
Initial biochar colonizers are fast-growing bacteria — Pseudomonas, Bacillus, and other r-strategists. Over 6-12 months, the community shifts toward slower-growing K-strategists and fungal dominants, including mycorrhizal networks. This transition mirrors the ecological succession pattern seen in any new habitat, but the biochar pore structure accelerates it by providing physical protection from predation and desiccation.
**Management principle:** Do not disturb terra preta soil unnecessarily. Tillage breaks fungal networks and resets microbial succession. Use broadfork aeration instead of rototilling. Apply mulch continuously to feed surface biology. The system manages itself once established — your job shifts from building fertility to not destroying it.
Ongoing Inputs
Established terra preta requires minimal maintenance:
- **Annual compost top-dress:** 1-2 inches of finished compost on the surface each fall. The biochar-microbe system will integrate it.
- **Mulch continuously.** Never leave terra preta soil bare. Bare soil exposes biology to UV, temperature extremes, and erosion.
- **No additional biochar needed** after initial application unless expanding beds or correcting specific deficiencies identified by soil testing.
- **Soil test annually** for the first 3 years, then every 2-3 years. Watch CEC trend — it should rise steadily. If CEC plateaus or drops, the microbial community may be stressed (usually from tillage, chemical inputs, or extended drought without mulch cover).
9. Scaling — Field Application
Application Rates Per Acre
| Soil Condition | Biochar Rate | Charged Biochar-Compost Mix | Notes | |---------------|-------------|---------------------------|-------| | Sandy, low-CEC soil | 5-10 tons/acre | 10-20 tons/acre mix | Maximum water retention improvement | | Clay, compacted soil | 2-5 tons/acre | 4-10 tons/acre mix | Improves drainage and root penetration | | Existing good soil | 1-3 tons/acre | 2-6 tons/acre mix | Enhancement, not remediation | | Degraded/eroded soil | 8-15 tons/acre | 16-30 tons/acre mix | Remediation application, may need 2-3 annual applications |
One cubic yard of biochar weighs approximately 400-600 lbs depending on feedstock density and moisture. One ton of biochar occupies roughly 3-5 cubic yards.
Production Scale-Up
A single TLUD burn of a 55-gallon drum produces approximately 15 gallons (about 25-35 lbs) of biochar. At 5 tons per acre, you need roughly 300 drum-loads to treat one acre. This is impractical.
**Field-scale options:**
- **Cone kiln (Kon-Tiki):** A 5-ft diameter pit processes 1-2 cubic yards of feedstock per 2-3 hour burn, yielding 0.5-1 cubic yard of biochar. Ten burns produces enough for one acre at moderate application rates.
- **Flame-cap kiln:** Open trench method where feedstock is continuously fed and burning material is periodically quenched with water. Can produce 2-5 cubic yards per day with continuous operation.
- **Conservation burn integration:** During brush clearing (cedar, mesquite), build windrows and conduct controlled char burns instead of open burn. Quench before full combustion. Quality is variable but quantity is high.
- **Commercial biochar:** Purchased in bulk at $400-1,200 per ton depending on source and certification. At 5 tons/acre, cost is $2,000-6,000 per acre — significant but one-time. The amendment lasts centuries.
Commercial Biochar Sourcing
If purchasing rather than producing:
- **Verify feedstock.** Request feedstock documentation — avoid biochar from construction waste, treated lumber, or municipal solid waste.
- **Check IBI certification.** International Biochar Initiative certification verifies carbon content, pH, moisture, particle size, heavy metals, and PAH levels.
- **Test CEC and surface area.** Quality biochar should show CEC > 20 cmol/kg and surface area > 200 m2/g.
- **Verify pyrolysis temperature.** Request process documentation showing sustained temperature above 450C.
- **Buy uncharged.** Charged biochar is sometimes sold at premium prices but the charging is often inadequate. Buy raw and charge it yourself to control quality.
Regulatory Considerations
- Biochar is not currently regulated as a fertilizer or soil amendment in most U.S. states. It falls outside EPA regulated materials when produced from clean biomass feedstock.
- Some states require registration of soil amendments for commercial sale. Check your state Department of Agriculture if selling biochar or terra preta soil.
- USDA Organic certification allows biochar use — it qualifies as a "mined substance or naturally occurring biological material" under NOP guidelines, provided the feedstock is not synthetic.
- Carbon credit programs increasingly recognize biochar as a carbon sequestration method. Puro.earth and other registries issue carbon removal certificates for verified biochar production. This can offset production costs significantly for commercial operations.
10. Sources
1. Glaser, B., & Birk, J. J. (2012). State of the scientific knowledge on properties and genesis of Anthropogenic Dark Earths in Central Amazonia (terra preta de Indio). *Geochimica et Cosmochimica Acta*, 82, 39-51. DOI: 10.1016/j.gca.2010.11.029
2. Glaser, B., Haumaier, L., Guggenberger, G., & Zech, W. (2001). The 'Terra Preta' phenomenon: a model for sustainable agriculture in the humid tropics. *Naturwissenschaften*, 88, 37-41. DOI: 10.1007/s001140000193
3. Lehmann, J., & Joseph, S. (Eds.). (2015). *Biochar for Environmental Management: Science, Technology and Implementation* (2nd ed.). Routledge. DOI: 10.4324/9780203762264
4. Deenik, J. L., McClellan, T., Uehara, G., Antal, M. J., & Campbell, S. (2010). Charcoal volatile matter content influences plant growth and soil nitrogen transformations. *Soil Science Society of America Journal*, 74(4), 1259-1270. DOI: 10.2136/sssaj2009.0115
5. Cheng, C. H., Lehmann, J., & Engelhard, M. H. (2008). Natural oxidation of black carbon in soils: Changes in molecular form and surface charge along a climosequence. *Geochimica et Cosmochimica Acta*, 72(6), 1598-1610. DOI: 10.1016/j.gca.2008.01.010
6. Lehmann, J., Rillig, M. C., Thies, J., Masiello, C. A., Hockaday, W. C., & Crowley, D. (2011). Biochar effects on soil biota — A review. *Soil Biology and Biochemistry*, 43(9), 1812-1836. DOI: 10.1016/j.soilbio.2011.04.022
7. Cho, J. Y., & Cho, H. K. (2010). *Natural Farming: Agriculture Materials*. Cho Global Natural Farming, Chungbuk, South Korea.
8. International Biochar Initiative. (2015). *Standardized Product Definition and Product Testing Guidelines for Biochar That Is Used in Soil* (IBI-STD-2.1). https://biochar-international.org/characterizationstandard/
9. Liang, B., Lehmann, J., Solomon, D., Kinyangi, J., Grossman, J., O'Neill, B., Skjemstad, J. O., Thies, J., Luizao, F. J., Petersen, J., & Neves, E. G. (2006). Black carbon increases cation exchange capacity in soils. *Soil Science Society of America Journal*, 70(5), 1719-1730. DOI: 10.2136/sssaj2005.0383
10. Woolf, D., Amonette, J. E., Street-Perrott, F. A., Lehmann, J., & Joseph, S. (2010). Sustainable biochar to mitigate global climate change. *Nature Communications*, 1, 56. DOI: 10.1038/ncomms1053
`[soil-science]` `[growing]` `[practical-skills]` `[advanced]`