garden-design
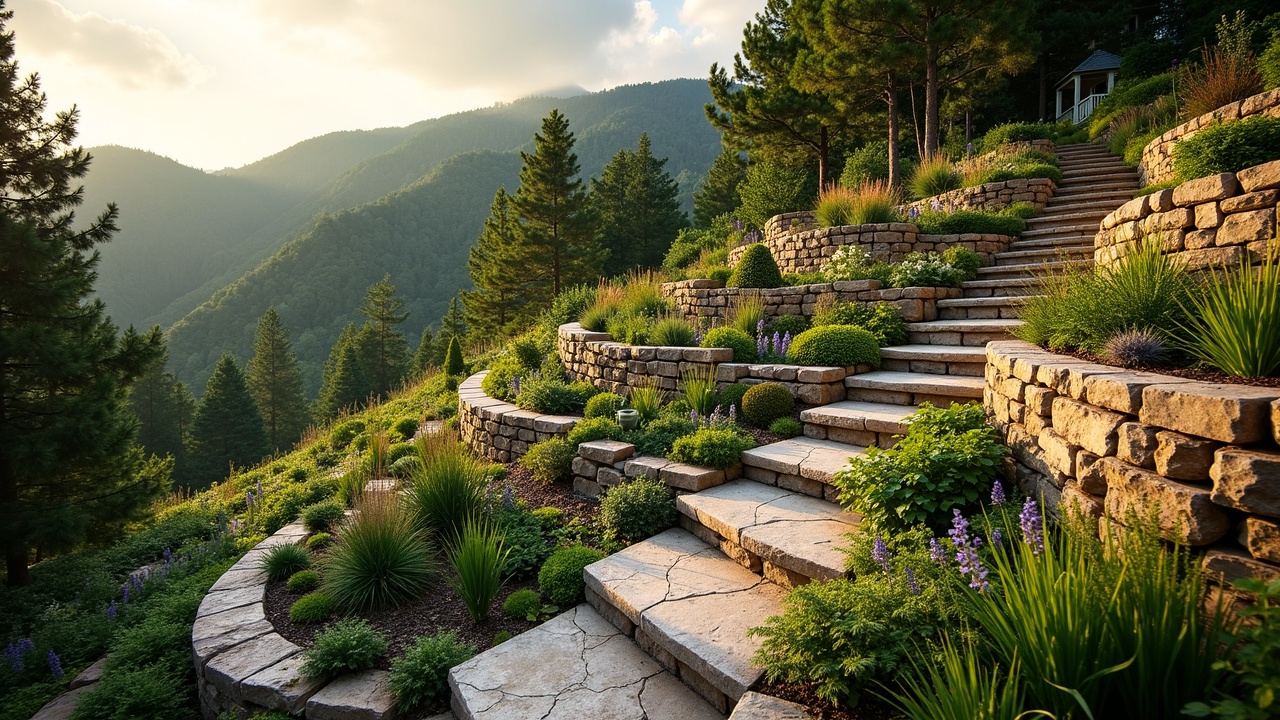
Terracing Outdoor Hills: Retaining Walls, Soil Layers, Slope Orientation, and Water Management
Complete guide to terracing hillsides for gardening, covering retaining wall design, soil layering, slope orientation, growing zones, water management.
Why Terrace a Hillside
Sloped land is often the most underutilized space on a property. Rainfall runs off before it soaks in, topsoil erodes with each storm, and planting anything beyond deep-rooted groundcover seems impractical. Terracing solves all of these problems by converting a steep slope into a series of level planting surfaces, each held in place by a retaining wall. The result is dramatically increased usable growing area, captured rainwater, reduced erosion, and visually striking landscape architecture that adds long-term value to any property.
Terracing is one of humanity’s oldest agricultural techniques. The rice terraces of the Philippines, the vineyard slopes of Italy, and the ancient Inca agricultural terraces in Peru all demonstrate that sloped land, properly engineered, can be among the most productive growing environments available. The principles that guided those constructions 2,000 years ago still apply to a backyard hillside today.
Choosing Which Sides to Terrace
Slope orientation (which compass direction the slope faces) profoundly affects growing conditions. Each aspect creates a distinct microclimate that favors different crops and management strategies.
South-Facing Slopes
In the Northern Hemisphere, south-facing slopes receive the most direct sunlight throughout the year. They warm up earliest in spring, stay warm latest into fall, and are ideal for heat-loving crops like tomatoes, peppers, melons, and fruit trees. South-facing terraces are the most productive for food gardening in zones 3–7. The downside is that they also dry out fastest and may need more irrigation than other aspects.
North-Facing Slopes
North-facing slopes receive the least direct sun and stay cooler and moister throughout the day. They are well-suited for shade-tolerant crops, cool-season greens, berries (blueberries, raspberries), and woodland plants (ferns, hostas, medicinal herbs). In hot climates (zones 8–10), a north-facing terrace may actually be preferable for crops that bolt or burn in full sun.
East-Facing Slopes
East-facing terraces receive morning sun and afternoon shade. Morning light dries dew quickly, reducing fungal disease pressure. This orientation is excellent for crops that benefit from moderate light: salad greens, herbs, peas, and brassicas. In very hot climates, east-facing terraces protect heat-sensitive crops from the intense afternoon sun.
West-Facing Slopes
West-facing slopes receive afternoon and evening sun, which is the hottest and most intense. They tend to run warm, which benefits heat-loving crops but can stress cool-season plants. West-facing terraces are ideal for Mediterranean herbs, drought-tolerant perennials, and ornamentals that thrive in warm, dry conditions.
| Slope Aspect | Light Pattern | Temperature | Best Crops |
|---|---|---|---|
| South-facing | Maximum direct sun | Warmest, driest | Tomatoes, peppers, fruit trees, melons |
| North-facing | Least direct sun | Coolest, most moist | Berries, greens, shade herbs, woodland plants |
| East-facing | Morning sun, afternoon shade | Moderate | Salad crops, herbs, peas, brassicas |
| West-facing | Afternoon sun | Warm, can be intense | Mediterranean herbs, drought-tolerant plants |
Mixed-Aspect Terracing
If your hillside wraps around a ridge or curves, you may have multiple aspects on the same slope. Use this to your advantage by planting different crops on different faces. A hill that transitions from southeast to southwest gives you both morning-sun beds for cool crops and afternoon-sun beds for heat lovers, all within the same terraced system.
Retaining Wall Design
The retaining wall is the structural backbone of every terrace. It must hold back the weight of soil and absorbed water without shifting, tilting, or collapsing. The choice of material depends on wall height, budget, aesthetics, and the permanence you want.
Dry-Stacked Stone
Fieldstone or quarried stone stacked without mortar. The most traditional and visually attractive option. Dry-stacked walls allow water to seep through the gaps between stones, providing natural drainage. They are self-healing—individual stones can be repositioned if settling occurs. Best for walls under 3 feet. Requires significant stone supply but zero cement.
Timber (Landscape Ties or Logs)
Pressure-treated landscape timbers or rot-resistant logs (cedar, black locust) pinned together with rebar and anchored into the hillside with deadman anchors. Timber walls are relatively easy to build and provide a natural look. Lifespan ranges from 10–25 years depending on wood species and ground contact conditions. Best for walls under 4 feet.
Gabion Baskets
Wire mesh cages filled with rock or rubble. Gabions are extremely strong, permeable (excellent drainage), and can be stacked to significant heights. They conform to slight ground movement without cracking and are relatively inexpensive when local stone or recycled concrete is used as fill. Gabion walls have an industrial aesthetic that works well in modern or rustic landscapes.
Concrete Block (CMU)
Standard concrete masonry units or specialized retaining wall blocks that interlock without mortar. Block walls can be engineered for heights up to 6 feet with proper geogrid reinforcement and drainage backfill. They are the most structurally predictable option and are readily available at any building supply store. Segmental retaining wall blocks have a lip or pin system that creates an automatic setback (batter) for stability.
| Material | Max. Height (DIY) | Cost per Linear Foot | Drainage | Lifespan |
|---|---|---|---|---|
| Dry-stacked stone | 3 ft | $10–$30 (stone cost varies) | Excellent (natural gaps) | 50–100+ years |
| Timber | 4 ft | $8–$15 | Moderate (needs drain pipe) | 10–25 years |
| Gabion baskets | 6 ft (with engineer) | $15–$35 | Excellent (fully permeable) | 50–75 years |
| Concrete block | 4 ft (6 ft with geogrid) | $12–$25 | Good (with gravel backfill) | 50+ years |
Engineering Rule of Thumb
For any retaining wall over 4 feet tall, consult a structural engineer or experienced landscape contractor. The forces exerted by saturated soil behind a tall wall are enormous—a 6-foot wall holding waterlogged clay can experience lateral pressure exceeding 2,000 pounds per linear foot. Underbuilt walls fail catastrophically, not gradually.
Soil Layers in the Growable Section
Each terrace bed should be constructed in layers, much like a raised bed placed on a slope. The layering ensures proper drainage, prevents soil loss through the retaining wall, and creates an optimal root environment.
Layer 1: Drainage Base (Bottom 4–8 inches)
Coarse gravel or crushed stone placed directly behind and below the retaining wall. This layer intercepts water moving downhill through the subsoil and directs it laterally to drain pipes or weep holes in the wall. Without this layer, hydrostatic pressure builds behind the wall and eventually causes failure.
Layer 2: Filter Fabric
A sheet of non-woven geotextile fabric laid over the gravel layer to prevent fine soil particles from migrating into and clogging the drainage stone. This is a critical detail that many DIY terrace builders skip—without it, the gravel layer silts up within a few years and drainage fails.
Layer 3: Subsoil / Fill (Middle 6–12 inches)
Native subsoil or clean fill material that provides bulk volume. This layer does not need to be high-quality growing soil because roots primarily occupy the topsoil layer above. If your native subsoil is heavy clay, mix in 20–30% coarse sand or decomposed granite to improve internal drainage.
Layer 4: Topsoil / Growing Medium (Top 8–12 inches)
High-quality topsoil amended with compost to create the active root zone. Use the same soil-building principles as any garden bed: 60–70% screened topsoil blended with 30–40% finished compost. This layer should be loose, well-structured, and rich in organic matter. It is the only layer that needs to meet garden-quality standards.
What Grows Well by Zone on Terraces
Terraces create unique growing conditions: excellent drainage, thermal mass from stone or concrete walls (which radiate stored heat at night), and microclimates that vary from terrace to terrace based on height and aspect.
- Zones 3–5: Hardy fruit trees (apple, cherry, plum) on upper terraces where cold air drains away. Root vegetables and brassicas on middle terraces. Strawberries and rhubarb along terrace edges. Stone walls store daytime heat and release it at night, extending frost-free periods by 1–2 weeks.
- Zones 6–7: Full vegetable production on south-facing terraces. Grapes and berries thrive with the excellent drainage. Herbs cascade over wall edges beautifully. Peach and fig trees benefit from the reflected warmth of stone walls.
- Zones 8–10: Terraces become water management tools as much as growing surfaces. Mediterranean crops (olives, grapes, lavender, rosemary) are perfectly suited. Use north-facing terraces for heat-sensitive crops. Tropical fruits on protected south-facing upper terraces where cold air drains downhill.
Water Management and Irrigation on Slopes
Water is the most challenging element to manage on terraced slopes. Rain hits the top terrace first and either soaks in, runs off the surface, or percolates through the soil to lower terraces. Without intentional management, upper terraces dry out while lower terraces become waterlogged.
Capturing Rainwater
Each terrace should be graded perfectly level or with a very slight backward slope (toward the hillside) so that rainfall soaks into the bed rather than running off the front edge. A 1–2% back-slope is sufficient. This keeps water where it falls and prevents erosion of the terrace face.
Overflow Management
During heavy rainfall, water will exceed the capacity of each terrace to absorb it. Install overflow channels at one or both ends of each terrace that direct excess water safely to the next level via a stone-lined spillway or buried pipe. Without controlled overflow paths, water finds its own route—usually by undermining a retaining wall.
Drip Irrigation
Drip irrigation is ideal for terraces because it delivers water slowly and precisely to the root zone. Run a main supply line down the slope along one edge, with lateral drip lines branching into each terrace. Use pressure-compensating emitters to ensure equal water delivery on every terrace regardless of elevation differences. A timer and filter complete the system.
Swales and French Drains
On the uphill side of each terrace, a shallow swale (a trench filled with gravel, topped with soil) captures subsurface water flowing downhill and spreads it evenly across the terrace width. This passive irrigation system harvests rainwater that would otherwise bypass the growing area entirely. In arid climates, swales can significantly reduce the need for supplemental irrigation.
The Keyline Principle
Keyline design is a landscape planning method that identifies the natural drainage patterns of a slope and uses shallow ripping or plowing along contour lines to redirect water from valleys (where it concentrates) to ridges (where it is scarce). Applying keyline principles to a terraced hillside maximizes rainwater distribution and reduces the irrigation demand on upper terraces, which are naturally the driest.
Construction Sequence
Building terraces is physically demanding work that proceeds from the bottom of the slope upward. This is counterintuitive—most people want to start at the top—but building from the bottom ensures that each completed wall supports the construction of the next level.
- Survey and mark contour lines: Use a water level, laser level, or A-frame level to mark level lines across the slope at the desired terrace spacing.
- Excavate the lowest terrace: Cut into the hillside along the lowest contour line, creating a level platform. The cut material becomes fill for the front of the terrace.
- Build the retaining wall: Construct the wall at the front edge of the excavated platform. Backfill with drainage gravel, filter fabric, and soil layers as described above.
- Repeat upward: Move to the next contour line and repeat the cut-and-fill process. Each terrace uses the excavated material from the cut above as fill material, minimizing the need to import soil.
- Install drainage and irrigation: Once all terraces are built, install overflow channels, drip irrigation lines, and any swales or French drains.
- Add topsoil and compost: Spread the growing medium layer on each terrace and allow it to settle for 2–4 weeks before planting.
Long-Term Maintenance
Terraced gardens require periodic maintenance that flat gardens do not. Inspect retaining walls annually for shifting, bulging, or erosion at the base. Clear drainage channels and weep holes of debris and sediment. Replenish topsoil and compost on each terrace annually, as some material inevitably migrates downhill with rain and gravity. Check irrigation lines for damage from freeze-thaw cycles or rodent chewing.
A well-built terrace system, maintained consistently, will last generations. The investment in proper engineering and materials at the construction phase eliminates the vast majority of maintenance headaches that plague poorly built terraces.
Start with One Terrace
If you have never built a retaining wall before, start with a single low terrace (18–24 inches) using dry-stacked stone. Learn the techniques, understand how water moves on your specific slope, and observe the results for a full year before committing to a multi-terrace system. The knowledge gained from one terrace is worth more than all the planning in the world.