guides
Indoor Gardening: Substrates, Grow Lights, Yield Optimization, Space Planning, and Pest Management
Complete guide to indoor gardening covering substrates, grow lights, fans, humidity management, improving yield and quality, space optimization, vertical growing, and indoor pest management.
Why Grow Indoors
Indoor gardening eliminates the unpredictability of outdoor growing. There are no frosts, no droughts, no hailstorms, no deer, and no seasons. You control every variable—light, temperature, humidity, nutrition, and photoperiod. This level of control means you can grow food and herbs year-round regardless of where you live, and you can optimize conditions far beyond what any outdoor environment provides.
The tradeoff is that you must provide everything the sun and soil normally handle for free. Light is the most expensive input, followed by climate control. However, advances in LED technology have dropped the cost of indoor lighting dramatically over the past decade, making productive indoor gardens accessible to anyone with a spare corner, closet, or shelf.
Substrates: Soil, Soilless, and Hydroponic
Indoor growers have three broad categories of growing media, each with distinct management requirements and advantages.
Soil-Based Growing
Standard potting mix (coir/peat, compost, perlite) works well indoors and is the most forgiving medium for beginners. Soil buffers pH fluctuations, holds nutrients in reserve, and supports beneficial microbial communities. Use high-quality, sterilized potting mix to avoid introducing soil-borne pests and diseases into your home. Avoid garden soil—it compacts in pots and often contains fungus gnats, weed seeds, and pathogens.
Soilless Growing
Soilless mixes use inert media like coconut coir, perlite, vermiculite, and peat in various ratios without any actual soil or compost. The grower provides all nutrients through liquid fertilizer. Soilless growing offers faster growth rates than soil because nutrients are immediately available in dissolved form, but it requires more precise nutrient management—there is no compost buffer to catch mistakes.
Hydroponic Systems
Plants grow in water with dissolved nutrients, supported by an inert medium (clay pebbles, rockwool, perlite) or no medium at all (nutrient film technique, deep water culture). Hydroponics delivers the fastest growth rates and highest yields per square foot of any growing method. The learning curve is steeper, but once dialed in, hydroponic systems are remarkably efficient.
| Method | Growth Rate | Complexity | Cost to Start | Best For |
|---|---|---|---|---|
| Soil-based | Moderate | Low | $20–$50 | Beginners, herbs, leafy greens |
| Soilless | Fast | Medium | $30–$80 | Vegetables, precise control |
| Deep water culture | Very fast | Medium | $40–$100 | Lettuce, herbs, fast-growing crops |
| Ebb and flow | Very fast | Medium–High | $80–$200 | Variety of crops, scalable |
| Nutrient film (NFT) | Very fast | High | $100–$300 | Leafy greens, commercial-scale |
| Kratky (passive hydro) | Fast | Low | $10–$30 | Lettuce, herbs, zero-electricity setups |
The Kratky Method for Beginners
The simplest hydroponic system requires no pumps, no timers, and no electricity. Fill a container (mason jar, bucket, tote) with nutrient solution, place a net pot with seedling and clay pebbles in the lid, and let roots grow into the solution. As the plant drinks, an air gap forms above the water line, providing oxygen to upper roots while lower roots stay submerged. Lettuce, herbs, and leafy greens grow exceptionally well with this zero-maintenance method.
What Plants Grow Best Indoors
Not every plant is suited to indoor growing. The best indoor crops share common traits: compact growth habit, moderate light requirements, and relatively short time from seed to harvest.
Herbs
The most rewarding indoor crops. Basil, cilantro, parsley, chives, mint, dill, and oregano all perform well under grow lights or in a bright south-facing window. Herbs are compact, aromatic, and harvested frequently in small amounts—exactly what indoor growing excels at.
Leafy Greens
Lettuce, spinach, kale, arugula, and microgreens are ideal indoor crops. They grow fast (lettuce in 30–45 days from seed), require less light than fruiting crops, and can be harvested continuously by cutting outer leaves. Microgreens are the ultimate indoor crop—seed to harvest in 7–14 days on a windowsill.
Compact Fruiting Crops
Dwarf tomatoes (Tiny Tim, Micro Tom, Red Robin), compact peppers (Fish, Thai, NuMex Twilight), and strawberries can produce fruit indoors with sufficient light. These crops need 12–16 hours of strong light from quality grow lights—a windowsill alone is usually not enough for fruiting.
Sprouts and Microgreens
The lowest barrier to entry for indoor growing. Sprouts (alfalfa, mung bean, radish) need only a jar, water, and a few days. Microgreens (sunflower, pea, radish, broccoli) grow on a thin layer of soil or coir in a tray and are harvested at the first true-leaf stage. Both are nutritionally dense and require minimal space and equipment.
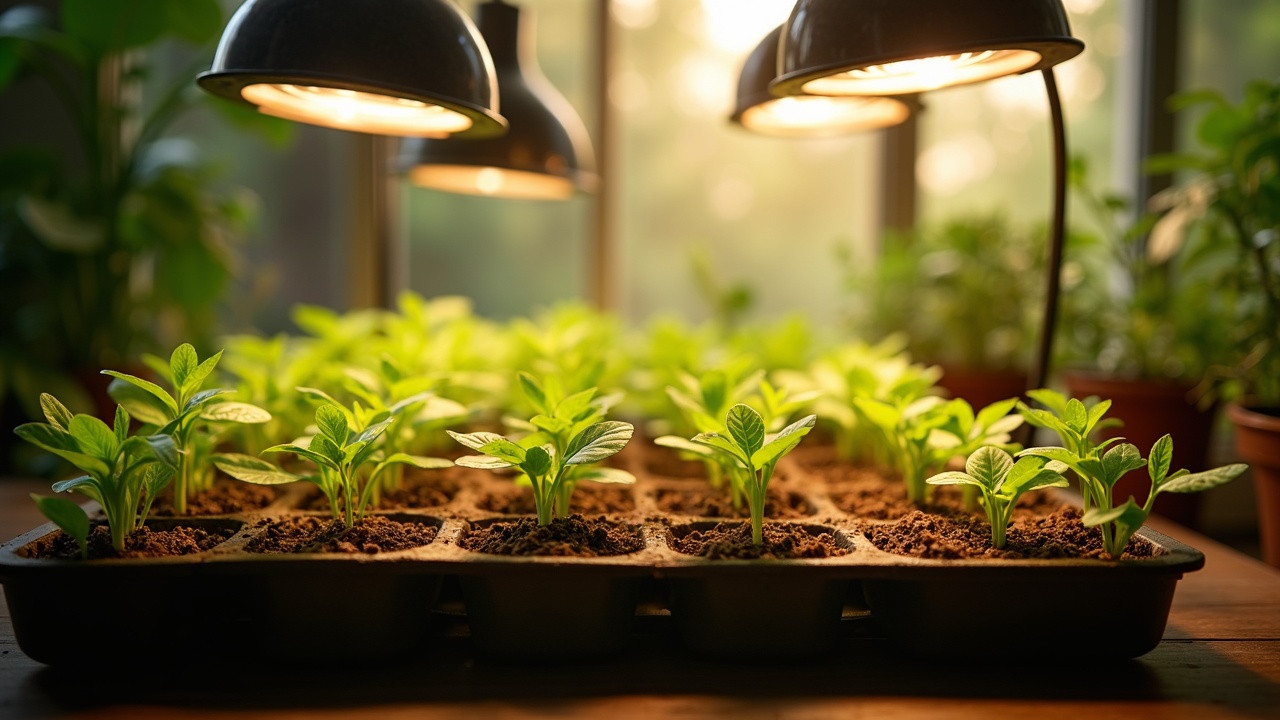
Grow Lights
Light is the engine of plant growth, and indoors you must provide it artificially. The technology has evolved dramatically—modern LED grow lights are efficient, cool-running, and tunable to specific plant needs.
LED Grow Lights
The current standard for indoor growing. Full-spectrum white LEDs or targeted red/blue spectrum LEDs provide the wavelengths plants need for photosynthesis. LEDs use 40–60% less electricity than older HID (high-intensity discharge) lights and produce far less heat, which simplifies climate control. A quality LED panel drawing 100–150 watts covers a 2x2-foot growing area effectively.
Fluorescent Lights
T5 fluorescent tubes remain a solid choice for seedlings, herbs, and leafy greens. They are inexpensive, widely available, and produce soft, even light at close range. Fluorescents are not powerful enough for fruiting crops but are perfect for seed starting and low-light plants. Keep tubes 2–4 inches above plant canopy for maximum effectiveness.
Light Distance and Duration
LED panels should be hung 12–24 inches above the plant canopy, depending on the light’s intensity (check the manufacturer’s recommended hang height). Closer is not always better—too close causes light stress and leaf bleaching. Most edible plants need 12–16 hours of light per day. Use a simple outlet timer to maintain a consistent photoperiod.
| Light Type | Wattage for 2x2 ft Area | Electricity Cost/Month | Best For |
|---|---|---|---|
| LED panel (full spectrum) | 100–150W | $8–$15 | All crops including fruiting |
| T5 fluorescent | 96–216W (4-tube fixture) | $10–$20 | Seedlings, herbs, greens |
| LED strip lights | 20–40W per shelf | $3–$6 | Microgreens, small herbs, supplemental |
Light Measurement: DLI
Daily Light Integral (DLI) measures the total amount of photosynthetically active light a plant receives in a day. Leafy greens need a DLI of 12–17 mol/m2/day, while fruiting crops need 20–30. A cheap lux meter app on your phone can help you estimate whether your lights are delivering enough intensity at canopy level. If yields are poor despite good nutrition and watering, insufficient light is almost always the cause.
Airflow and Fans
Stagnant air is the enemy of indoor plants. Without air movement, a boundary layer of humid, CO2-depleted air forms around leaves, slowing photosynthesis and encouraging fungal growth. Even gentle air circulation from a small oscillating fan solves these problems.
- Strengthens stems: Plants respond to mechanical stress (wind) by building thicker, stronger stems. Indoor plants grown without air movement tend to be leggy and weak.
- Reduces disease: Moving air prevents moisture from condensing on leaf surfaces, dramatically reducing the risk of powdery mildew, botrytis, and other fungal diseases.
- Improves gas exchange: Fresh air at the leaf surface provides CO2 for photosynthesis and carries away transpired moisture.
- Evens temperature: Fans eliminate hot spots near lights and cold spots near windows, creating a more uniform growing environment.
A small 6-inch clip fan or USB desk fan running on low is sufficient for a shelf or small grow area. For larger setups, an oscillating tower fan or inline fan with ducting provides more thorough circulation. The goal is gentle, consistent movement—not a gale that desiccates plants.
Humidity Management
Indoor air is often drier than plants prefer, especially during winter when heating systems run. Most edible plants grow best at 50–70% relative humidity. Below 40%, leaf edges brown and transpiration demands increase; above 80%, fungal diseases proliferate.
Increasing Humidity
- Humidity trays: Shallow trays filled with pebbles and water placed beneath plant containers. As water evaporates, it raises local humidity around the plants. Simple, passive, and effective for small groupings.
- Grouping plants: Plants release moisture through transpiration. Grouping them together creates a localized humid microclimate. This is especially effective on plant shelves or in grow tents.
- Small humidifiers: An ultrasonic cool-mist humidifier near (but not directly on) plants provides precise humidity control. Choose a model with a built-in hygrostat for automated operation.
Reducing Humidity
- Increase ventilation: Open a window or run an exhaust fan to exchange humid indoor air with drier outside air.
- Dehumidifiers: For enclosed grow spaces (tents, rooms), a small dehumidifier prevents condensation and mold.
- Spacing and pruning: Thinning dense foliage and increasing plant spacing allows air to circulate and moisture to dissipate.
Improving Yield and Quality
Once your basic setup is running, several techniques can significantly increase the quantity and quality of your indoor harvest.
Nutrient Management
Indoor plants in confined media need regular feeding. Use a complete liquid fertilizer (containing all macro and micronutrients) at half strength every watering, or full strength every other watering. Monitor pH of your nutrient solution: 5.8–6.5 for soilless and hydroponic, 6.0–7.0 for soil. Nutrient lockout from incorrect pH is the most common cause of deficiency symptoms in otherwise well-fed indoor plants.
Light Schedules
Most vegetables and herbs grow best under 14–16 hours of light followed by 8–10 hours of darkness. The dark period is important—plants conduct essential metabolic processes during darkness, including root growth and hormone regulation. Some crops (like short-day plants and certain flowering varieties) require specific light/dark ratios to trigger reproductive development.
Pruning and Training
Indoor space is limited, so train plants to use it efficiently. Pinch growing tips of herbs to promote bushy, lateral growth rather than tall, lanky stems. Remove lower leaves on tomato plants that receive insufficient light (they consume more energy than they produce). Use small stakes or string to support plants vertically and expose more leaf surface to light.
Succession Planting
Stagger your plantings by 2–3 weeks so that you always have crops at different stages of growth. When one tray of lettuce is harvested, the next is already approaching maturity. This ensures continuous production rather than feast-and-famine cycles.
Track Your Results
Keep a simple log of what you plant, when you plant it, what nutrients you use, and when you harvest. Over several growing cycles, patterns emerge: which varieties perform best under your specific lights, which feeding schedule produces the most flavorful herbs, and how long each crop takes from seed to plate. This data turns guesswork into a reliable system.
Space Optimization and Vertical Growing
Indoor growing space is almost always limited. Vertical growing—stacking plants upward rather than spreading them outward—is the most effective way to maximize production per square foot.
Shelving Units
A standard 4-tier wire shelving unit (48 inches wide, 18 inches deep, 72 inches tall) provides four growing levels, each lit by its own LED strip or panel mounted to the shelf above. This single piece of furniture can produce more herbs and greens than a 4x8-foot outdoor garden bed, in about 6 square feet of floor space.
Vertical Towers
Hydroponic tower gardens use a vertical column with planting pockets at multiple levels. Water and nutrients circulate from a base reservoir up through the tower. These systems are particularly efficient for lettuce, strawberries, and herbs. A single tower with 20–30 planting sites occupies about 2 square feet of floor space.
Wall-Mounted Systems
Pocket planters, living wall panels, and rail-mounted containers attached to walls or the backs of doors use otherwise wasted vertical space. These work well for herbs and small ornamental plants but require careful attention to water management since they drain differently than traditional pots.
Window Integration
South and west-facing windows remain valuable growing real estate even when supplemental lighting is available. Window-mounted shelves, suction cup planters, and sill-width trays extend the window’s growing capacity. Combine window light with a small supplemental LED for herbs that need more intensity than the window alone provides.
Indoor Pest Management
Indoor gardens are not immune to pests. The enclosed environment can actually accelerate pest reproduction since there are no natural predators. Prevention is far easier than eradication.
Common Indoor Pests
- Fungus gnats: Small black flies that lay eggs in moist soil. The larvae feed on organic matter and young roots. Prevent by letting the top inch of soil dry between waterings and using yellow sticky traps. BTI (Bacillus thuringiensis israelensis) mosquito dunks dissolved in water kill larvae without harming plants.
- Spider mites: Microscopic mites that create fine webbing on leaf undersides. They thrive in hot, dry conditions. Increase humidity, spray with water, and treat with neem oil or insecticidal soap. Wipe leaf undersides weekly to check for early infestations.
- Aphids: Soft-bodied insects that cluster on new growth and leaf undersides. They reproduce explosively indoors. Blast off with water, apply insecticidal soap, or introduce ladybugs (yes, they work indoors in enclosed grow spaces).
- Whiteflies: Tiny white flying insects that cluster under leaves and excrete sticky honeydew. Yellow sticky traps reduce adult populations. Neem oil and insecticidal soap control nymphs on leaf surfaces.
- Thrips: Slender insects that scrape leaf surfaces, causing silvery streaks. They are difficult to control once established. Blue sticky traps (thrips prefer blue over yellow), spinosad-based sprays, and predatory mites (Amblyseius cucumeris) are the most effective controls.
Prevention Strategies
- Quarantine new plants: Isolate any plant brought from a nursery, garden center, or outdoor area for at least 2 weeks before placing it near your indoor garden.
- Inspect regularly: Check leaf undersides, stem joints, and soil surfaces weekly. Catching an infestation early—when there are 5 pests instead of 500—makes control trivial instead of overwhelming.
- Clean growing area: Remove dead leaves, spent flowers, and fallen debris promptly. These harbor pests and fungal spores.
- Use sterile media: Starting with pasteurized or sterilized growing mix eliminates soil-borne pest eggs and larvae from the beginning.
- Air circulation: Strong airflow makes it harder for flying pests to land and lay eggs, and discourages fungal spore germination.
Neem Oil: The Indoor Gardener’s Ally
Cold-pressed neem oil is one of the most versatile organic pest controls available. It works as an insecticide, miticide, and fungicide. Mix 1 teaspoon of neem oil with 1 teaspoon of mild liquid soap in 1 quart of warm water and spray all leaf surfaces (tops and bottoms) every 7–10 days as a preventive, or every 3–4 days during active infestations. Apply in the evening or when lights are off to avoid leaf burn.
Getting Started
The simplest indoor garden is a pot of herbs on a windowsill. If that produces results, add a small LED light above a shelf of lettuce trays. If that succeeds, consider a multi-tier growing rack or a hydroponic system. Scale up only when you are confident managing what you already have. Indoor gardening rewards precision and consistency more than ambition and scale. Start small, learn your environment, track your results, and let your indoor garden grow at the pace of your own experience.